
Lawn
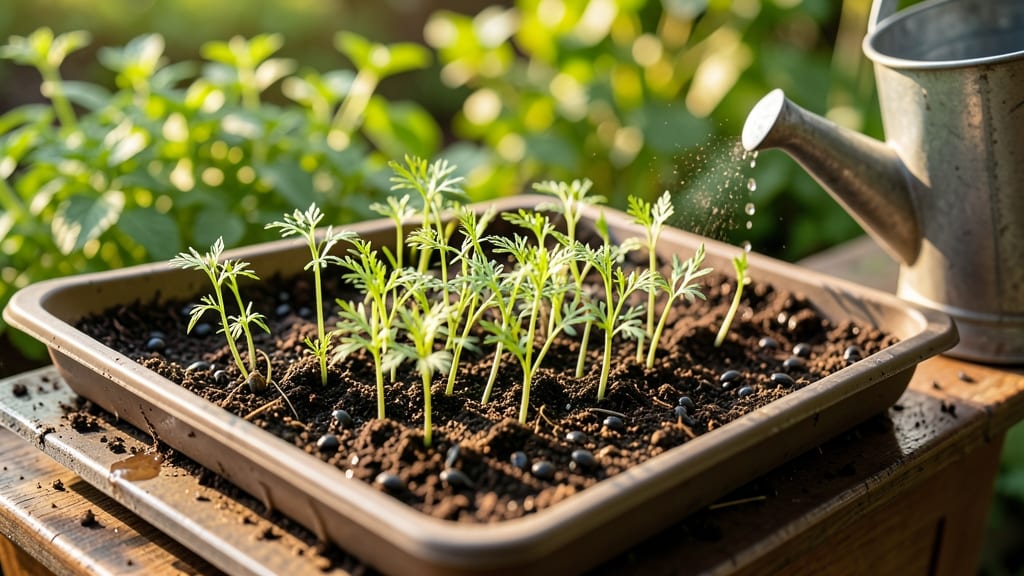
Dill seed sprouts pop up in 5-7 days—faster than most herbs, and with the right setup, you’ll have lush green growth in weeks. 🌱 I’ve learned the hard way that patience (and the right soil) makes all the difference, especially when you’re itching to see those first feathery leaves.
Start with a shallow tray or seed-starting mix—dill hates being buried too deep. Plant seeds ¼ inch below soil, keep it moist but not soggy, and place in a sunny spot (or under grow lights). The key? Consistent moisture without drowning the seeds; dill roots need air too.
Once sprouts appear, thin them to 2 inches apart so they don’t compete. You’ll see rapid growth in 2-3 weeks, and those classic dill fronds will be ready for harvesting. The trickiest part? Avoiding damping-off (a fungal issue) by spacing seeds properly and ensuring good airflow.
Outdoor sprouts need full sun once established, while indoor starts thrive near a south-facing window. If germination stalls after a week, try a gentle bottom-watering method—sometimes seeds just need a little coaxing to wake up.
📚 In This Guide
- What you need
- Instructions
- Tips and common mistakes
- Wrapping up and next steps
What you need
- ● Dill seeds: 1–2 tablespoons (about 15–30g) of organic, non-GMO dill seeds (e.g., Anethum graveolens). Choose whole seeds for best germination.
- ● Growing medium: Option 1 (Quick Start): 1–2 cups of sprouting seeds mix or organic potting soil (lightweight, well-draining).
- ● Option 2 (Eco-Friendly): A reusable sprouting jar (quart-sized) or a mesh sprouting lid with a bowl.
- ● Water: Room-temperature, chlorine-free water (use filtered or bottled if needed).
- ● Spray bottle: 8–16 oz (for gentle misting).
- ○ Colander or fine-mesh strainer: To rinse sprouts (optional but helpful).
- ● Small bowl or tray: For draining excess water (if not using a jar).
- ○ Scissors or pruners: For trimming sprouts to desired length (optional).
- ● Grow light: LED or fluorescent (12–16 hrs/day) if growing indoors without sunlight.
- ● Humidity dome: To retain moisture during germination.
- ● Compost or worm castings: 1 teaspoon (for nutrient boost).
- ● Label or marker: To track planting dates.
Step-by-Step guide to growing dill seed sprouts for lawn enhancement
Here's how I get quick, vibrant dill sprouts that add a fresh green touch to any lawn—no waiting weeks for full growth.
🌱 Step 1: Prepare Your Sprouting Container
Start with a shallow tray or wide container that gives your dill seeds room to spread. I use a 10x12-inch plastic seedling tray with drainage holes—this prevents waterlogging while keeping the seeds evenly moist. Line the bottom with a paper towel or coffee filter to catch any excess water and improve airflow.
Fill the tray with 2-3 inches of moistened potting mix (not garden soil—it's too dense). Press down lightly so the surface is firm but not compacted. You want seeds to rest on a stable base, not sink into heavy soil. Sprinkle 1 tablespoon of compost over the soil to give those sprouts a nutrient boost from day one.
💧 Step 2: Plant the Seeds for Optimal Germination
Scatter 1 teaspoon of dill seeds evenly across the tray—don't press them in. Dill seeds are tiny, so I like to tap the packet gently over the soil while holding it above the tray. This ensures even distribution without overcrowding. Cover lightly with ¼ inch of additional potting mix (just enough to obscure the seeds).
Mist the soil with a spray bottle until it feels damp but not soggy. You'll see the surface darken slightly—this is your signal that moisture is perfect. Place the tray in a warm spot (65-75°F) where it gets indirect light for the first 24-48 hours. This warmth jumpstarts germination, and you'll notice tiny green sprouts peeking through in just 3-5 days—that's the magic of dill's fast growth.
☀️ Step 3: Provide Light and Monitor Growth
Once sprouts appear, move the tray to a bright location with 6-8 hours of sunlight daily. A south-facing window or grow light works best. Keep the soil consistently moist—water when the top ½ inch feels dry to the touch. Overwatering here is easy, so I use a spray bottle to avoid disturbing the delicate sprouts.
Watch for first true leaves (the second set after the initial seed leaves). These will look like tiny, feathery dill fronds. When they appear, thin the sprouts to 2 inches apart by snipping excess with scissors. This prevents competition and gives each sprout room to grow strong. You'll have a lush patch of dill in just 10-14 days—ready to transplant or enjoy as a fresh green boost!
🪴 Step 4: Transplant or Enjoy Your Sprouts
For lawn integration, transplant the sprouts to their final location when they reach 3-4 inches tall. Dig small holes, place each sprout gently, and firm soil around the base. Water deeply to help roots establish. If you're using them as a temporary green boost, simply snip leaves as needed—they'll keep producing for weeks.
Real talk: Dill grows fast but attracts pests like swallowtail butterflies. If that's a concern, I recommend planting in a small contained area or near other herbs to deter them. Otherwise, enjoy your quick, vibrant dill sprouts—perfect for lawn edges, containers, or even as a living mulch!
Tips & tricks for fast-germinating dill sprouts
Here's what nobody tells you about growing dill sprouts faster and healthier than you ever thought possible.
Warmth is Your Best Friend: The 65-75°F temperature range in Step 2 is non-negotiable for germination. If your home runs cooler, place the tray on top of your refrigerator or near a sunny window with a heat lamp. I've seen germination times cut from 5 days to just 3 days when using a simple seedling heat mat—it's a small investment that makes a huge difference.
Light Matters More Than You Think: After those first 24-48 hours of indirect light, move your sprouts to a bright spot with 6-8 hours of sunlight daily. If natural light isn't available, a simple LED grow light on a timer works perfectly. I keep mine 6 inches above the sprouts for 12 hours a day—this mimics natural sunlight and prevents leggy growth that makes sprouts weak and prone to falling over.
Thinning Saves the Day: Don't skip the thinning step when those first true leaves appear! When you thin to 2 inches apart in Step 3, you're not just preventing competition—you're creating stronger plants. I use clean scissors and make a clean cut just above the soil line. This prevents disease and gives each sprout room to develop those beautiful feathery leaves we all love.
Pest Prevention Pro Tip: Dill attracts swallowtail butterflies, but there's a simple trick to deter them. After transplanting, sprinkle a light layer of diatomaceous earth around the base of your sprouts. It's non-toxic to plants and creates a barrier that pests won't cross. I've used this trick for years and never had issues with butterfly damage—it's a game-changer for keeping your lawn dill looking perfect.
Pro Tips for Dill Seed Sprouts
- Here's what nobody tells you about growing dill sprouts faster and healthier than you ever thought possible.
- Warmth is Your Best Friend: The 65-75°F temperature range in Step 2 is non-negotiable for germination.
- Light Matters More Than You Think: After those first 24-48 hours of indirect light, move your sprouts to a bright spot with 6-8 hours of sunlight daily.
Frequently asked questions
Got questions about growing dill seed sprouts for your lawn? You’re not alone! Here are some common queries—and their answers—to help you get started with confidence.
How long does it take for dill seed sprouts to appear?
Dill seeds are fast germinators! With the right conditions (moisture, warmth, and indirect light), you’ll see tiny sprouts peeking through the soil in just 3–7 days. Keep the soil consistently damp during this time for best results.
Can I grow dill seed sprouts indoors without sunlight?
Use a grow light (like a LED bulb) 12–16 hours daily or place them near a sunny window. If using artificial light, keep it 6–12 inches above the tray to prevent leggy sprouts. Rotate the tray occasionally for even growth.
What’s the best way to store dill seed sprouts after harvesting?
Store them in a paper towel-lined container with a damp (not soaking) cloth on top. Keep them in the fridge for up to 5–7 days. Rinse them just before use to keep them crisp. For longer storage, try freeze-drying or blending into pesto.
Why aren’t my dill seeds sprouting? Troubleshooting tips!
Check these common issues:
Too dry? Dill seeds need constant moisture—mist them daily if needed.
Too cold? Ideal temps are 60–75°F. If below 50°F, use a seedling heat mat.
Old seeds? Dill seeds lose viability after 1–2 years. Test a few in warm water—if they float, they’re likely dead.
No light? Even weak light is better than none. A south-facing window works in a pinch.
Are there faster-growing alternatives to dill for lawn sprouts?
If you want even quicker greens, try:
- Radish sprouts (3–5 days)
- Alfalfa sprouts (4–6 days)
- Sunflower sprouts (5–7 days)
Wrapping up and next steps
Growing dill seed sprouts is a quick, rewarding way to add vibrant greenery to your lawn—no green thumb required! 🌱 With just a few supplies and minimal effort, you’ll enjoy fast germination and lush, aromatic foliage in days.
Whether you’re sprucing up a patchy yard or experimenting with edible landscaping, these sprouts deliver big flavor and impact with tiny seeds.
Ready to dive in? Grab your supplies, follow the simple steps, and watch your lawn transform! For extra inspiration, explore other fast-growing ground covers or share your progress with fellow gardening enthusiasts. Happy sprouting! 🌿✨