
Lawn
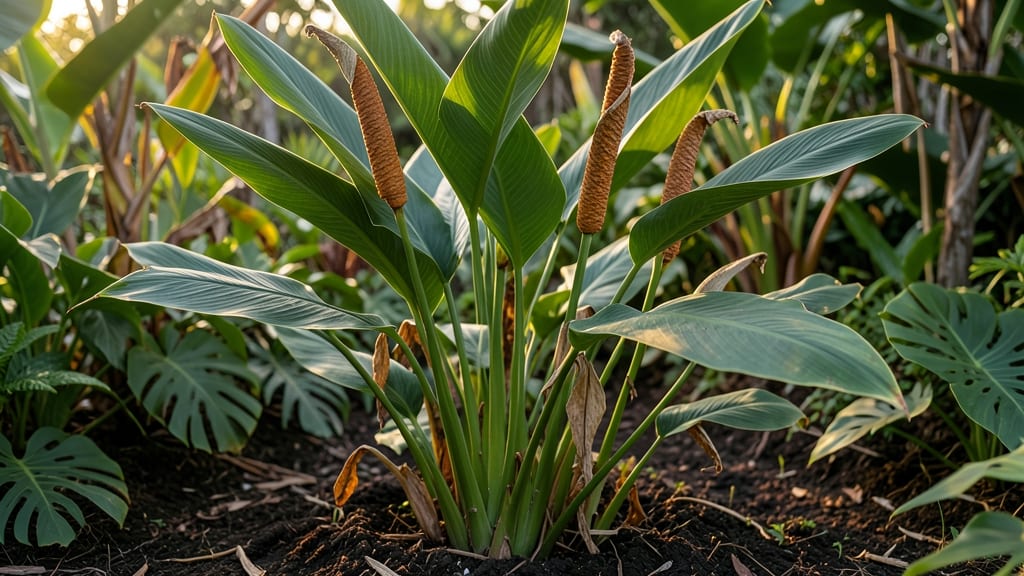
Harvesting canna seed pods before they twist is the secret to saving seeds that actually grow. 🌱 I’ve struggled with dried-up pods that crumbled at the touch—until I learned the right timing and handling.
The difference between a thriving new plant and a wasted effort often comes down to when (and how) you collect those pods.
Mature pods turn from green to a papery brown and feel firm when gently squeezed. Once they’re ready, twist them off the stalk carefully—don’t yank, or you’ll damage the seeds inside.
Spread them in a dry, shaded spot for 2-3 weeks to fully dry before storing in an airtight container. Proper drying keeps seeds viable for years, so don’t rush this step.
Planting these seeds in spring (after frost) gives them time to establish before winter. Scatter them shallowly in well-draining soil, keep them moist, and expect sprouts in 4-6 weeks. The first year might be slow, but with patience, you’ll get those bold canna blooms—just like the parent plant.
This method works for both tropical and hardy canna varieties, though colder climates may need overwintering indoors. The key is consistency: dry pods thoroughly, store them properly, and give seeds the right conditions. Once you master it, you’ll never buy canna lilies again!
📚 In This Guide
- What you need
- Instructions
- Tips and common mistakes
- Wrapping up and next steps
What you need
- ● Mature canna plants (with fully developed seed pods—typically 3-6 months after flowering).
- ● Sharp pruning shears or garden scissors (sterilized with rubbing alcohol to prevent disease).
- ● Heavy-duty gloves (gardening gloves with reinforced palms for protection).
- ● Paper towels or soft cloth (for gently cleaning pods post-harvest).
- ● Brown paper bags or breathable mesh bags (1-2 per harvest session, labeled with the date).
- ● Small wooden skewers or toothpicks (for propping open stubborn pods if needed).
- ● Air-tight storage containers (glass jars or plastic bins with silica gel packets for humidity control).
- ● Permanent marker (for labeling seeds by variety and harvest date).
- ● Seed drying tray (a wire mesh rack or cooling rack for even airflow).
- ● Food dehydrator (set to low heat for accelerated drying if needed).
- ● Humidity monitor (to track storage conditions, ideal range: 30-40% humidity).
- ● Seed catalog or notebook (to log varieties, germination notes, and storage dates).
- ● Twist-tie or rubber bands (for securing pod stems if they’re overly flexible).
Step-by-step instructions for harvesting canna seed pods safely
Here's how to collect those plump, twist-resistant pods without damaging the plant or seeds.
🌱 Step 1: Identify Mature Seed Pods
Look for pods that have turned a deep brown color and feel firm when gently squeezed—this means they're fully mature and ready for harvest. I avoid picking green pods because they won't contain viable seeds. The pods should also be about 2-3 inches long and slightly papery to the touch.
Check your cannas weekly once the growing season winds down. Early morning is the best time to harvest because the pods are firmer and less likely to twist in your hands. If you wait too long, the pods may split open naturally, scattering seeds and making collection difficult.
🌿 Step 2: Twist Gently to Detach Pods
Grasp the pod firmly near its base with one hand while using your other hand to support the stem below. I twist slowly in a clockwise direction—this is the most effective way to avoid breaking the stem or damaging the seeds inside. You'll feel a slight resistance before the pod pops free.
Don't yank or pull suddenly, even if the pod feels ready. A sharp tug can cause the stem to snap, leaving behind a stub that may rot or attract pests. If a pod resists, let it go and come back in a few days—it might not be fully mature yet.
💧 Step 3: Clean and Dry the Pods
Rinse the harvested pods gently under cool water to remove any dirt or debris, but avoid soaking them. I lay them out on a clean towel or paper towel in a single layer, making sure they're not touching each other. This prevents mold growth and ensures even drying.
Place the pods in a warm, dry spot with good air circulation—like a sunny windowsill or a well-ventilated room. They should dry completely in 3-5 days, turning a lighter brown color and feeling crisp to the touch. If you notice any soft spots or mold, discard those pods immediately.
⏰ Step 4: Store for Year-Round Viability
Once fully dry, store the pods in a paper envelope or breathable fabric bag—plastic containers trap moisture and can cause the seeds to spoil. Label each bag with the variety name and harvest date to keep track of your collection.
Keep the stored pods in a cool, dark place like a pantry or seed storage box. Under these conditions, canna seeds remain viable for up to 3 years. Check them periodically for signs of pests or moisture buildup, and discard any pods that show damage.
☀️ Step 5: Plant Stored Seeds Next Season
When you're ready to plant, open the dried pods and gently squeeze them to release the seeds. I like to plant them directly in well-draining soil, about 1 inch deep, in a warm, sunny location. Keep the soil consistently moist but not soggy until germination occurs.
Germination typically takes 2-4 weeks, depending on temperature and moisture levels. If you notice any seedlings struggling, thin them out to give each plant enough space to grow strong. With proper care, your stored seeds will produce vibrant cannas just like the parent plant.
Tips & tricks for perfect canna seed pod harvesting
Here's what nobody tells you about harvesting canna seed pods without ruining the plant or seeds.
Timing Secret: The early morning harvest window is your best friend. Pods are at their firmest then, which makes the twist-and-release technique work flawlessly. I've learned this the hard way—harvesting in the afternoon heat often results in pods that twist awkwardly or split prematurely. If you miss morning, wait until evening when the plant is less stressed from daytime heat.
Twisting Technique: That clockwise twist isn't just random—it aligns with how the pod naturally detaches. Start with your dominant hand grasping the pod near its base while your other hand supports the stem below. Apply gentle, steady pressure while twisting—you'll feel a slight resistance before the pod pops free. The key is patience; forcing it can damage the stem or crush seeds inside. Think of it like opening a stubborn jar—slow and steady wins.
Drying Wisdom: The 3-5 day drying period is critical for seed viability. Spread pods in a single layer on a clean towel where they can get indirect sunlight and good airflow. I've found that placing them on a mesh cooling rack speeds up drying while preventing mold. Watch for any pods that develop soft spots or mold—these should be discarded immediately as they can contaminate your entire batch. A small fan on low setting can help maintain consistent airflow.
Storage Strategy: Paper envelopes or breathable fabric bags are non-negotiable for long-term storage. Plastic containers trap moisture that can cause mold or rot within weeks. I label each bag with the variety name and harvest date using a permanent marker—this helps track which seeds are freshest. Store in a cool, dark pantry where temperatures stay consistent. The 3-year viability claim holds true only if you maintain these conditions; any moisture exposure cuts that timeline dramatically.
Pro Tips for Canna Seed Pods
- Here's what nobody tells you about harvesting canna seed pods without ruining the plant or seeds.
- Timing Secret: The early morning harvest window is your best friend.
- Twisting Technique: That clockwise twist isn't just random—it aligns with how the pod naturally detaches.
Frequently asked questions
Got questions about harvesting and storing canna seed pods? You’re not alone! Here are some of the most common queries—and their answers—to help you master the process like a pro.
When is the best time to harvest canna seed pods?
The ideal time to harvest is when the pods turn brownish-black and begin to split open naturally—usually late fall to early winter. If you wait too long, seeds may scatter or lose viability. Harvest them before the first hard frost for the best results!
How long can I store harvested canna seed pods?
With proper drying and storage, canna seeds stay viable for 1–2 years in a cool, dry place (like a sealed container in your pantry). For longer storage, refrigerate them in an airtight bag with a silica gel packet to prevent moisture damage.
What if my seed pods twist off before I’m ready to harvest?
Don’t worry—this is normal! If pods twist early, simply collect the seeds inside and dry them separately. Store them in a paper envelope in a well-ventilated spot until fully dry. Twisting is a natural defense mechanism, but it doesn’t mean the seeds are unusable!
Can I use canna seed pods for anything other than planting?
While seeds are the primary goal, the pods themselves can be dried and used as natural mulch or even decorative elements in crafts. Just ensure they’re completely dry to avoid mold. Some gardeners also repurpose them as seed starters for other plants!
What should I do if my seeds don’t germinate after planting?
First, check for moisture and warmth—canna seeds need consistent humidity and temps above 70°F (21°C). If they’re still dormant, try scarifying (lightly nicking the seed coat) or soaking them in lukewarm water for 24 hours before replanting. Patience is key—some varieties take 2–4 weeks to sprout!
Wrapping up and next steps
Harvesting canna seed pods with care ensures viable seeds for year-round storage—no twisty surprises needed! 🌱 Whether you’re a seasoned gardener or just starting, the right tools and techniques make all the difference. With patience and precision, you’ll unlock a treasure trove of seeds ready for next season’s growth.
Ready to dive in? Start by gathering your supplies and follow the steps above—your future garden (and those twist-resistant pods!) will thank you. Happy harvesting! 🌿✨