
Propagation
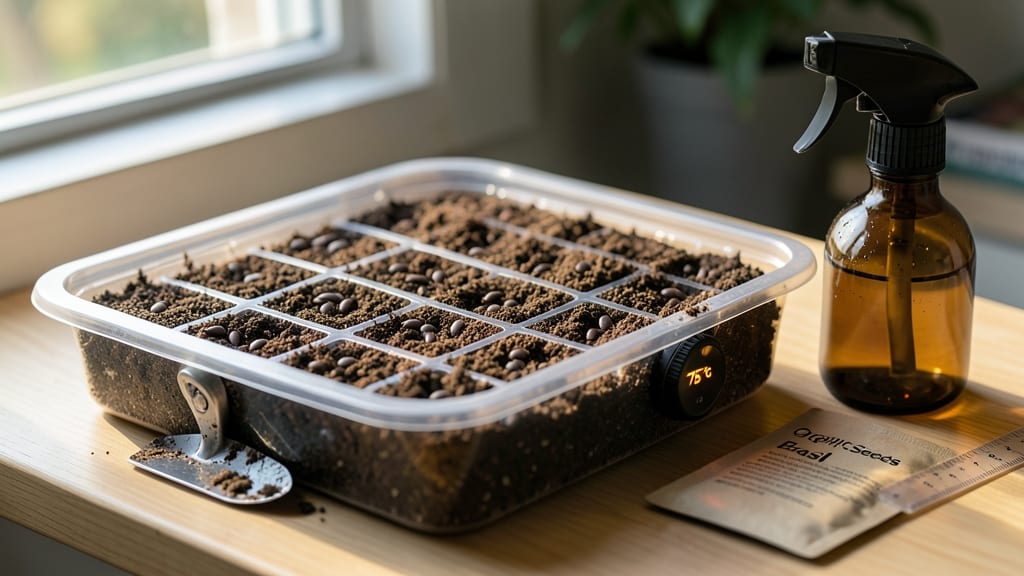
A heat mat for seed germination cuts your waiting time by half—some seeds pop up in 3-5 days instead of weeks. 🌱 I’ll never go back to slow, unreliable germination after seeing my first batch of peppers and tomatoes emerge like clockwork. The secret?
Mimicking the warm, moist conditions seeds crave in their native tropics. You’ll need just three things: a heat mat (70-90°F range), a seed tray, and a clear plastic dome or plastic wrap. The mat sits under your tray, while the dome traps humidity—no fancy equipment required.
Most seeds thrive between 75-85°F, but check your seed packets for exact needs (some, like lettuce, prefer cooler temps). Once sprouts appear, keep the mat on for another 5-7 days to strengthen seedlings before moving them under grow lights.
The payoff? Faster growth, stronger stems, and fewer lost batches. Even my finicky basil now germinates reliably—no more waiting months for stubborn seeds. Works for peppers, tomatoes, eggplants, and herbs, but skip it for cool-weather crops like spinach.
For alternatives, try a DIY setup with a warm water bottle or a heated propagation station. Let’s get those seeds sprouting!
📚 In This Guide
- What you need
- Instructions
- Tips and common mistakes
- Wrapping up and next steps
What you need
- ● Heat mat – A thermostatically controlled seedling heat mat (10–15 watts per square foot). Size: 12"x24" or larger, depending on your seed tray capacity.
- ● Seed trays or containers – Clear plastic or plastic seed trays with drainage holes (10"x20" or similar). Quantity: 1–2 trays per heat mat.
- ● Germination medium – Peat pellets, coconut coir, or seed-starting mix (sterilized and moistened). Avoid garden soil—it may harbor pathogens.
- ● Seeds – Choose fast-germinating varieties (e.g., lettuce, basil, or marigolds) for best results.
- ● Spray bottle – For gentle watering to keep the medium damp (not soggy!).
- ○ Thermometer – Optional but helpful: A small soil or air thermometer to monitor temperatures (ideal range: 70–90°F).
- ● Plastic wrap or humidity dome – To retain moisture and create a mini greenhouse effect.
- ● Power source – A surge protector or extension cord (heat mats draw low power but need steady electricity).
- ● Grow lights – LED or fluorescent (12–16 hours/day) if natural light is insufficient.
- ● Labeling tags – To track seed varieties and planting dates.
- ● Fans (low setting) – For gentle airflow to prevent mold (use sparingly!).
- ● Heating pad with adjustable settings – If you want precise temperature control for different seed types.
How to use a heat mat for faster seed germination
Here’s my foolproof method for coaxing seeds to sprout in record time—no more waiting weeks for stubborn germination.
🌱 Step 1: Select the Right Heat Mat and Position It Properly
A standard seedling heat mat (20-24 inches wide) works best for most trays. Place it on a flat, stable surface—like a shelf or table—where it won’t shift during use. I always position mine under the seed tray before adding soil, so the warmth radiates upward evenly. Avoid placing it near drafts or air vents, as inconsistent temperatures will slow germination.
Most heat mats have a built-in thermostat, but if yours doesn’t, use a seedling heat mat with adjustable settings to maintain 70-85°F at the soil surface. If the mat feels too hot to touch, it’s too warm—adjust immediately. Pro tip: I like to run the mat for 12 hours daily during germination, then reduce to 8 hours once sprouts appear.
💧 Step 2: Prep Trays and Soil for Optimal Warmth Transfer
Fill your seed trays with moistened seed-starting mix—not garden soil—up to ½ inch below the rim. Press down lightly so the surface is firm but not compacted. The key here is even moisture without saturation. I like to mist the soil with a spray bottle until it’s damp enough to hold together when squeezed, but no water should pool at the bottom.
Place the tray directly on the heat mat, ensuring full contact. If your tray has a lid or humidity dome, leave it off during the first 24 hours to let excess moisture escape. Once seeds sprout, you can add the dome to retain humidity—but never let the soil stay soggy. Watch for condensation on the underside of the tray; if it’s heavy, the soil is too wet.
☀️ Step 3: Monitor Temperature and Germination Progress
Most seeds germinate fastest at 75-85°F, but check your seed packet for specific needs—some, like peppers, thrive at 80-90°F, while others, like lettuce, prefer 65-75°F. Use a soil thermometer to confirm the mat’s output. If the temperature drops below 60°F, germination slows dramatically, and seeds may rot instead of sprouting.
Within 3-7 days, you’ll see the first signs of life—tiny green shoots pushing through the soil. This is your cue to reduce heat mat use to 8 hours daily and introduce bright, indirect light (like a grow light 4 inches above the tray). If seeds take longer than 10 days, they may need more warmth or better moisture control. I’ve found that covering the tray with clear plastic wrap (not a dome) for the first 48 hours helps retain humidity without trapping too much heat.
⏰ Step 4: Transition to Normal Care After Sprouting
Once seedlings have two true leaves (not just the initial cotyledons), it’s time to wean them off the heat mat. Gradually reduce its use over 3-4 days, finally turning it off completely. This prevents shock to tender roots. Move the tray to a sunny windowsill or under grow lights for 14-16 hours daily—without the mat, they’ll need consistent light to prevent leggy growth.
Water from the bottom now—place the tray in ½ inch of water for 10-15 minutes, then drain excess. This keeps moisture even without disturbing delicate roots. If you notice yellowing leaves, it’s usually a sign of overwatering or poor drainage. At this stage, I also fertilize lightly with a diluted fish emulsion to give them a nutrient boost.
Tips & tricks for perfect seedling germination with heat mats
Warmth is the secret weapon for coaxing stubborn seeds to sprout faster—here's how to maximize your heat mat's potential without common pitfalls.
Temperature Precision Matters: While the instructions call for 70-85°F at the soil surface, I've found that most seedling heat mats run slightly cooler than advertised. Use a soil thermometer to verify actual temperatures—especially if you're growing heat-loving crops like peppers (aim for 80-90°F). The 60°F threshold is critical: below this, germination slows dramatically, and seeds may rot instead of sprouting. I keep a small thermometer tucked under the tray to monitor real-time conditions.
Moisture Balance is Everything: The 24-hour no-dome period in Step 2 prevents mold while maintaining proper humidity. Here's what I've learned: after the initial 24 hours, I add a humidity dome—but only if the soil feels dry when checked with my finger. Overly damp soil leads to condensation buildup, which can smother emerging seedlings. For extra insurance, I poke small drainage holes in plastic wrap before sealing it over trays during the first 48 hours.
Light Transition Strategy: When you reduce heat mat use to 8 hours daily after sprouting, timing matters more than you'd think. I've found that moving trays to bright, indirect light (like a south-facing window) for the remaining 14-16 hours prevents leggy growth. The key is to position lights 4 inches above seedlings—any closer causes burning, any farther leads to stretching. I use a simple ruler to maintain this distance consistently.
Seed-Specific Adjustments: Not all seeds respond equally to heat. While most benefit from 12 hours on the mat, delicate seeds like lettuce prefer 8-10 hours daily to prevent overheating. I keep a small notebook next to my setup, tracking which varieties thrive at different temperature ranges. For example, tomatoes and peppers love the full 80-90°F range, while herbs like basil germinate best at 65-75°F.
Pro Tips for Heat Mat For Seed Germination
- Warmth is the secret weapon for coaxing stubborn seeds to sprout faster—here's how to maximize your heat mat's potent...
- Temperature Precision Matters: While the instructions call for 70-85°F at the soil surface, I've found that most seed...
- Moisture Balance is Everything: The 24-hour no-dome period in Step 2 prevents mold while maintaining proper humidity....
Frequently asked questions
Got questions about using a heat mat for seed germination?
You’re not alone! Here are answers to the most common concerns—so you can get those seeds sprouting like a pro.
How long should I keep seeds on a heat mat for germination?
Most seeds need 12–24 hours of warmth per day to germinate faster. Once sprouts appear (usually in 3–7 days), reduce heat to room temperature. Overheating can stress delicate seedlings—keep temps between 70–90°F (21–32°C), depending on the seed type.
Can I use a heat mat for all types of seeds?
Not all seeds love heat! Fast-germinating seeds like peppers, tomatoes, and herbs thrive with warmth, but slow germinators (e.g., beans, peas) or cold-required seeds (e.g., lettuce, cabbage) may not need it—or could even rot. Always check seed packets for specific needs.
What if my seeds aren’t sprouting after using a heat mat?
Try these fixes:
- Check moisture: Seeds need damp (not soggy) soil. Mist lightly if dry.
- Test heat levels: Use a thermometer—some mats run hotter than advertised!
- Adjust depth: Plant seeds at the correct depth (usually 2x their size).
- Fresh seeds: Old seeds (over 1 year) may have lost viability.
Are there alternatives to a heat mat for warming seeds?
Yes! Try these DIY or low-cost options:
- Bottom heat from appliances: Place seed trays on top of a refrigerator (not freezer) or laptop (carefully!) for gentle warmth.
- Grow lights with heat: Use a full-spectrum LED 6–12 inches above seeds—some emit enough heat.
- Hot water bottle: Wrap in a towel and nestle under trays for short bursts.
- Compost heat: Bury seed pots in warm compost (120–140°F) for 24 hours.
Do I need to keep the heat mat on 24/7?
Nope! Most seeds only need 12–16 hours of warmth daily. Turn it off at night or during cooler parts of the day to mimic natural conditions. Pro tip: Use a timer to automate cycles—your seedlings (and sanity) will thank you!
Wrapping up and next steps
Using a heat mat for seed germination is a game-changer for gardeners eager to see sprouts in days instead of weeks! 🌱 The consistent warmth mimics natural soil conditions, boosting success rates and speeding up growth—perfect for impatient plant lovers.
Whether you're a beginner or a seasoned pro, this simple tool can transform your seed-starting routine.
Ready to dive in? Start small—pick a few easy seeds like basil or marigolds, test your setup, and watch your confidence (and seedlings!) grow. Happy planting!