
Propagation
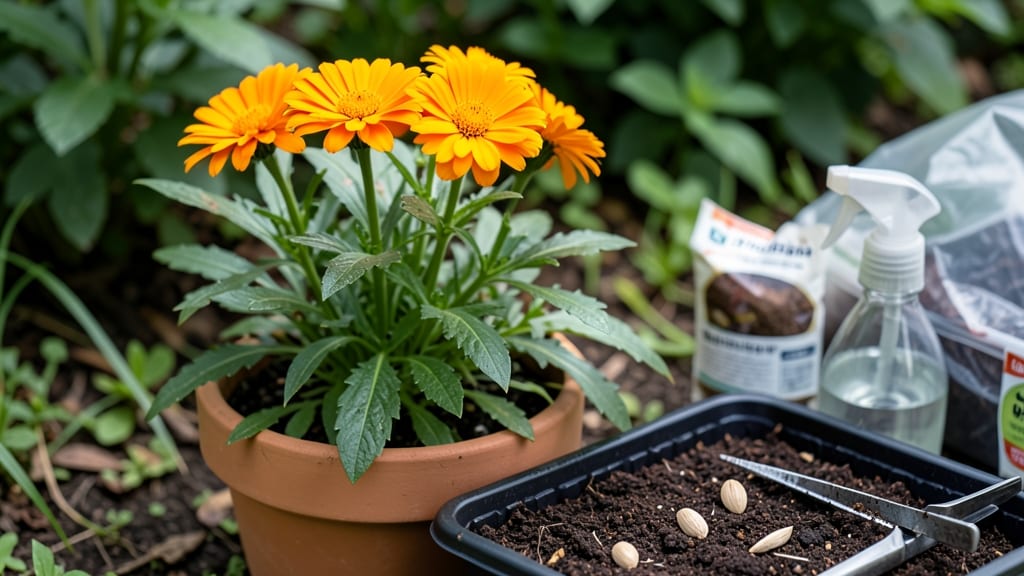
Growing calendula from seed in pots lets you enjoy those cheerful orange blooms even on a tiny balcony—no garden required. 🌱 I’ve grown calendula for years, and the secret to success starts with the right pot size and soil mix.
These hardy annuals thrive in containers, making them perfect for renters or small spaces. The process is straightforward: sow seeds ¼ inch deep in well-draining soil, keep them moist (not soggy), and place the pot in full sun.
Germination takes about 7–14 days, and you’ll see those vibrant petals unfolding in just 12 weeks. The key is avoiding overwatering—calendula hates wet feet—and ensuring good airflow to prevent fungal issues.
By summer, your pots will burst with bright orange and yellow blooms, attracting pollinators while adding a pop of color. Plus, container-grown calendula is easier to protect from pests and move to optimal sunlight. No more struggling with weeds or soil-borne diseases—just pure, fuss-free beauty.
This method works for 5-gallon pots or larger, and you can even grow them year-round in a sunny window. Let’s get those seeds started!
📚 In This Guide
- What you need
- Instructions
- Tips and common mistakes
- Wrapping up and next steps
What you need
- ● Calendula seeds – 10–20 seeds (non-GMO, heirloom varieties like ‘Bonanza’ or ‘Moonbeam’ work well).
- ● Seed-starting pots or trays – 4–6 inch pots (or a seed tray with individual cells). Tip: Biodegradable pots are eco-friendly!
- ● Seed-starting mix – 1–2 cubic feet of sterile, well-draining potting soil (avoid garden soil—it’s too dense!).
- ● Grow lights or sunny windowsill – A south-facing window or a 12–16 hour LED grow light (12–18 inches above seedlings).
- ● Spray bottle – For gentle watering (avoid over-saturating seeds!).
- ● Plastic wrap or humidity dome – To retain moisture while seeds germinate.
- ○ Fertilizer (optional but helpful) – A balanced liquid fertilizer (5-5-5 or 10-10-10) or fish emulsion for young seedlings.
- ● Heat mat – Speeds up germination (70–75°F is ideal).
- ● pH test kit – Calendula prefers 6.0–7.0 pH.
- ● Compost or worm castings – Boosts soil nutrients for stronger plants.
- ● Plant labels – To track varieties if growing multiple types.
- ● Pruning shears – For pinching back leggy seedlings later.
Step-by-step instructions for growing calendula in containers
Here's how I grow vibrant calendula from seed in pots—no fuss, just consistent results.
🌱 Step 1: Prepare Pots and Seed Starting Mix
Use 4-inch diameter pots with drainage holes for each plant. I fill them with a mix of 50% potting soil and 50% perlite or vermiculite to ensure excellent drainage—calendula hates soggy roots. Moisten the mix until it's damp but not dripping, then let it sit for 10 minutes to settle.
Tap the pot gently on the table to eliminate air pockets. The surface should be level and firm enough to support delicate seeds. Calendula seeds are tiny, so I use a toothpick to create small dimples about ¼ inch deep—this prevents them from washing away during watering.
🌱 Step 2: Sow Seeds and Maintain Ideal Conditions
Place 2-3 seeds per pot in each dimple, then cover lightly with a thin layer of mix—just enough to hide them. Mist the surface with a spray bottle until evenly moist. Real talk: Don't water from above after planting, or you'll bury the seeds too deep.
Cover the pots with plastic wrap or a humidity dome to retain warmth and moisture. Calendula germinates best at 65-75°F, so I place them on a seedling heat mat if my home runs cooler. Expect sprouts in 7-14 days—don't be tempted to water daily. The dome keeps humidity perfect until germination.
☀️ Step 3: Provide Light and Thin Seedlings
Once seedlings emerge, remove the plastic immediately to prevent damping-off. Place pots under grow lights or in a south-facing window where they'll receive 12-14 hours of light daily. You'll see leggy growth if light is insufficient—those thin stems won't support heavy blooms later.
When seedlings reach 2 inches tall and have 2-3 true leaves, thin to the strongest plant per pot. Use clean scissors to snip excess seedlings at soil level—don't pull, or you'll disturb the remaining roots. Water gently after thinning to help the remaining plant establish.
💧 Step 4: Fertilize and Encourage Blooming
After the first set of true leaves appears, switch to a balanced liquid fertilizer (10-10-10) diluted to half strength. Feed every 2-3 weeks during active growth. Calendula thrives in lean soil, so I avoid heavy feeding—too much nitrogen produces lush foliage but few flowers.
Pinch back the tips of stems when plants reach 6 inches tall to encourage bushier growth. This simple step prevents leggy plants and increases flower production. You'll see new side shoots emerge within a week—that's your signal the plant is responding well.
✂️ Step 5: Deadhead and Maintain Through the Season
Remove spent blooms regularly to prolong flowering. I use my fingers to gently twist off faded flowers at the base—no need for pruners. This encourages the plant to produce more blooms instead of setting seed. Calendula is self-cleaning, but consistent deadheading keeps it looking tidy and productive.
Water when the top inch of soil feels dry, but avoid wetting the foliage to prevent fungal issues. In hot weather, I water in the morning to allow leaves to dry before evening. By 12 weeks, you'll have continuous blooms—just keep deadheading and fertilizing lightly.
Tips & tricks for perfect calendula blooms in containers
A few subtle adjustments can transform your calendula from ordinary to spectacular. These are the lessons I learned after seeing too many seedlings fail or bloom poorly.
Soil Mix Matters: The 50-50 blend of potting soil and perlite isn't just about drainage—it's about aeration. Calendula roots need oxygen to thrive, and compacted soil leads to rot. I've found that adding a handful of coarse sand to the mix helps prevent compaction over time, especially if you're using heavier potting soils. This small tweak keeps roots healthy right from the start.
Germination Environment: Those 7-14 days until sprouts can feel like an eternity, but patience pays off. I've discovered that placing pots on a seedling heat mat set to 75°F consistently produces faster germination than relying on room temperature alone. If you don't have a heat mat, try placing pots on top of your refrigerator (not inside) for gentle warmth. The key is maintaining that 65-75°F range—any cooler and germination slows dramatically.
Light Strategy: The 12-14 hours of daily light requirement is non-negotiable, but quality matters just as much as quantity. I've seen leggy seedlings from fluorescent lights that don't emit enough blue spectrum. If using grow lights, position them just 2-3 inches above seedlings and use full-spectrum bulbs. For window placement, south-facing gets the most consistent results, but west-facing windows provide excellent afternoon light that calendula loves.
Fertilizer Timing: The 2-3 week feeding schedule works perfectly, but there's a trick to getting the most from each application. I always fertilize right after watering—this prevents fertilizer burn from concentrated salts. Also, I've found that adding a pinch of Epsom salt (about 1/2 teaspoon per gallon of water) to the diluted fertilizer boosts magnesium levels, which results in more vibrant orange blooms. It's an optional upgrade, but one that makes a noticeable difference.
Pro Tips for Growing Calendula From Seed In Pots
- A few subtle adjustments can transform your calendula from ordinary to spectacular.
- Soil Mix Matters: The 50-50 blend of potting soil and perlite isn't just about drainage—it's about aeration.
- Germination Environment: Those 7-14 days until sprouts can feel like an eternity, but patience pays off.
Frequently asked questions
Got questions about growing calendula from seed in pots? You’re not alone! Here are some of the most common queries—plus quick, practical answers to help you cultivate vibrant orange blooms with ease.
How deep should I plant calendula seeds in pots?
Calendula seeds are tiny, so plant them just 1/8 inch deep (about 3mm) in the soil. Press them lightly into the surface and keep the soil moist until germination. Overwatering or burying them too deep can lead to rot—so, gentle is key!
How long does it take for calendula seeds to germinate?
Germination usually takes 7–14 days in warm (65–75°F) and consistently moist soil. For faster results, use a seedling heat mat or place pots in a sunny windowsill. Patience pays off—don’t give up if sprouts take a little longer!
Can I grow calendula in small pots, or do they need big containers?
Calendula thrives in 5–6 inch pots (or larger) since they have shallow roots. If you’re short on space, opt for self-watering pots or cluster 2–3 plants in a single container. Just ensure they get 6+ hours of sunlight daily to prevent leggy growth.
Why are my calendula seedlings turning yellow or wilting?
Yellowing leaves often signal overwatering or poor drainage. Let the top inch of soil dry out between waterings, and use pots with drainage holes. Wilting can also mean underwatering or heat stress—move pots to a shadier spot if temps exceed 85°F.
Do I need to deadhead calendula flowers for more blooms?
Yes! Snip spent blooms just above the next set of leaves to encourage continuous flowering. This redirects energy to new buds, keeping your calendula in bloom for weeks longer. Use clean scissors to avoid disease—bonus points for composting the cuttings!
Wrapping up and next steps
Growing calendula from seed in pots is a rewarding journey that brings vibrant color and natural beauty to your space—without needing a sprawling garden! With the right containers, soil, and a little patience, you’ll enjoy cheerful blooms in just 12 weeks.
Whether you’re a beginner or a seasoned gardener, these sunny flowers are forgiving, versatile, and perfect for harvesting petals for salves, teas, or garnishes.
Ready to dive in? Start with your seeds today—pick a sunny spot, grab your pots, and let nature do the rest! Once your calendula thrives, share your progress or explore more ways to use your harvest.