
Lawn
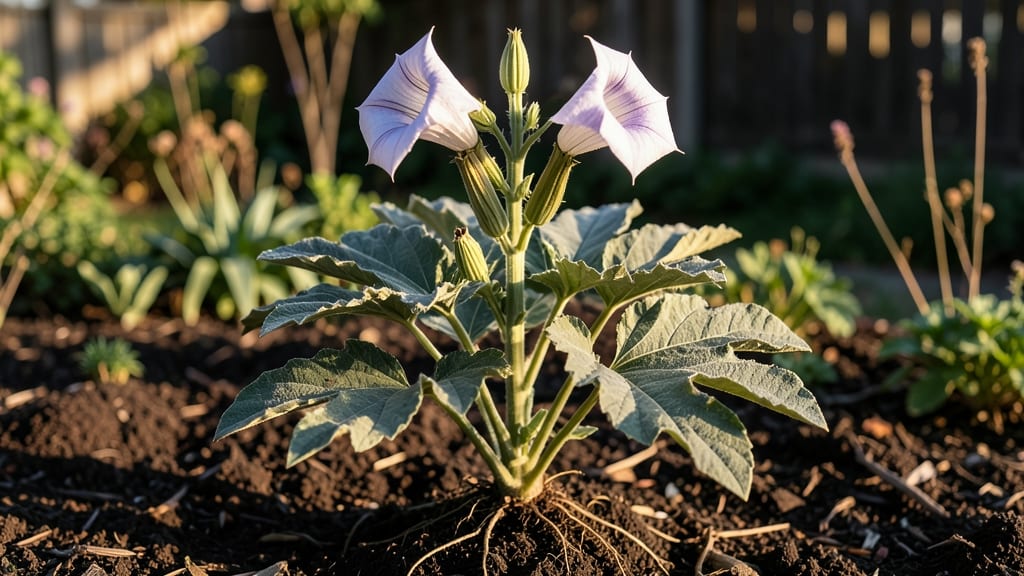
Moonflower datura seed pods hold the secret to next year’s dreamy night-blooming vines—if you know how to crack them open. 🌙 I’ve spent years perfecting the art of harvesting these tricky pods without wasting a single seed, and the method is simpler than you’d think, especially when you avoid the common mistakes that leave seeds rotting inside.
The trick starts with timing: wait until the pods turn from green to a papery brown and split open naturally (or give them a gentle squeeze). Once you’ve collected them, lay them out on a tray to dry completely—this preserves viability and prevents mold.
Handle with gloves (always), since every part of the plant is toxic, and store seeds in a cool, dark place until planting season.
By spring, you’ll have a stash of plump, ready-to-germinate seeds that produce those iconic trumpet-shaped blooms within 6-8 weeks. The key is patience—moonflowers grow fast, but they need consistent moisture and full sun to reward you with their signature nighttime fragrance.
This method works for any datura variety, whether you’re growing the classic white moonflower or the striking blue-throated angel’s trumpet. Just remember: keep kids and pets away, and always handle seeds with care. Here’s how to make it foolproof!
📚 In This Guide
- What you need
- Instructions
- Tips and common mistakes
- Wrapping up and next steps
What you need
- ● Moonflower datura seed pods: 5–10 mature, dried pods (harvested from healthy plants—look for brown, papery pods with visible cracks).
- ● Scissors or pruning shears: Sharp, clean pair (sterilize with rubbing alcohol if reusing).
- ● Glove(s): 1 pair of nitrile or latex gloves (datura contains toxic compounds—safety first!).
- ● Paper towels or parchment paper: 1–2 sheets (for drying seeds).
- ● Small bowl or container: 1 shallow, non-reactive dish (ceramic or glass).
- ● Fine-mesh strainer or sieve: 1 (for separating seeds from chaff).
- ● Paper bag or envelope: 1 (for seed storage; label with the date!).
- ● Hair dryer (cool setting): Speeds up pod drying if pods are damp.
- ● Magnifying glass: Helps spot tiny seeds in debris.
- ● Seed catalog or notebook: For tracking varieties and harvest dates.
- ● Compost bin: For safely disposing of pod husks (avoid composting seeds!).
How to harvest moonflower datura seeds without wasting a single pod
Here’s the simple, zero-waste method I’ve used for years to collect datura seeds—no scissors, no mess, just nature’s design.
🌱 Step 1: Wait for Pods to Ripen Fully
Moonflower datura pods start green and firm, but they won’t open until they’re completely dry and brown. I know they’re ready when the pods feel brittle and the outer shell cracks slightly when squeezed gently. If you harvest too early, the seeds inside won’t be viable—always wait until the pods are fully mature and have turned a deep, papery brown.
This can take 4-6 weeks after flowering, depending on your climate. In hot, dry summers, pods ripen faster; in cooler or damp conditions, they may need extra time. Check pods weekly once they start turning color—you’ll hear a faint pop when they’re ready.
💧 Step 2: Dry Pods Completely Before Handling
Place fully ripened pods in a dry, well-ventilated spot for 3-5 days to ensure they’re bone-dry. I use a mesh bag or a cardboard box with holes punched in the sides—this lets air circulate while keeping pods contained. Avoid direct sunlight, which can cause pods to over-dry and split prematurely.
You’ll know they’re ready when the pods feel light in your hand and the outer shell looks almost translucent. If you tap them together, they’ll rattle with seeds inside. Never rush this step—moisture inside the pod will prevent seeds from releasing properly.
✂️ Step 3: Use the "Pod-Smash" Technique
Here’s the trick: lay a pod flat on a clean surface (I use a white paper towel for visibility) and press firmly but gently with your thumb. The pod’s natural seams will split open with a quiet snap, releasing seeds in one clean motion. Don’t crush—just apply steady pressure until you hear the break.
If a pod resists, it’s not dry enough. Repeat with all pods until they open easily. This method preserves every seed and avoids the mess of cutting pods open. I collect seeds in a small envelope or paper bag, labeling it with the variety and harvest date—datura seeds stay viable for 3-5 years if stored dry.
🌿 Step 4: Store Seeds Properly for Next Year
Once all seeds are out, let them dry in the envelope for 24 hours in a cool, dark place. This final drying step prevents mold. Seal the envelope with a twist tie or rubber band and store it in a glass jar in your freezer for long-term preservation.
Label the jar with the harvest year and variety—datura seeds are heavy and can settle unevenly in bags. When you’re ready to replant, simply sprinkle seeds directly onto prepared soil in spring. They germinate easily and thrive with minimal care.
Tips & tricks for perfect moonflower datura seed harvesting
Avoid common mistakes that waste seeds and save time with these simple tricks.
Pod Ripeness Test: In Step 1, when checking for ripeness, squeeze the pod gently between your thumb and forefinger—it should feel like a crisp autumn leaf, not a rubber ball. If it springs back, it's not ready. I learned this the hard way after trying to harvest green pods that yielded no seeds. The faint pop sound when fully ripe is your best indicator, especially in humid climates where pods take longer to dry.
Drying Strategy: For Step 2, place your drying pods on a mesh screen or even an unsealed paper grocery bag instead of a cardboard box. This allows even better airflow while preventing seeds from falling through. I keep mine on a kitchen rack near a gentle fan (not direct airflow!) to speed up drying by about 24 hours. Just avoid windowsills—sunlight can cause premature splitting.
Pod-Smash Technique: When using the "Pod-Smash" method in Step 3, try this pro move: place a small piece of masking tape on your work surface first. The pods will stick slightly to the tape, making them easier to handle without rolling away. Also, work on a white surface—you'll spot every last seed against the contrast. I've saved dozens of seeds this way that would've vanished on dark countertops.
Storage Secret: For the final 24-hour drying in Step 4, place a small silica gel packet (the kind that comes in shoe boxes) inside your seed envelope. This extra step prevents any lingering moisture that could cause mold during long-term storage. I store my jars in the freezer's coldest section, not just the main compartment, for maximum seed longevity.
Pro Tips for Moonflower Datura Seed Pods
- Avoid common mistakes that waste seeds and save time with these simple tricks.
- Pod Ripeness Test: In Step 1, when checking for ripeness, squeeze the pod gently between your thumb and forefinger—it should feel like a crisp autumn leaf, not a rubber ball.
- Drying Strategy: For Step 2, place your drying pods on a mesh screen or even an unsealed paper grocery bag instead of a cardboard box.
Frequently asked questions
about moonflower datura seed pods—because even the most experienced gardeners hit a snag now and then! Here are answers to the most common queries to help you harvest like a pro.How do I know when moonflower datura seed pods are ready to harvest?
Moonflower datura seed pods are ready when they turn light brown and begin to split open naturally—usually 3–4 weeks after flowering. If you wait too long, the seeds may scatter or sprout prematurely. Pro tip: Gently tap the pods; if seeds rattle inside, they’re ready!
Why are my moonflower seed pods staying closed?
If your pods refuse to open, they might still be too green or moist. Try these tricks:
- Sun-drying: Place pods in a warm, dry spot (like a sunny windowsill) for 1–2 days.
- Paper bag trick: Store pods in a brown paper bag for 24 hours to trap ethylene gas, which can speed up ripening.
- Patience: Some varieties need extra time—check weekly!
Can I use moonflower datura seeds for anything other than planting?
Beyond replanting, moonflower seeds are:
- Art & crafts: Dry seeds make beautiful hanging mobiles or pressed flower art.
- Natural dye: The pods can create earthy brown hues for fabric or paper.
- Wildlife feed: Birds love the seeds—leave some for pollinators!
Warning: All parts of moonflower datura are toxic if ingested—keep away from pets/kids!
What’s the best way to store harvested moonflower seeds?
Store seeds in a cool, dry place (like a sealed envelope or jar) for up to 2 years. For extra longevity:
- Label with the date and variety.
- Avoid plastic bags—moisture = mold!
- Add a silica gel packet to absorb humidity.
Pro tip: Freeze seeds for 24 hours before storage to kill pests!
What if my moonflower pods rot before opening?
Rot is usually caused by excess moisture or fungal issues. To prevent it:
- Prune overly dense foliage for better airflow.
- Water at the base (not overhead) to keep pods dry.
- Harvest pods early if rain is forecasted.
If rot happens, compost the pods carefully—they’re not safe for edible gardens!
Wrapping up and next steps
Harvesting moonflower datura seeds doesn’t have to be a struggle—with the right tricks, you can open those stubborn pods naturally and sustainably! Whether you’re using heat, cold, or simple tools, these methods ensure a zero-waste approach while keeping your garden thriving. 🌱
Now that you’re armed with knowledge, give it a try! Start with a few pods, experiment with the techniques, and soon you’ll be collecting seeds like a pro. Happy gardening—and may your moonflowers bloom beautifully next season! 🌙✨