
Lawn
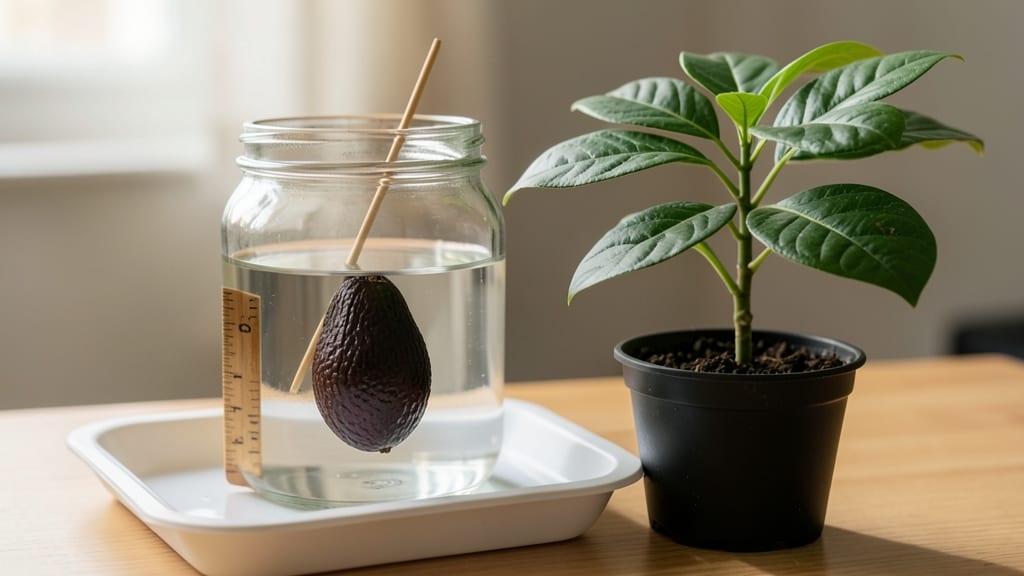
That pit from your avocado toast could grow into a houseplant—starting avocado seeds in water turns kitchen scraps into living green thumbs. 🌱 I’ve watched my own seedling grow roots in just 3 weeks, and the process is simpler than you’d think, though it does require patience (and avoiding the #1 killer mistake most beginners make).
The secret lies in keeping the water fresh, the pit upright, and the environment warm. You’ll need a glass jar, toothpicks, and a little space near a sunny window—no fancy equipment, just what’s already in your home.
The roots start as tiny white threads, then thicken into sturdy stems ready for potting, and the whole thing feels like watching a tiny miracle unfold.
By week 4, you’ll have roots 3-6 inches long—enough to transplant into soil, though many keep them in water as a quirky desk plant. The real magic? No special soil, no greenhouse, just a jar and a little attention.
Just beware of mold or stagnant water, which can rot the pit before it even gets started.
This method works year-round, though slower in winter, and the plant itself might not bear fruit (but who cares when it’s just for fun?). Once you’ve mastered it, you’ll be tempted to try every pit in the house—just don’t blame me if your kitchen turns into a jungle.
Ready to give it a shot?
📚 In This Guide
- What you need
- Instructions
- Tips and common mistakes
- Wrapping up and next steps
What you need
- ● 1 fresh avocado pit – Choose a seed from a ripe, organic avocado (the bigger, the better!)
- ● 1 glass or jar – At least 6–8 inches tall (mason jars or clear cups work great for visibility)
- ● Toothpicks or small skewers (3–4) – For balancing the seed
- ● Water – Room-temperature, filtered if possible (change weekly)
- ● Spray bottle – For gentle misting (keeps the seed moist without over-saturating)
- ● Small plate or mesh screen – To cover the jar and protect from pests (like fruit flies!)
- ● Grow light or sunny windowsill – If your space lacks natural light (6+ hours/day)
- ● Notebook & pen – Track water changes, root growth, and milestones!
- ● Patience & consistency – Roots may take 2–6 weeks to appear!
- ● Clean workspace – Avoid bacteria by washing hands/tools before handling the seed.
- ● Warm spot (70–80°F) – Speeds up germination (a kitchen counter is perfect!)
How to germinate avocado seeds in water for fast, strong roots
Here's the simple method I've used to grow avocado plants with thick, healthy roots in under a month.
🌱 Step 1: Extract and Clean the Seed
Start with a fresh avocado pit—never use one that's been sitting out for weeks. Rinse it under cool water to remove any remaining fruit flesh. You'll see three distinct sections: the pointed end (top), the flat side (middle), and the rounded bottom. The flat side is where new roots will emerge.
Use a clean knife to carefully slice off both ends of the pit—about ¼ inch from each end. This exposes the seed's germination points. Don't cut too deep or you'll damage the seed. The goal is to reveal the tiny growth areas while keeping the seed intact. Pat it dry with a paper towel before proceeding.
🪴 Step 2: Set Up the Water Germination Container
Choose a container that's at least 4 inches deep—a mason jar, glass vase, or even a clean plastic cup works. Fill it with room-temperature water until the pit floats with just the rounded bottom submerged. The flat side should remain above water, exposed to air. This keeps the seed stable while allowing roots to grow downward.
Change the water every 2-3 days to prevent bacterial growth. You'll know it's time when the water looks cloudy or smells funky. I like to use a pencil with a rubber eraser on one end to prop up the pit—this keeps it from sinking too low while maintaining the right water level.
💧 Step 3: Monitor for Root Growth
Place your container in a warm spot with indirect light—a kitchen counter near a window works perfectly. Avoid direct sunlight, which can overheat the water and stress the seed. You'll see the first signs of life in about 2-4 weeks, when a small white root emerges from the rounded bottom.
Once the root reaches about 2 inches, it's ready for the next step. Don't let the root grow too long before planting—long roots can break easily. Watch for mold on the water surface; if you see any, dump the water and rinse the pit before refilling with fresh water.
☀️ Step 4: Transition to Soil for Plant Growth
When roots are 2-3 inches long, fill a small pot (at least 6 inches deep) with well-draining potting mix. Make a hole in the center deep enough to bury half of the pit. Gently place the pit in the hole so the flat side faces upward—this is where the stem will emerge.
Cover the pit with soil, leaving just the top ¼ inch exposed. Water lightly until the soil feels evenly moist. Place the pot in bright, indirect light and keep the soil consistently damp (not soggy). You'll see the first green shoot appear in about 2-4 weeks—patience is key here.
⏰ Step 5: Care for Your Young Avocado Plant
Once the shoot reaches 6 inches tall, you can gradually introduce more sunlight. Avocado plants need 6+ hours of bright light daily to thrive. Rotate the pot weekly so the plant grows straight. Water when the top 1 inch of soil feels dry—avocados hate soggy roots.
Fertilize lightly every 2 months with a balanced, water-soluble fertilizer. You won't see fruit for years, but consistent care now means a stronger plant later. Keep the pot size small at first—avocados grow slowly and need to outgrow their container before you repot.
Tips & tricks for starting avocado seed in water
Here's what I've learned after watching dozens of avocado seeds sprout—these little details make all the difference between a thriving plant and a sad, moldy mess.
The Cutting Technique: When slicing those ¼-inch ends in Step 1, I use a serrated knife for cleaner cuts. The key is to expose the germination points without damaging the seed's interior—think of it like peeling an apple without breaking the core. If you cut too deep, you risk exposing the seed to bacteria. Here's a trick: hold the pit firmly and make one clean slice per end, then gently twist to separate.
Water Level Matters: In Step 2, the water level is critical—only the rounded bottom should be submerged. If the flat side gets wet, it can rot before sprouting. I've found that using a clear container lets you monitor the water level easily. If the pit sinks too low, it's time for a refresh. Pro tip: Add a few ice cubes to keep the water cool and prevent bacterial growth between changes.
Light Positioning: Step 3 mentions indirect light, but here's what nobody tells you—avocado seeds need warmth more than light at first. Place your container near a warm spot like a sunny windowsill during the day, then move it to a warmer room at night. I've seen seeds sprout faster when kept consistently warm (around 70-75°F). Avoid drafts or cold windowsills, which can slow or stop germination entirely.
Transplanting Timing: In Step 4, don't wait until roots are 3 inches before planting—aim for 2 inches. Longer roots are more fragile and can break during the transfer. When you're ready to plant, soak the roots in water for 5 minutes to make them more pliable. This reduces transplant shock and helps the seed adjust to soil more smoothly.
Pro Tips for Starting Avocado Seed In Water
- Here's what I've learned after watching dozens of avocado seeds sprout—these little details make all the difference between a thriving plant and a sad, moldy mess.
- The Cutting Technique: When slicing those ¼-inch ends in Step 1, I use a serrated knife for cleaner cuts.
- Water Level Matters: In Step 2, the water level is critical—only the rounded bottom should be submerged.
Frequently asked questions
Got questions about growing an avocado tree from a seed? You’re not alone! Here are some of the most common queries—and their answers—to help you succeed with your avocado seed in water project.
How long does it take for avocado seeds to sprout roots in water?
With patience and the right conditions, roots typically appear in 2–6 weeks. Most seeds show signs of growth within 3 weeks if kept in warm (70–85°F), indirect sunlight. If nothing happens after 6 weeks, gently check for mold or rot—your seed might need a fresh start!
Should I change the water weekly, or can I leave it the same?
Change the water every 3–5 days to prevent bacterial growth and stagnation. Use room-temperature water to avoid shocking the seed. A splash of hydrogen peroxide (1 tsp per cup) once a week can also keep the water fresh and clear of algae.
What do I do once the roots are 2–3 inches long?
Once roots reach 2–3 inches, it’s time to transfer your seed to soil! Plant it in a well-draining potting mix, burying about 1/3 of the seed (the part with roots) and keeping the top exposed. Water lightly and place in bright, indirect light to encourage leaf growth.
Why is my avocado seed turning black or moldy in the water?
Blackening or mold is usually a sign of rot or bacterial growth. If you spot this, remove the seed, trim any mushy areas with a clean knife, and let it dry for a day before restarting in fresh water. Use a small jar with a lid (not airtight) to reduce humidity and mold risks.
Can I grow an avocado tree indoors, or does it need outdoor sunlight?
Yes! Avocado trees thrive indoors with bright, indirect light (like near a south-facing window). If you notice leggy growth or pale leaves, supplement with a grow light for 12–14 hours daily. Outdoor sunlight is ideal once the tree matures, but start indoors to protect delicate roots.
Wrapping up and next steps
Starting an avocado seed in water is a simple, rewarding way to grow your own plant—no green thumb required! 🌱 With just a little patience and care, you’ll watch those roots sprout in as little as 3 weeks, setting the stage for a thriving houseplant.
Once your seedling has strong roots and a sturdy stem, the next step is to transplant it into soil and give it the love it deserves.
So grab that pit, get growing, and enjoy the satisfaction of nurturing life from something as humble as an avocado seed. Your future plant (and future bragging rights) will thank you! 🌿