
Lawn
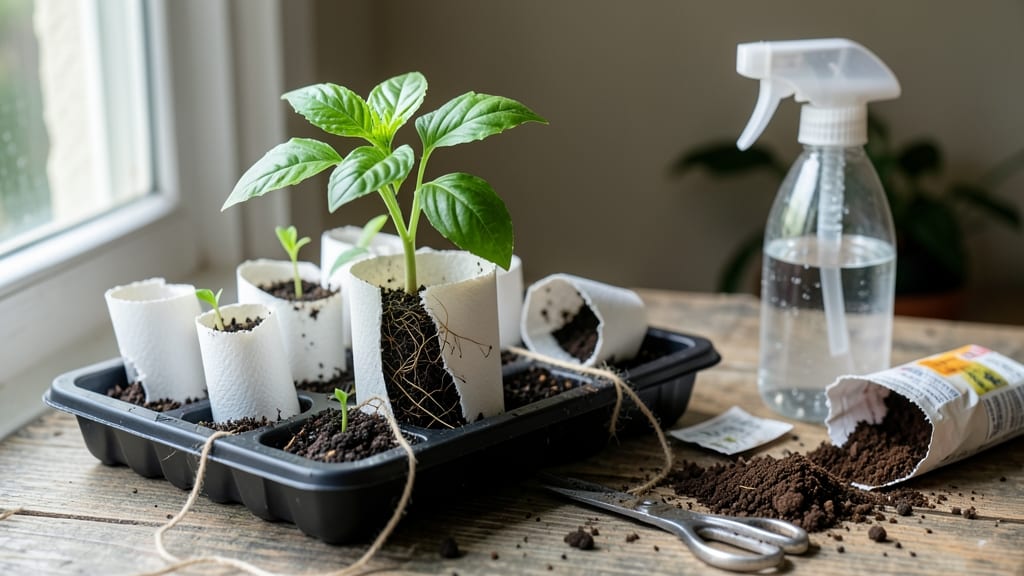
Toilet paper roll seed starters let you grow seedlings with zero waste and maximum efficiency. 🌱 I've used them for years—especially for herbs and flowers—and they cut my seed-starting costs by half while keeping my kitchen clutter-free.
The best part? You're reusing something you already have lying around, and your seedlings get a perfect cozy home to sprout in.
Start by flattening empty toilet paper rolls, then fill them with seed-starting mix. Plant your seeds, label the rolls with the plant type, and give them a light misting. Place them in a tray or container with a lid (or cover with plastic wrap) to keep humidity high.
Within 7-10 days, you'll see tiny green shoots pushing through the soil—proof that this method really works.
Once your seedlings have their first true leaves, they're ready to transition to soil. Simply cut the rolls open, gently remove the seedlings, and plant them in pots or directly in the garden.
The rolls break down naturally, so you don't even have to worry about removing them. You'll end up with sturdy, healthy seedlings that outperform many store-bought plants.
This method works for almost any small seed—herbs like basil and parsley, flowers like petunias and marigolds, and even tiny veggies like lettuce and radishes. It's perfect for beginners because it's hard to mess up, and it's a great way to teach kids about gardening without the fuss.
Plus, you'll be amazed at how much you can grow in just 2 weeks.
📚 In This Guide
- What you need
- Instructions
- Tips and common mistakes
- Wrapping up and next steps
What you need
- ● Empty toilet paper rolls – 4–6 (clean, dry, and free of labels or tape)
- ● Seed-starting mix – 1–2 cups (lightweight, sterile potting soil or coconut coir)
- ● Seeds – Your choice (herbs, flowers, or veggies like basil, marigolds, or lettuce)
- ○ Scissors or knife – For cutting rolls (optional, if rolls are too long)
- ● Water spray bottle – To mist seeds gently
- ○ Plastic wrap or clear lid – To create a mini greenhouse (optional but helpful)
- ● Biodegradable pots – For transplanting later (like peat or coconut fiber pots)
- ● Plant labels – To track seed types (toothpicks + masking tape work too!)
- ● Tray or shallow container – To hold rolls and catch excess water
- ● Grow lights or sunny windowsill – For optimal light exposure
Step-by-Step instructions for toilet paper roll seed starters
Here’s how to turn empty rolls into a zero-waste, space-saving seed starter that works for almost any tiny seed!
🌱 Step 1: Prep the Rolls and Fill with Soil
Start by flattening any cardboard tubes slightly to fit snugly in your seed tray or egg carton. Cut the tubes into 3-inch sections—this gives roots room to grow without crowding. Fill each tube ¾ full with your seed-starting mix, pressing gently so it stays put but doesn’t compact. I like to tap the tube on the table a few times to settle the soil evenly.
Leave a ½-inch gap at the top—this prevents soil from spilling when you water. If your rolls are thick, fold the top edge inward to create a little rim. This keeps moisture in and makes planting easier later. Pro tip: Label each tube with the plant name and date using a marker or toothpick—you’ll forget which is which in two weeks!
💧 Step 2: Plant Seeds and Water Gently
Follow the seed packet’s depth instructions—usually twice the seed’s diameter. For tiny seeds like lettuce or basil, I use the eraser end of a pencil to make a small hole, then drop in 1-2 seeds per tube. Cover them lightly with extra soil, just enough to hide them but not bury them deep. Press the soil down very gently—you’re not packing dirt, just securing the seeds.
Water the tubes until the soil feels damp to the touch, but not soggy. I use a spray bottle for this step because it lets me control the flow. Avoid soaking the tubes from the bottom—you want the soil to stay loose and airy. Place the tubes in a shallow tray to catch any runoff, and set them in a warm spot (around 70°F) until you see sprouts.
☀️ Step 3: Provide Light and Monitor Growth
Once seeds sprout (usually in 5-14 days depending on the plant), move the tubes to a bright spot with 6-8 hours of indirect light daily. A south-facing window or a grow light works best. You’ll know they’re getting enough light when the seedlings grow upright and their leaves stay a vibrant green—not pale or stretched out.
Water from the bottom of the tray now—this keeps the soil evenly moist without disturbing the delicate roots. Let the top inch of soil dry out slightly between waterings. If you see condensation inside the tubes, they’re getting too much moisture. That’s a sign to hold off until the soil feels slightly dry to the touch.
🪴 Step 4: Transplant When Ready
When seedlings have 2-3 true leaves (not just the initial cotyledons), they’re ready to move. Gently squeeze the sides of the tube to loosen the soil ball, then slide the seedling out. Plant it in your garden or a larger pot, making sure to bury it to the same depth it was in the tube. The cardboard will break down naturally, so no need to remove it.
Water the transplanted seedlings well, and keep the soil moist for the first week. If you’re moving them outdoors, do it on a cloudy day or in the evening to reduce shock. Your little sprouts will thank you for the gentle start—and you’ll love the zero-waste win!
Tips & tricks for perfect toilet paper roll seed starters
These clever tricks will help you maximize your seedling success while keeping the process simple and sustainable!
Cardboard Prep Matters: Flattening the tubes completely prevents them from collapsing during watering. I like to use a rolling pin or heavy book to press them flat—this ensures they stay sturdy when filled with soil. For extra stability, you can lightly tape the seams with masking tape if your tubes are particularly thin. This small step makes all the difference when you're handling damp soil later.
Soil Depth Secret: In Step 1, filling the tubes only ¾ full leaves room for roots to grow downward without becoming root-bound. I've found that adding a thin layer of perlite or vermiculite to the bottom ¼ inch improves drainage and prevents soggy soil. This keeps your seedlings healthy and happy during their entire growth cycle.
Lighting Insight: The 6-8 hours of indirect light mentioned in Step 3 is crucial for preventing leggy seedlings. If your window light isn't sufficient, consider supplementing with a simple LED grow light placed just a few inches above the tubes. I've seen dramatic differences in seedling strength when using this extra light—especially for fast-growing plants like radishes or lettuce.
Transplanting Hack: When it's time to transplant in Step 4, gently slide the entire tube into the soil. The cardboard will decompose naturally, so you can plant it directly in your garden. This method preserves the root structure and reduces transplant shock. I've even planted these tubes directly into larger pots for herbs, and they've thrived beautifully!
Pro Tips for Toilet Paper Roll Seed Starter
- These clever tricks will help you maximize your seedling success while keeping the process simple and sustainable!
- Cardboard Prep Matters: Flattening the tubes completely prevents them from collapsing during watering. I like to use ...
- Soil Depth Secret: In Step 1, filling the tubes only ¾ full leaves room for roots to grow downward without becoming r...
Frequently asked questions
Got questions about toilet paper roll seed starters?
You’re not alone! Here are answers to the most common ones to help you grow confidently with this eco-friendly method.
How long does it take for seeds to sprout in toilet paper rolls?
Most seeds sprout within 5–14 days, depending on the type. Fast growers like radishes or lettuce may appear in a week, while slower ones (like beans or herbs) can take up to two weeks. Keep them moist and in a warm spot for best results!
Can I reuse toilet paper rolls for multiple seed batches?
Yes! After removing seedlings, rinse and dry the rolls completely to prevent mold. Store them in a cool, dry place until your next planting. Just avoid using rolls with bleach or dyes—they can harm seeds.
What if my seeds don’t sprout? Troubleshooting tips?
Check these first:
- Moisture: Rolls should stay damp (not soggy). Mist daily if needed.
- Light: Place near a sunny window or under grow lights (6+ hours/day).
- Temperature: Most seeds need warmth (70–80°F). A seedling heat mat helps if your home is chilly.
- Seed viability: Test old seeds by soaking them—if they float, they’re likely dead.
Are toilet paper rolls better than peat pots for seedlings?
Both work, but toilet paper rolls are zero-waste and biodegradable! Peat pots break down too, but they’re less eco-friendly. Rolls also let you see moisture levels and roots better—plus, they’re cheaper and reusable.
Can I use any toilet paper for this method?
Stick to 100% recycled, unbleached toilet paper to avoid chemicals that could stunt growth. Brands like Seventh Generation or Who Gives A Crap are safe bets. Avoid scented or colored rolls—they may contain additives harmful to seeds.
Wrapping up and next steps
Transforming simple toilet paper rolls into thriving seed starters is a game-changer for eco-conscious gardeners! 🌱 With just a few household items, you’ve unlocked a zero-waste, budget-friendly way to grow seedlings strong—all while reducing plastic waste.
Whether you’re a beginner or a green thumb, this method proves that sustainability and simplicity go hand-in-hand.
Ready to level up your garden? Grab those empty rolls, pick your favorite seeds, and start sprouting today! Your future plants—and the planet—will thank you. 🌎✨