
Propagation
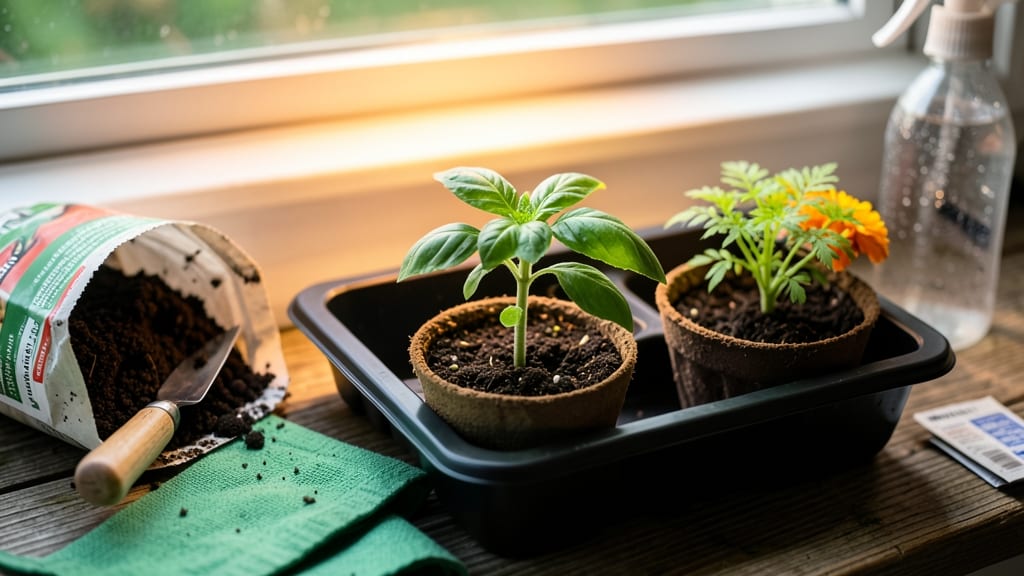
The right potting soil for seed starting can double your germination rate. 🌱 I learned this the hard way after my first batch of seedlings rotted in damp, heavy store-bought mix—until I switched to a sterile, lightweight blend designed just for seeds.
That one change turned my seed-starting failures into reliable, healthy seedlings every time. Most seed-starting mixes combine 50% peat or coco coir for moisture retention with 30% perlite or vermiculite for aeration, plus a bit of compost for nutrients.
The key is avoiding garden soil (it’s too dense) or potting mix for mature plants (it’s too heavy). For delicate seeds like lettuce or petunias, go finer; for hardy veggies like tomatoes or beans, add a touch more grit.
You’ll see tiny roots exploring the mix within 5-7 days, and seedlings that don’t flop over when they sprout. The secret is keeping it fluffy—never pack it down—and adding a sprinkle of seed-starting fertilizer (like 1-2-1) at planting time.
Overwatering is the #1 killer, so use a spray bottle until the seeds germinate. For those who want to DIY, blend 60% peat moss, 30% perlite, and 10% worm castings—sterilize it in the oven at 200°F for 30 minutes to kill pathogens.
Store it in a sealed container until use, and you’ve got a mix that outperforms anything on the shelf.
📚 In This Guide
- What you need
- Instructions
- Tips and common mistakes
- Wrapping up and next steps
What you need
- ● Sterile base soil: 50% peat moss or coco coir (holds moisture, promotes aeration).
- ● Organic matter: 25% compost or worm castings (adds nutrients).
- ● Perlite or vermiculite: 20% (boosts drainage and air circulation).
- ○ Optional nutrient boost: 5% seed-starting fertilizer (low-dose, water-soluble).
- ● Mixing container: Large bucket (5+ gallons) or wheelbarrow.
- ● Measuring tools: Kitchen scale (for precision) or measuring cups.
- ● Sterilization method: Microwave-safe bowl (for small batches) or steam sterilizer (for bulk).
- ● Containers: Seed trays, pots, or egg cartons (with drainage holes!).
- ● Sterilize everything! Heat soil to 180°F (82°C) for 30+ minutes to kill pathogens.
- ● Use sterile gloves to avoid contaminating your mix.
- ● For fussy seeds, add a light layer of sand (5%) to prevent damping-off.
Step-by-Step guide to creating the perfect seed-starting mix
Here's how I blend a sterile, lightweight mix that outpaces store-bought blends for germination.
🌱 Step 1: Select the Base Components
Start with 50% peat moss or coconut coir—this holds moisture while allowing airflow. I prefer coconut coir because it's renewable and doesn't compact like peat. Add 30% perlite or vermiculite for drainage and aeration; perlite adds grit while vermiculite retains moisture better. For the remaining 20%, use compost or worm castings—this provides gentle nutrients without overwhelming tender seedlings.
Measure carefully: too much organic matter can heat up and bake seeds, while too little grit leads to waterlogged roots. I use a kitchen scale for precision, but a simple 50-30-20 volume ratio works with hand measurements if you're comfortable eyeballing it.
🌿 Step 2: Sterilize and Mix Thoroughly
Spread the dry components on a clean tarp or large tray. If using garden soil or compost, bake it in the oven at 200°F for 30 minutes to kill pathogens—this prevents damping-off disease that wipes out seedlings overnight. For peat and perlite, skip sterilization unless you've noticed mold before.
Mix with gloved hands or a clean shovel, breaking up any clumps. The goal is a texture like crumbled cake—light enough for roots to penetrate but stable enough to hold seeds in place. I like to sift the mix through a mesh screen to eliminate large particles that can smother seeds.
💧 Step 3: Hydrate Without Over-Saturating
Add warm water gradually while mixing—about 1 part water to 2 parts dry mix by volume. The ideal moisture level feels like a wrung-out sponge: damp but not dripping. Press a handful gently; water should bead up on the surface without pooling. Too much moisture suffocates seeds, while too little prevents root development.
Let the mix sit for 10-15 minutes before using. This allows any excess water to distribute evenly. I test by grabbing a handful—if water drips when squeezed, it's too wet. If it crumbles completely, add a little more water and remix.
☀️ Step 4: Test and Adjust for Seed Type
Different seeds need different mixes. For tiny seeds like lettuce or petunias, add 10% fine horticultural sand to improve seed-to-soil contact. For large seeds like beans or peas, reduce the perlite to 20%—they need firmer support to anchor properly. I keep separate mixes for delicate seedlings versus heartier varieties.
Fill your seed trays or pots to 1 inch below the rim, leaving room for watering. Tap gently to settle the soil without compacting it. The surface should look even and ready for planting—no bare spots where seeds could dry out or sink too deep.
⏰ Step 5: Maintain Moisture Without Waterlogging
After sowing, cover trays with clear plastic domes or plastic wrap to retain humidity. Place in a warm location (70-75°F)—a seedling heat mat helps if your home runs cooler. Check moisture daily by lifting the tray; condensation on the underside means it's too wet. Mist lightly with a spray bottle if the surface dries.
Once seeds germinate, remove the cover immediately to prevent fungal growth. The mix should stay evenly moist but never soggy—think of a damp sponge, not a dripping washcloth. You'll know you've got it right when seedlings emerge with sturdy stems, not leggy or moldy growth.
Tips & tricks for perfect seed-starting mix
Here's what I learned after years of trial-and-error that'll help you create the ideal environment for your seedlings.
Sterilization Secret: In Step 2, when sterilizing garden soil or compost at 200°F for 30 minutes, place it on a baking sheet first—this prevents moisture buildup that can create steam and ruin your oven. I also recommend using a wire rack inside the oven for even heat circulation. The goal is to kill pathogens without cooking the organic matter, which would destroy its beneficial properties.
Texture is Everything: After mixing your components in Step 2, run the finished mix through a mesh screen to eliminate any large particles that could smother seeds. The ideal texture should resemble crumbled cake—light enough for roots to penetrate but stable enough to support tender seedlings. I find that adding a small handful of horticultural sand (about 5%) helps achieve this perfect balance for most seeds.
Moisture Mastery: When hydrating your mix in Step 3, use warm water (around 75°F) to help prevent temperature shock to seeds. The 10-15 minute resting period after adding water is crucial—this allows any excess moisture to redistribute evenly. I've learned the hard way that skipping this step can lead to uneven moisture distribution, causing some areas to become waterlogged while others stay dry.
Customize for Seed Types: In Step 4, remember that different seeds have different needs. For tiny seeds like lettuce, add that extra 10% fine horticultural sand to improve seed-to-soil contact—this helps prevent seeds from sinking too deep. For large seeds like beans, reduce perlite to 20% to create a firmer growing medium. I keep separate mixes for delicate seedlings versus heartier varieties to ensure optimal growing conditions for each.
Pro Tips for Potting Soil For Seed Starting
- Here's what I learned after years of trial-and-error that'll help you create the ideal environment for your seedlings.
- Sterilization Secret: In Step 2, when sterilizing garden soil or compost at 200°F for 30 minutes, place it on a bakin...
- Texture is Everything: After mixing your components in Step 2, run the finished mix through a mesh screen to eliminat...
Frequently asked questions
Got questions about seed-starting soil? You’re not alone!
Here are answers to the most common queries—so you can grow confidently from seed to sprout.
What’s the difference between potting soil and seed-starting mix?
Potting soil is nutrient-rich and designed for mature plants, while seed-starting mix is sterile, lightweight, and free of weeds/seeds. It promotes faster germination and prevents damping-off disease—critical for tiny, vulnerable seedlings!
Can I use regular garden soil for starting seeds?
Nope! Garden soil is too dense, may contain pathogens, or compact when wet, smothering seeds. Seed-starting mixes are formulated to drain well, hold moisture without suffocating roots, and stay sterile. Skip the shortcut—your seeds will thank you!
How do I sterilize homemade seed-starting mix?
Bake store-bought potting soil in the oven at 200°F (93°C) for 30 minutes to kill fungi/bacteria. Or microwave damp soil in 30-second bursts (stirring between each) until steaming. Let it cool completely before use. Pro tip: Add perlite or vermiculite for extra fluff!
Why are my seeds rotting even with fresh potting soil?
Overwatering or poor drainage are the usual culprits. Ensure pots have drainage holes, and water only when the top inch feels dry. If dampness persists, mix in 10% perlite or sand to improve airflow. Too much moisture = seed suicide!
Are there budget-friendly alternatives to commercial seed-starting mix?
Yes! Blend 50% coconut coir, 30% peat moss, and 20% perlite/vermiculite for a cheap, sterile base. Avoid yard soil or compost—both can harbor pests or diseases. Test small batches first to tweak ratios!
Can I reuse potting soil for multiple seed batches?
Not recommended! Old soil may harbor fungal spores or depleted nutrients. If you must reuse it, sterilize it first (bake or microwave) and replenish with fresh perlite/compost. Fresh mix = happier, healthier seeds!
Wrapping up and next steps
Choosing the right potting soil for seed starting sets the foundation for healthy, thriving seedlings—so don’t underestimate its power! A sterile, well-draining mix with the right nutrients ensures strong roots and vibrant growth from day one.
Now that you’re armed with the knowledge, grab your supplies and get ready to plant those seeds with confidence!
🌱 Next step: Mix your soil, fill those trays, and watch your garden dreams take root! Happy planting! 🌱