
Lawn
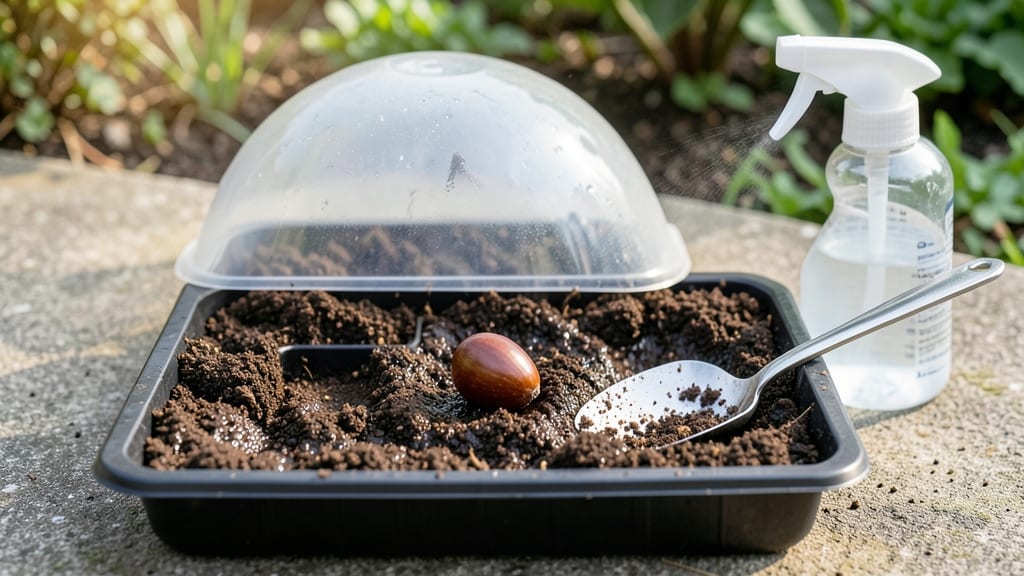
Growing a cherry tree from seed lets you watch nature’s slow magic unfold—though patience is the real fruit here. 🌱 The first step is picking fresh seeds from ripe cherries (not store-bought—they’re treated to prevent sprouting), then cold-stratifying them in the fridge for 6-8 weeks to mimic winter.
This trick breaks dormancy, giving you a 10-30% chance of germination instead of zero.
You’ll need a shallow tray, moist paper towels, and a plastic bag to create a humid greenhouse. Plant the seeds just below the soil surface in well-draining potting mix, and keep them in bright, indirect light.
Germination takes 3-6 weeks, but don’t rush it—cherry trees grow like tortoises, not hares. Saplings may take 5-7 years to bear fruit, but the journey includes stunning spring blooms.
The real payoff comes when your tree finally flowers—though it’ll need full sun, consistent watering, and protection from late frosts. Start with a small pot, then transplant outdoors after the last frost.
If your seeds don’t sprout, try again: viability drops after 6 months, so freshness matters more than anything else.
Common pitfalls? Overwatering (moldy soil kills seeds faster than drought), impatience (cherry trees aren’t speed demons), and assuming all seeds will work (they won’t). But when that first leaf unfurls, you’ll understand why the wait was worth it. Here’s how to keep it thriving once it’s up.
📚 In This Guide
- What you need
- Instructions
- Tips and common mistakes
- Wrapping up and next steps
What you need
- ● Mature cherry fruit: Choose fully ripe cherries (preferably sweet varieties like Bing or Rainier) from a healthy, pesticide-free tree. Aim for 5–10 fruits to maximize seed yield.
- ● Sharp knife or pruning shears: For carefully slicing open cherries to extract seeds. A sterilized blade prevents contamination.
- ● Small bowl or container: A shallow dish (like a ceramic or glass bowl) to collect seeds and pulp. Size: 6–8 inches wide works best.
- ● Water: Room-temperature water for soaking and rinsing seeds. Use 1–2 cups for cleaning.
- ● Fine-mesh strainer or sieve: To separate seeds from pulp. Opt for a mesh size of 1–2mm for precision.
- ● Paper towels or clean cloth: For drying seeds. Use 2–3 sheets per batch.
- ● Small resealable plastic bag or airtight container: For storing seeds. Choose a dark, opaque bag to block light.
- ● Permanent marker: To label your seed storage with the date and cherry variety.
- ● Stratification kit: Includes moistened sand or peat moss for cold stratification (if germinating indoors). A small plastic tray with drainage holes works too.
- ● Humidity dome or plastic wrap: To maintain moisture during stratification. A clear plastic bag with tiny holes suffices.
- ● Garden journal: To track seed sources, germination dates, and notes on tree health.
- ● Gloves: Nitrile or latex gloves if handling large quantities of cherries to keep hands clean.
- ● Seedling trays or pots: If you plan to sprout seeds immediately, use 3–4 inch pots with well-draining soil.
Instructions for harvesting and storing cherry seeds
Here's my foolproof method for saving cherry seeds that guarantees strong germination next spring.
🍒 Step 1: Select and Extract Ripe Cherries
Choose fully ripe cherries that have fallen naturally from the tree—these contain the most viable seeds. Avoid bruised or insect-damaged fruit. I like to work with 4-6 cherries (enough for multiple planting attempts) and process them within 24 hours of harvest to prevent fermentation.
Cut each cherry in half and gently squeeze out the pit. Don't crush the seed inside—this damages the embryo. Place the pits in a bowl of lukewarm water for 24 hours to soften the outer flesh. You'll notice the water turn slightly cloudy as the pulp dissolves.
🌱 Step 2: Clean and Stratify the Seeds
After soaking, remove the pits and scrub off any remaining fruit flesh under running water. Let them air-dry completely on a paper towel for 2-3 days in a warm, dry place. The pits should feel light and hollow when tapped—this indicates proper drying.
Place the dried pits in a plastic bag with slightly damp sand or peat moss (about 1 inch deepg). Seal the bag and store it in your refrigerator's crisper drawer for 8-12 weeks. This cold stratification mimics winter conditions and breaks seed dormancy. Check monthly—they should remain moist but not soggy.
☀️ Step 3: Prepare Containers and Planting Medium
Fill small pots (3-4 inches deep) with a mix of 50% potting soil and 50% perlite. This lightweight blend prevents damping-off while allowing proper drainage. I use 4 pots to account for potential germination failures—cherry seeds often don't all sprout at once.
Moisten the mix until it's damp but not dripping. Press it down lightly to remove air pockets, then create ½-inch deep planting holes spaced 2 inches apart. The goal is firm, even contact between seed and soil to encourage root development.
🌱 Step 4: Plant and Maintain Germination Conditions
Place 1 pit per hole, pressing gently so the pointed end faces down. Cover with ¼ inch of additional soil mix. Water lightly with a spray bottle until the surface looks evenly moist. Place the pots in a warm location (70-75°F) with indirect light.
Keep the soil consistently moist—never soggy—by watering when the top ½ inch feels dry. Germination typically takes 4-8 weeks, but some seeds may take longer. You'll know it's working when you see the first tiny green shoot pushing through the soil.
🌿 Step 5: Transplant and Nurture Young Seedlings
Once seedlings reach 3-4 inches tall with 2-3 true leaves, transplant them to individual 6-inch pots filled with regular potting mix. Handle the seedlings carefully—they have delicate root systems. I use a small spoon to lift them from the germination pots to avoid damaging the stems.
Place the pots in bright, indirect light and gradually introduce them to outdoor conditions over 2 weeks before planting in the ground. Cherry seedlings grow slowly at first, so don't rush them. You'll see stronger growth when they develop their first set of compound leaves—this is when they're ready for permanent planting in spring.
Tips & tricks for perfect cherry seed harvesting
These little-known techniques will help you maximize your cherry seed germination success rate—because not all seeds behave the same way.
Timing is Everything: The 24-hour soak in Step 1 is critical for removing the fruit flesh without damaging the seed. I've found that using lukewarm water (around 90°F) speeds up the pulp dissolution process while keeping the seed safe. The cloudy water you'll see is normal—it's just the fruit sugars and pectin breaking down. Don't be tempted to shorten this time, as incomplete soaking can leave residue that inhibits germination.
Stratification Secrets: In Step 2, the 8-12 week cold stratification period mimics winter conditions perfectly. I recommend checking your pits monthly because the moisture level can change unexpectedly. If the sand or peat moss feels dry to the touch, add a tiny bit of water—just enough to keep it damp, not wet. The goal is to maintain that consistent moisture without creating an anaerobic environment that could cause mold.
Planting Precision: When creating those ½-inch deep planting holes in Step 3, I've learned that using a pencil or small stick to make the holes gives you more control than fingers. Press the pits gently but firmly so they make solid contact with the soil—this encourages strong root development. The 2-inch spacing between holes gives each seedling room to grow without competing immediately, which is especially important for cherry seeds that germinate unevenly.
Germination Patience: The 4-8 week germination window in Step 4 can feel like forever, but remember that cherry seeds are naturally slow to sprout. I keep my pots in a warm spot with indirect light (like a south-facing windowsill covered with sheer curtain) and use a spray bottle to maintain moisture. If you notice condensation on the inside of the pot covers, that's a good sign—it means the humidity is just right for germination.
Pro Tips for Seed Of Cherry
- These little-known techniques will help you maximize your cherry seed germination success rate—because not all seeds ...
- Timing is Everything: The 24-hour soak in Step 1 is critical for removing the fruit flesh without damaging the seed. ...
- Stratification Secrets: In Step 2, the 8-12 week cold stratification period mimics winter conditions perfectly. I rec...
Frequently asked questions
Got questions about harvesting and saving cherry tree seeds?
Here are answers to the most common ones to help you grow next year’s beautiful blooms—without the stress!
When is the best time to collect cherry seeds?
Harvest seeds from fully ripe cherries in late summer or early fall (August–October), when the fruit is soft and juicy. Avoid unripe or overripe fruit—seeds from them may not germinate well. Let the cherries ferment slightly (1–2 days) to break down the flesh before extracting seeds.
Can I use store-bought cherries to grow a tree?
Technically yes, but it’s tricky! Store-bought cherries are often treated to prevent spoilage, and seeds may not germinate. For best results, use seeds from local, organic cherries (preferably from a tree in your area) to ensure hardiness and disease resistance. If you must use store-bought seeds, soak them in water for 24 hours first.
How do I store cherry seeds until planting?
After cleaning, let seeds dry completely (1–2 weeks in a cool, dark place). Store them in a sealed container with a damp paper towel (not wet!) in the fridge (35–40°F) for 2–3 months to simulate winter stratification. Check occasionally to keep them slightly moist—this mimics natural conditions and boosts germination rates.
Why aren’t my cherry seeds sprouting?
Cherry seeds need cold stratification (a winter-like chill) to break dormancy. If you skip this step, germination may take months—or never happen! Try soaking seeds in warm water for 48 hours, then refrigerating them for 6–8 weeks before planting. Patience is key—some varieties take up to 6 months to sprout!
Will a seed-grown cherry tree produce fruit like the parent?
Probably not! Seed-grown trees may take 5–10 years to fruit (if at all) and often have different traits than the parent plant. For reliable fruit production, grafted trees are better. If you just want a tree for shade or blooms, seeds are a fun, low-cost experiment—but expect surprises!
Wrapping up and next steps
Harvesting cherry tree seeds is a simple yet rewarding way to ensure next year’s vibrant blooms—no stress, just patience and care! 🌱 By following the right steps, you’ll turn this year’s fruit into next season’s stunning blossoms.
Whether you’re a seasoned gardener or a beginner, the key is timing, proper storage, and a little love for your future tree.
Ready to grow your own cherry tree? Start by collecting seeds from ripe cherries this fall—then follow the steps above to nurture them into saplings. Your garden (and future picnics!) will thank you. Happy planting! 🌸