
Lawn
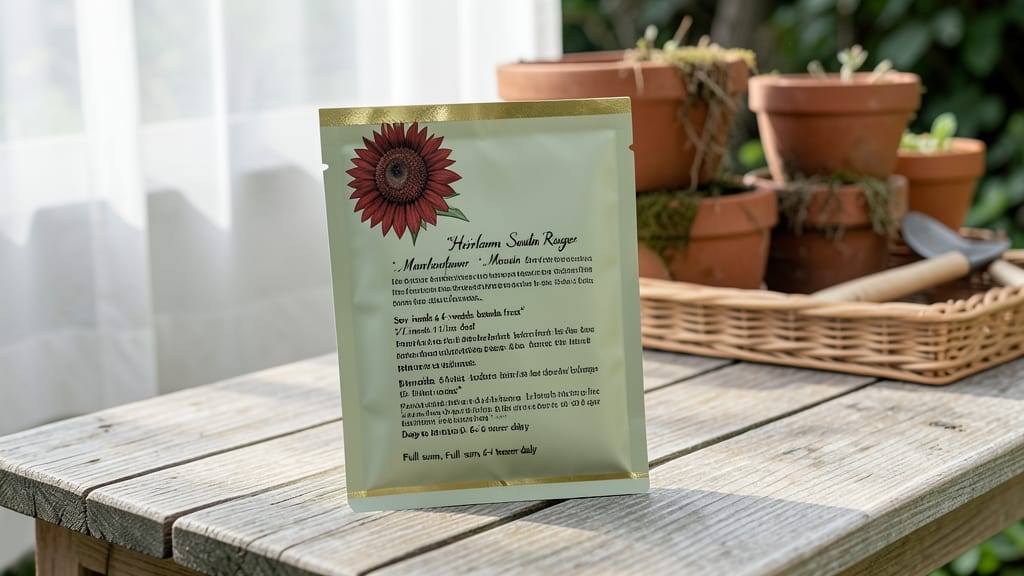
The back of a seed packet holds the secret to whether your spring flowers thrive or flop. 🌱 I’ve learned the hard way that ignoring those tiny details means waiting months for seeds that never sprout—or worse, growing plants that never bloom.
That’s why I now treat every packet like a gardening instruction manual, not just a pretty label.
Look for the big four: sunlight needs (full sun, partial shade, or dappled light), planting depth (usually in inches), spacing (how far apart to sow), and soil type (sandy, loamy, or clay). Don’t skip the germination time—some seeds pop in days, others take weeks.
My impatiens, for example, need moist, well-draining soil and consistent moisture to break dormancy, while my columbines can handle dryer conditions once established.
Symbols like a sun icon or water droplet clarify needs without words. A ❄️ symbol means cold stratification is required—like my bluebells, which need 6-8 weeks in the fridge before planting.
Misreading these can mean wasted seeds or stunted plants. But when you get it right? Reliable blooms that make your garden the envy of the neighborhood.
Pro tip: Photocopy packet info before planting—some details fade with age. And if instructions seem vague? Check the seed company’s website for clarifications. That little packet is your gardening GPS, leading you straight to success.
📚 In This Guide
- What you need
- Instructions
- Tips and common mistakes
- Wrapping up and next steps
What you need
- ● Seed packet – Choose cold-stratification-friendly seeds (check the packet for instructions—look for terms like "stratify" or "chill").
- ● Potting soil or peat moss – 1–2 cups (sterilized to prevent mold; mix with perlite or vermiculite for drainage).
- ● Plastic storage bag or airtight container – A quart-sized ziplock or small Tupperware works perfectly.
- ● Paper towels or coffee filters – 1–2 sheets (to moisten seeds without sogginess).
- ● Spray bottle with water – For gentle hydration (avoid soaking!).
- ● Refrigerator – A standard fridge (35–40°F) mimics winter conditions.
- ● Notebook & pen – Track stratification dates and seed types (trust us, you’ll forget!).
- ● Grow lights or sunny windowsill – For post-stratification sprouting (if not planting outdoors).
- ● Humidity dome or plastic wrap – Keeps moisture high without overwatering.
- ● Seedling trays with drainage holes – For transplanting after stratification.
- ● Thermometer – Ensures your fridge stays in the ideal 35–40°F range.
- ● Labels or masking tape – Mark seeds by type/date to avoid mix-ups.
How to cold stratify seeds for spring blooms
Here's the foolproof method I use every fall to break dormancy and guarantee strong, vibrant spring flowers.
🌱 Step 1: Select and Prepare Your Seeds
Start with fresh seeds from a reputable supplier—older seeds often fail to germinate after stratification. Look for varieties labeled as "difficult to germinate" or "requires cold stratification" on the packet. I like to pre-moisten the seeds slightly by placing them in a damp paper towel for 12 hours before starting the process. This ensures they're ready to absorb moisture once placed in the cold.
If your seeds are in a gel packet, don't remove them—just place the entire packet in the stratification medium. For loose seeds, mix them with a carrier like damp sand or peat moss to prevent clumping. This also helps distribute them evenly in the container.
❄️ Step 2: Choose and Set Up Your Stratification Method
There are three reliable methods: refrigerator, outdoor burial, or seedling heat mat. For beginners, I recommend the refrigerator method because it gives you precise control. Use a ziplock bag with a tiny air hole or a sealed container with a moist paper towel. Place the seeds and medium inside, then seal it tightly to maintain humidity.
If you're using the outdoor method, bury seeds in a shaded, moist area of your garden in late fall. Mark the spot clearly so you don't accidentally dig them up. For the heat mat method, place seeds on a damp paper towel over the mat set to 35-40°F. This mimics natural winter conditions without risking freezing.
⏰ Step 3: Cold Treat for the Correct Duration
Most seeds need 60-90 days of cold treatment, but check the packet for specific requirements—some perennials like peonies need 120 days. Place your sealed container or buried seeds in the refrigerator's crisp drawer (usually 35-40°F). If using the outdoor method, leave them until mid-winter before bringing them indoors.
Don't peek inside the container during stratification—temperature fluctuations can break dormancy prematurely. If you're using the heat mat, monitor it daily to ensure it stays within the 35-40°F range. Once the cold period ends, remove the seeds and let them sit at room temperature (68-72°F) for 24 hours to acclimate.
🌿 Step 4: Sow Stratified Seeds for Germination
After stratification, sow seeds in well-draining potting mix at the depth recommended on the packet (usually 2-3 times the seed's diameter). Water gently but thoroughly, ensuring the soil stays consistently moist—not soggy. Place the container in a warm, bright spot (like a sunny windowsill) and cover it with a clear plastic dome or plastic wrap to retain humidity.
Germination timing varies by species, but you'll typically see sprouts within 7-21 days. Once they emerge, remove the dome immediately to prevent fungal growth. Keep the soil moist but never waterlogged—overwatering at this stage is the fastest way to kill delicate seedlings.
☀️ Step 5: Transition to Outdoor Planting
When seedlings develop 2-3 true leaves (not just the initial cotyledons), they're ready for transplanting. Harden them off by placing them outside in a shaded, sheltered spot for 1-2 hours the first day, gradually increasing exposure over 7-10 days. This prepares them for the garden without shock.
Plant in well-draining soil with full sun exposure (6+ hours daily) and water deeply at the base. Mulch around the base to retain moisture and protect roots. With cold stratification, you'll see stronger, more vigorous blooms next spring—worth the extra effort!
Tips & tricks for perfect seed stratification
Real talk: Cold stratification isn't rocket science, but these little details make all the difference between a thriving spring garden and a sad pile of failed seeds.
Timing Secret: That 12-hour pre-moistening in Step 1 isn't just optional—it primes seeds for better moisture absorption during stratification. I learned this the hard way after watching seeds clump together and fail to germinate. Use a spray bottle to mist them evenly rather than soaking, which can cause mold. For seeds in gel packets, gently pat them dry after pre-moistening to prevent excess moisture buildup.
Temperature Matters: The 35-40°F range in Step 2 is non-negotiable for mimicking natural winter conditions. If you're using the refrigerator method, place your container on the middle shelf—not the crisper drawer—unless it's specifically labeled for that temperature range. For outdoor burial, choose a spot that naturally stays cool, like the north side of a shed or under dense shrubs. Pro tip: Use a small thermometer to verify your chosen spot stays within the ideal range.
Common Mistake Fix: If your seeds aren't germinating after the full 60-90 days, don't assume they've failed. First, check if you accidentally peeked inside the container—even a quick glance can expose seeds to warm air and break dormancy prematurely. For the heat mat method, ensure it's not cycling above 40°F—some models fluctuate when they sense temperature changes. If you're still having issues, try repeating the process with fresh seeds from a different supplier.
Make-Ahead Strategy: You can start stratification up to 3 months in advance, but don't begin earlier than 8 weeks before your last frost date. This gives seeds just enough cold treatment without over-stratifying, which can reduce germination rates. Store your sealed containers in a labeled box in the back of your fridge to avoid accidental defrosting during power outages. I like to write the seed variety and start date directly on the container with a permanent marker.
Pro Tips for Back Of A Seed Packet
- Real talk: Cold stratification isn't rocket science, but these little details make all the difference between a thriv...
- Timing Secret: That 12-hour pre-moistening in Step 1 isn't just optional—it primes seeds for better moisture absorpti...
- Temperature Matters: The 35-40°F range in Step 2 is non-negotiable for mimicking natural winter conditions. If you're...
Frequently asked questions
Got questions about cold stratification?
You’re not alone! Here are answers to the most common queries about using the back of a seed packet to prep seeds for a stunning spring garden.
What does "cold stratify" even mean?
Cold stratification mimics winter conditions by exposing seeds to cold, moist environments (usually 32–40°F or 0–4°C) for weeks or months. This breaks dormancy, helping seeds germinate faster and more reliably when spring arrives. Think of it as a "wake-up call" for seeds that need a chill to bloom!
How long should I cold stratify seeds?
Most seed packets list stratification times—typically 4–12 weeks. For example, trillium or peony seeds may need 3–4 months, while lupine or foxglove often require just 6–8 weeks. When in doubt, err on the longer side for tough seeds (like honey locust), but avoid over-stratifying—it can reduce viability.
Do I need to keep the seeds moist during stratification?
Yes! Moisture is key—seeds should stay damp but not soggy. Use a mix of peat moss or coconut coir (60% moisture) in a sealed bag or container. Check weekly: if the mix feels dry, lightly mist it. Overwatering can cause mold, so balance is critical. A paper towel method (folded around seeds in a bag) works too!
Can I skip stratification if I plant seeds outdoors in fall?
Sometimes! Many wildflowers, grasses, and perennials (like black-eyed Susans or coneflowers) can handle natural winter stratification if sown in late fall (before hard frosts). However, delicate or tropical seeds (e.g., orchids) must be cold-treated indoors. Always check the packet—it’s your best guide!
What if my fridge isn’t cold enough for stratification?
No worries! Most home fridges (35–40°F or 2–4°C) work fine for short-term stratification (up to 8 weeks). For longer periods (3+ months), try:
- A garage or unheated basement (consistent temps, no freezer risks).
- A seed fridge or cooling mat (available at garden centers).
- Buried seeds outdoors in snow or mulch (if your climate allows).
My seeds sprouted during stratification—now what?
If seeds germinate before their scheduled time, act fast! Plant them immediately in seed-starting mix (keep them warm, ~65–75°F or 18–24°C, with bright light). Avoid transplant shock by using small pots or peat pellets. If they’re too delicate to handle, store them in a paper towel with moisture until you’re ready to plant.
Wrapping up and next steps
The back of a seed packet holds more than just planting instructions—it’s your secret weapon for unlocking vibrant blooms next spring! 🌱 By mastering cold stratification, you’re not just following a method; you’re giving your seeds the best possible start.
Whether you’re a seasoned gardener or just beginning, this technique ensures stronger, healthier plants with minimal effort.
Ready to transform your garden? Start small—pick one packet, try the process, and watch your confidence (and blooms!) grow. Next, share your success with fellow gardeners or experiment with other seeds. Happy planting! 🌸