
Propagation
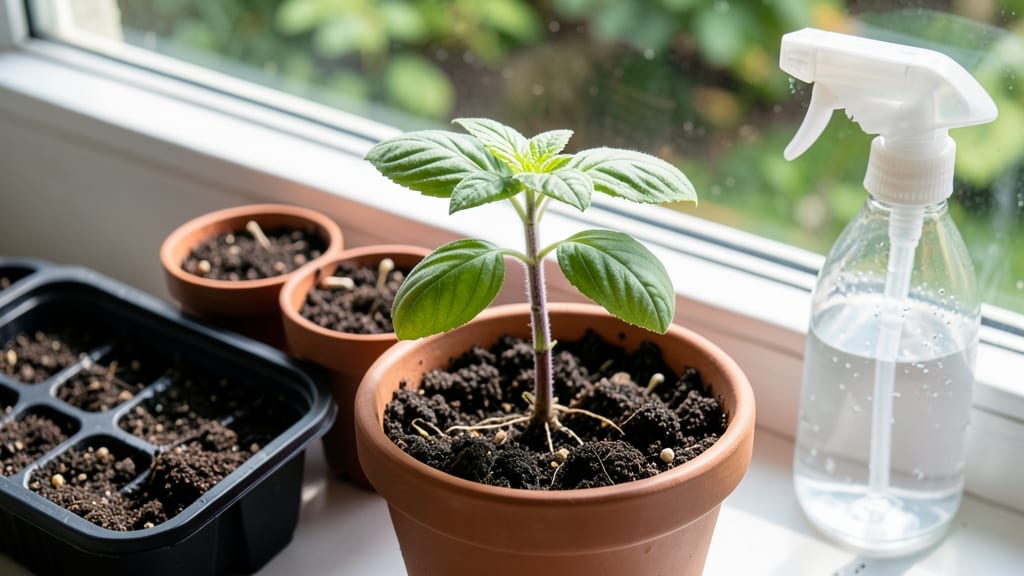
Growing basil from seed indoors means fresh pesto in 4-6 weeks—no store-bought plants, no waiting for spring. 🌱 I've started dozens of batches, and the secret isn't complicated: it's about light, warmth, and patience. Skip the fancy setups; a sunny window and a few simple supplies do the trick.
You'll need just three things: seeds (or a single basil plant to harvest seeds from), a small container with drainage, and a grow light or bright window. No fancy soil—regular potting mix works.
The real magic happens when you keep the soil moist but not soggy and maintain temperatures above 60°F. Germination happens in 7-14 days, and that's when the fun begins.
By week 4, you'll be pinching leaves for cooking, and the plants will keep producing all season. The smell of fresh basil in your kitchen is unmatched, and you'll never buy wilted store herbs again. Plus, you can grow year-round—no more waiting for summer.
This method works for any indoor space, from kitchens to sunrooms. Even if you've killed plants before, basil is one of the most forgiving herbs to grow. Let's get those seeds sprouting!
📚 In This Guide
- What you need
- Instructions
- Tips and common mistakes
- Wrapping up and next steps
What you need
- ● Basil seeds: 5–10 seeds (choose sweet basil or Thai basil for best results).
- ● Seed-starting trays or small pots: 2–4 inches deep (biodegradable or plastic).
- ● Seed-starting mix: Lightweight, sterile potting soil (avoid garden soil—it’s too dense!).
- ● Grow lights or a sunny windowsill: 6–8 hours of light daily (south-facing windows work best).
- ● Spray bottle: For gentle watering (avoid drowning those tiny seeds!).
- ● Plastic wrap or humidity dome: Keeps seeds cozy while germinating.
- ○ Heating mat (optional): Speeds up germination (70–75°F ideal).
- ● Fertilizer (balanced, water-soluble): Dilute to half-strength once seedlings sprout.
- ○ Small fan (optional): Encourages strong stems by gently stressing seedlings.
- ● Labels & markers: Track seed varieties if growing multiple types.
Step-by-Step instructions for growing basil from seed indoors
Here's how to get lush basil plants in just 3-4 weeks—no fancy gear required.
🌱 Step 1: Prepare Seed Starting Mix and Containers
Fill 4 small pots (2-3 inches deep) with a light, sterile seed-starting mix. I like to add a handful of perlite to the mix for extra drainage—this prevents soggy soil that can rot seeds. Moisten the mix until it feels like a damp sponge, not dripping wet. Tap each pot gently to settle the soil without compacting it.
Basil seeds are tiny, so I use a toothpick to create tiny holes about ¼ inch deep in the soil. This ensures consistent planting depth—too deep and they won't sprout. Place 2-3 seeds per pot since basil germinates unevenly. Cover them with a thin layer of soil, just enough to hide the seeds completely.
💧 Step 2: Create a Humid Warmth Dome
Cover the pots with clear plastic wrap or a humidity dome to trap warmth and moisture. Basil seeds need 70-80°F soil temperatures to germinate quickly. Place the covered pots on a seedling heat mat or in a warm spot like on top of your fridge—just don't let it get above 85°F or the seeds may overheat.
Check daily for condensation on the plastic. If it's foggy inside, you're golden—this means perfect humidity. Mist lightly if needed, but don't remove the cover until you see first sprouts in 5-10 days. I know it seems counterintuitive, but resist the urge to peek too often—temperature fluctuations delay germination.
☀️ Step 3: Move to Bright Light Immediately
The moment you see those first tiny leaves (called cotyledons), remove the plastic cover and place the pots under grow lights or a south-facing window. Basil seedlings need 12-14 hours of light daily to grow strong. If using a window, rotate pots daily so they don't lean toward the light—you'll see them stretch if they're reaching.
Keep soil lightly moist but never soggy. Water from the bottom by placing pots in ½ inch of water for 10 minutes, then drain completely. This prevents fungal diseases that love damp foliage. You'll know moisture is right when the soil surface looks slightly damp but not glistening.
🌿 Step 4: Thin and Fertilize for Bushy Growth
When seedlings have 2 sets of true leaves (not the initial cotyledons), thin to the strongest plant per pot. Snip the weaker stems at soil level with clean scissors—don't pull them, which can disturb roots. This gives your basil more space to grow without competition.
Start feeding with half-strength liquid fertilizer every 2 weeks. I use fish emulsion because it's gentle but packed with nutrients. Pinch off the top set of leaves when plants are 4-6 inches tall—this encourages bushier growth instead of tall, leggy stems. You'll notice new leaves forming at the base within a week.
⏰ Step 5: Harvest and Encourage Continuous Growth
Harvest the top leaves when plants reach 6-8 inches tall by cutting just above a leaf pair. This signals the plant to grow more leaves, not flowers. Basil grows fast—you'll have enough for cooking in 3-4 weeks from seed. Keep harvesting regularly to prevent flowering, which makes leaves bitter.
Here's the thing—basil loves warmth. If your home dips below 60°F at night, move plants to a sunny windowsill or under grow lights. You'll see new growth slow down if it gets chilly. With proper light and care, your indoor basil will keep producing fresh leaves for months.
Tips & tricks for growing fresh basil indoors
These simple tricks will help you grow basil faster and keep it thriving for months—no green thumb required.
Soil Prep Secret: The key to preventing seed rot in Step 1 is that sterile seed-starting mix. If you don't have it, mix regular potting soil with 20% perlite or vermiculite by volume. This improves drainage without changing the planting depth of those tiny ¼-inch holes we're making. I've found that using a clean, empty yogurt container as a temporary pot works perfectly for the first week—just poke drainage holes in the bottom first.
Germination Timing: Those 5-10 days for sprouts to appear can feel like forever, but here's what I've learned: Basil seeds need consistent warmth between 70-80°F to germinate. If your kitchen stays around 68°F, you might see sprouts in 10-12 days instead of 5-10. The moment you see those first green shoots, remove the plastic cover immediately—this prevents mold growth from trapped moisture. I like to place a small fan on low setting near the pots after removing covers to help seedlings develop stronger stems.
Lighting Hacks: For Step 3, if you don't have grow lights, position your pots within 6 inches of a south-facing window. Rotate them daily so all sides get equal light exposure. You'll know they're getting enough light when the seedlings grow upright rather than stretching toward the light. If your windows don't get enough sunlight, a simple LED desk lamp (5000K color temperature) placed 4-6 inches above the plants for 12-14 hours daily works surprisingly well. Just make sure to turn it off at night—plants need darkness to rest.
Fertilizer Frequency: When you start feeding with half-strength liquid fertilizer every 2 weeks in Step 4, I've found that fish emulsion works best when mixed to a very pale yellow color—about 1 teaspoon per quart of water. Over-fertilizing can burn tender basil roots, so always water the soil first to help dilute the fertilizer. If you notice yellowing leaves after fertilizing, flush the soil with plain water to remove excess salts. The pinch-off technique at 4-6 inches tall is crucial—it redirects the plant's energy to grow bushier instead of flowering.
Pro Tips for Basil From Seed Indoors
- These simple tricks will help you grow basil faster and keep it thriving for months—no green thumb required.
- Soil Prep Secret: The key to preventing seed rot in Step 1 is that sterile seed-starting mix. If you don't have it, m...
- Germination Timing: Those 5-10 days for sprouts to appear can feel like forever, but here's what I've learned: Basil ...
Frequently asked questions
Got questions about growing basil from seed indoors?
You’re not alone! Here are some of the most common concerns—plus quick, no-fuss answers to keep your green thumb thriving.
How long does it take for basil seeds to germinate indoors?
Basil seeds typically sprout in 7–14 days under ideal conditions (warmth, moisture, and indirect light). Keep the soil consistently damp and maintain a cozy environment (around 70–75°F) to speed things up. Patience is key—don’t overwater or disturb the soil while waiting!
Can I grow basil indoors without sunlight?
Basil thrives under grow lights (12–16 hours/day) or near a south-facing window. If natural light is weak, supplement with a full-spectrum LED bulb to prevent leggy, weak plants. Just avoid cold drafts—basil hates the chill!
Why is my indoor basil turning yellow or wilted?
Yellow leaves often mean overwatering (let the top inch of soil dry out between waterings) or nutrient deficiency (use a balanced liquid fertilizer every 4–6 weeks). Wilting? Check for root rot (too much moisture) or underwatering. Adjust care and give your plant a breath of fresh air!
Is it better to start with seeds or buy a basil plant?
Seeds are cheaper and more rewarding—you’ll enjoy the full growing journey! However, if you’re short on time, a healthy nursery starter (like Genovese or Thai basil) can save weeks. Just repot it into a larger container with fresh soil for better growth.
How do I keep my indoor basil from flowering too soon?
Flowering = bitter basil! Pinch off buds and flowers as soon as they appear to encourage leafy growth. Prune regularly (trim the top set of leaves when the plant hits 6 inches) to keep it bushy. Bonus: More leaves = more harvests for your pesto!
Wrapping up and next steps
Growing basil from seed indoors is a rewarding journey that brings fresh, fragrant herbs to your kitchen with minimal effort! 🌱 Whether you're a beginner or a seasoned plant parent, the key is patience, consistency, and a little love.
Now that you’ve mastered the basics, why not expand your indoor herb garden? Try your hand at other easy-to-grow seeds like mint, parsley, or cilantro—your future meals (and Instagram-worthy plates) will thank you!
Pro tip: Snap a photo of your thriving basil and share it with fellow plant enthusiasts for extra motivation! 📸✨