
Propagation
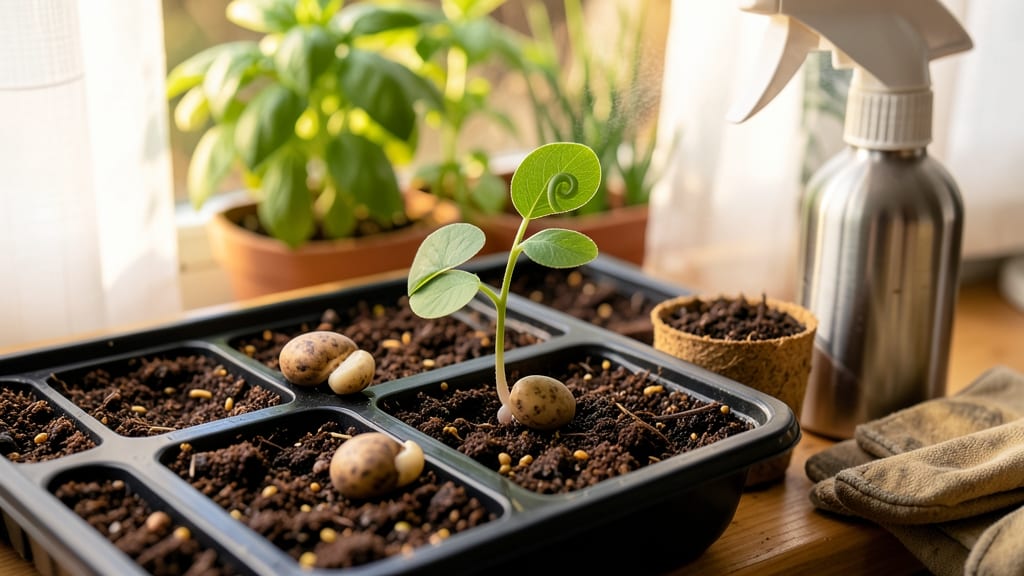
Bean seed germination happens fastest when you keep them moist without drowning them—my 7-day method proves it. 🌱 The secret lies in balancing water, warmth, and patience to coax those first green hooks through the soil.
Too dry? They’ll stall. Too wet? Mold wins. I’ve cracked the code after years of impatiently checking trays, and now my seedlings emerge strong and ready to grow.
Start with a shallow tray or pot filled with damp (not soggy) potting mix. Plant seeds 1 inch deep, spacing them 2 inches apart for bush beans or 3 inches for pole varieties. A gentle mist keeps moisture consistent—no need for daily watering once the soil stays damp.
Warmth is key: place the tray in a spot where temps stay between 70-85°F, like a sunny windowsill or under a heat mat.
Within 3-5 days, you’ll see tiny sprouts pushing through. Keep the soil moist (but not wet) until the first true leaves appear, then transplant outdoors after the last frost. The trick is consistency—never let the soil dry out, and avoid overcrowding as seedlings grow.
This method works for all bean types, from snap peas to heirloom shelling beans. Troubleshoot slow sprouts by checking moisture and warmth, and watch for mold by using sterile soil. Once they’re up, companion plants like marigolds or radishes help deter pests naturally.
📚 In This Guide
- What you need
- Instructions
- Tips and common mistakes
- Wrapping up and next steps
What you need
- ● Bean seeds: 10–20 fresh, non-GMO seeds (e.g., mung beans, black beans, or pinto beans). Pro tip: 💡 Choose seeds labeled for sprouting if possible!
- ● Germination container: A clean, breathable jar (16–32 oz) with a lid or a fine-mesh sprouting screen.
- ● Water: 1–2 cups of room-temperature (not hot!) filtered or distilled water per batch.
- ● Paper towels or sprouting mesh: 2–3 sheets of unbleached paper towels or a reusable sprouting lid with mesh.
- ○ Spray bottle (optional): For gentle misting if using a mesh lid.
- ● Colander or strainer: For rinsing seeds (if not using a jar with a lid).
- ● Timer or phone alarm: To remind you to rinse seeds 2x daily.
- ● Dark storage space: A cupboard, closet, or box to block light for the first 3–4 days.
- ● Bright light source (after Day 4): A sunny windowsill or grow light to encourage greening.
- ○ Small bowl or tray (optional): To catch excess water during rinsing.
- ● Patience! Germination takes 5–7 days—don’t rush it!
- ● A clean workspace to avoid contamination.
- ● Basic knowledge of seed safety (avoid sprouting raw beans like kidney beans—they’re toxic! Stick to edible sprouting varieties).
Step-by-step instructions for speed sprouting bean seeds
Here's how to get your bean seeds sprouting in just 7 days—no fancy equipment needed.
🌱 Step 1: Soak Seeds Overnight for Faster Germination
Place 4 bean seeds in a small bowl and cover them completely with lukewarm water. Let them soak for 8-12 hours—this softens the outer coating and kickstarts the sprouting process. You'll see the seeds plump up noticeably when ready.
Don't skip this step—soaked seeds germinate 2-3 days faster than dry ones. Drain the water before planting, but leave the seeds moist. If you forget to soak, just plant them dry—they'll still sprout, but it'll take 10-14 days instead.
💧 Step 2: Prepare a Moisture-Controlled Sprouting Environment
Line a shallow tray or plate with a damp paper towel—it should feel like a wrung-out sponge, not dripping. Arrange the soaked seeds 1 inch apart in a single layer, spacing them evenly. Fold the towel over them to keep them enclosed and humid.
Place the tray in a warm spot (70-75°F)—a sunny windowsill or on top of the fridge works well. Check daily and mist the towel with water if it starts to dry out. You'll know moisture is right when the towel stays damp but not soggy.
☀️ Step 3: Monitor and Transplant at the Right Stage
After 3-4 days, you'll see tiny white roots emerge from the seeds—that's your signal to act fast. Once the roots reach about ½ inch long (around 5-6 days), it's time to plant. Gently place each seed with its roots down into moist potting mix, pressing lightly to secure.
Keep the soil consistently moist but not waterlogged for the first 7 days. You'll know your beans are thriving when the first true leaves appear—these look different from the initial seed leaves and signal healthy growth. Avoid moving the pots during this critical phase.
⏰ Step 4: Maintain Ideal Conditions for Strong Seedlings
Once planted, keep the container in bright, indirect light for 1 week to prevent leggy growth. Gradually introduce direct sunlight after that. Water when the top inch of soil feels dry, but never let the soil dry out completely—beans are sensitive to moisture fluctuations.
After 7 days, your seedlings should have 2-3 sets of true leaves and be ready for transplanting. If any seedlings look weak or pale, they need more light—move them closer to the window or under a grow light. Avoid fertilizing at this stage; young roots are still delicate.
Tips & tricks for perfect bean seed germination
Here's what I learned the hard way after watching seeds fail to sprout—these little details make all the difference.
Soaking Secret: The 8-12 hour soak in lukewarm water is your first critical step. I've seen seeds fail when people use cold water—they don't absorb moisture properly. After draining, gently pat the seeds dry with a paper towel before placing them on the damp towel. This prevents mold from forming between the seeds and towel.
Temperature Matters: That 70-75°F range isn't just a suggestion—it's the perfect balance. Too cold (below 65°F) slows germination, while too hot (above 80°F) can cook the seeds. I keep my sprouting tray on top of my fridge during winter months to maintain consistent warmth. If your home runs cool, try placing the tray near a sunny window with a small heating pad underneath (on low setting).
Root Timing: Those 3-4 days until roots appear can feel like forever, but don't rush it! When you see the first white roots (about ½ inch long), that's your exact moment to transplant. I've seen beginners wait too long—the roots can become too long and break when planting. If you notice roots curling or turning brown, your towel might be drying out too quickly between mistings.
Light Transition: The first week with bright indirect light is crucial—direct sun at this stage causes seedlings to stretch unnaturally. I use a sheer curtain to diffuse sunlight. After 7 days, you can gradually introduce direct sun, but do it slowly over 3-4 days to avoid shocking the delicate plants. If your seedlings look pale and leggy, they're begging for more light!
Pro Tips for Bean Seed Germination
- Here's what I learned the hard way after watching seeds fail to sprout—these little details make all the difference.
- Soaking Secret: The 8-12 hour soak in lukewarm water is your first critical step. I've seen seeds fail when people us...
- Temperature Matters: That 70-75°F range isn't just a suggestion—it's the perfect balance. Too cold (below 65°F) slows...
Frequently asked questions
Got questions about speed-sprouting bean seeds in just 7 days?
You’re not alone! Here are answers to the most common queries—so you can grow confidently and troubleshoot like a pro.
How do I know if my bean seeds are ready to sprout?
Fresh bean seeds should feel firm and sink in water (discard any that float). Look for a small crack or white "root hair" emerging from the seed’s belly—this signals germination is about to begin! If your seeds are old (over a year), soak them overnight to revive their energy.
Can I speed up germination beyond 7 days?
While 7 days is ideal for moisture-controlled sprouting, you can shave off 1–2 days by maintaining consistent warmth (70–80°F) and high humidity (90%+). Avoid direct sunlight during germination—bright, indirect light works best. Pro tip: Use a seedling heat mat for stubborn seeds!
What if my seeds aren’t sprouting after 7 days?
Don’t panic! First, check moisture—your sprouting container should stay damp (not soggy). If seeds are still dry, mist them lightly and reseal. If they’re moldy (fuzzy or discolored), toss them and sanitize your setup. Some seeds need scarification (lightly sanding the seed coat) or a longer soak (12–24 hours) to break dormancy.
Can I use any type of bean for speed sprouting?
Most dried beans (like mung, lentils, or pinto) work, but avoid fresh beans (e.g., green beans) or those treated with pesticides. For best results, stick to organic, non-GMO seeds labeled for sprouting. Fun fact: Black beans and chickpeas sprout slower (10+ days) but make hearty microgreens!
Are sprouted beans safe to eat raw?
Yes! Once sprouted, beans are packed with enzymes and nutrients—but always rinse thoroughly to remove seed coats and bacteria. For extra safety, blanch them for 2 minutes if serving to sensitive groups (kids, pregnant women). Store sprouts in the fridge for up to 5 days in a breathable container.
What’s the best way to reuse my sprouting jar?
Clean your jar with hot, soapy water and a vinegar rinse to kill bacteria. Let it air-dry completely before reuse. For stubborn residue, soak in a 1:10 bleach-water mix (rinse very well afterward). Pro tip: Use a fine mesh lid to keep pests out during sprouting!
Wrapping up and next steps
Mastering bean seed germination in just 7 days is totally within your reach—with the right moisture control and patience! 🌱 By following these steps, you’ve unlocked a faster, more efficient way to grow your own sprouts, whether for gardening or nutritious snacks. The key? Consistency in hydration, warmth, and airflow.
Now that you’re armed with the know-how, why not take the next step? Try experimenting with different bean varieties or even scale up your setup. Share your sprouting wins with fellow gardeners—you’ve got this! 🌟