
Lawn
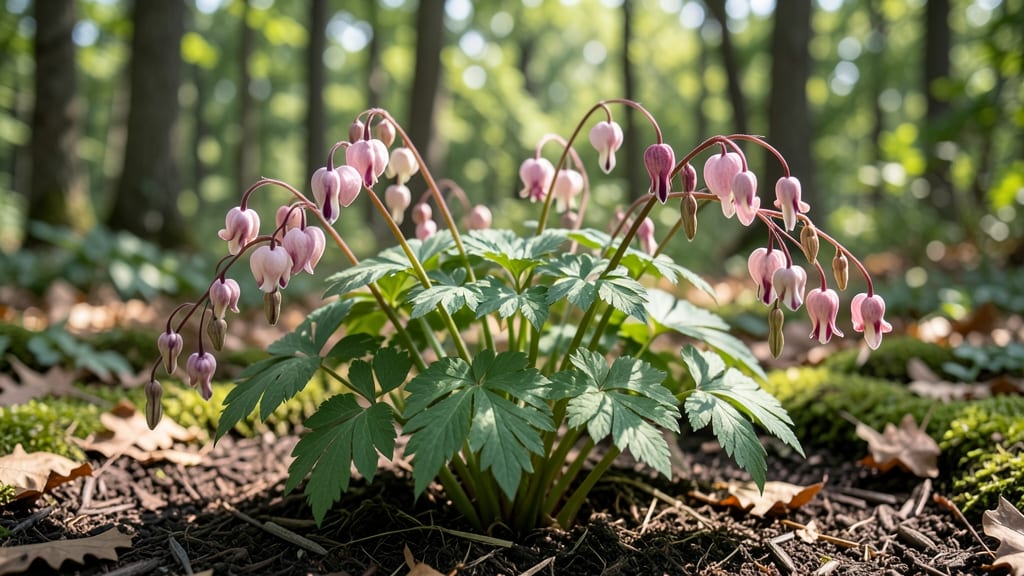
Harvesting bleeding heart seed pods turns last year's spent blooms into next season's heart-shaped wonders. 💚 I've learned that patience pays off—waiting for the pods to turn brown and crispy before collecting ensures the best germination rates, and the process is simpler than it looks.
The key is timing: gather pods in late summer or early fall when they're dry but haven't split open. Store them in a paper bag in a cool, dry place for 6-8 weeks to complete dormancy—this mimics winter's natural chilling period and boosts success.
When you're ready to plant, soak the seeds overnight to break dormancy, then scatter them on the soil surface. Keep them moist but not soggy, and you'll see tiny seedlings emerge in 3-4 weeks with the right care.
This method works even if you're new to seed starting—just avoid overwatering and give them bright, indirect light. Before you know it, you'll have a whole new generation of these graceful perennials ready to thrive in your garden.
📚 In This Guide
- What you need
- Instructions
- Tips and common mistakes
- Wrapping up and next steps
What you need
- ● Pruning shears or sharp scissors – For clean cuts without damaging the pods. (1 pair, sterilized)
- ● Paper grocery bags or breathable fabric sacks – To collect pods without crushing them. (2–3 bags, 12x15 inches each)
- ● Plastic or glass storage containers with lids – For long-term seed viability. (1–2 containers, airtight)
- ○ Silica gel packets or uncooked rice – Optional but helpful for drying pods. (Small bag or 1 cup)
- ● Permanent marker or labels – To tag pods with harvest dates. (1 marker)
- ○ Gloves (optional) – If handling thorny or prickly stems. (1 pair, garden-grade)
- ● Mature bleeding heart plants – Ensure pods are fully dried and brown before harvesting.
- ● Dry, well-ventilated space – Ideal for drying pods (e.g., garage, shed, or indoor drying rack).
- ● Patience (2–4 weeks) – Pods need time to dry completely before storage.
How to harvest bleeding heart seed pods for next year's plants
Here's the simple method I use to collect seed pods without stressing the plant.
🌿 Step 1: Identify and Locate Mature Seed Pods
Bleeding heart seed pods form after the plant's heart-shaped blooms fade into seed heads. Look for pods that have turned from green to a papery brown color—this signals they're fully mature and ready for harvest. I check my plants weekly starting in late summer, as pods ripen at different times depending on your climate.
Gently squeeze a pod between your fingers. If it feels dry and crumbly inside, it's ready. If it's still firm or green, wait another week. Harvesting too early means seeds won't be viable, while waiting too long risks the pods splitting open and scattering seeds before you can collect them.
✂️ Step 2: Harvest Pods Without Damaging the Plant
Use clean, sharp pruning shears to snip the entire seed pod stem, leaving about 2 inches of growth on the plant. Cutting too close to the base can stress the plant, while leaving too much stem makes the pods harder to store later. I collect pods on a dry day when humidity is low—this prevents mold from forming on the seeds.
Place the harvested pods in a paper bag (not plastic) and label them with the variety name and harvest date. The paper allows moisture to escape while still protecting the pods from dust and pests. Store the bag in a cool, dry place—like a garage or basement—until you're ready to process the seeds.
🪴 Step 3: Extract and Clean the Seeds
When you're ready to process the seeds, gently open each dried pod by pinching it between your fingers. The seeds will spill out easily once the pod is fully mature. I spread the seeds on a clean, dry towel or paper plate to air-dry for another week. This extra drying step ensures the seeds won't mold during storage.
Remove any debris or empty seed casings by hand, then transfer the clean seeds to a small envelope or airtight container. I like to store them in a sealed plastic bag with a silica gel packet to absorb any remaining moisture. Keep the container in a cool, dark place—like a refrigerator—where the seeds will stay viable for up to two years.
🌱 Step 4: Plant the Seeds for Next Season
Sow bleeding heart seeds in early spring, just as the soil begins to warm. Scatter them lightly on the surface of moist seed-starting mix—don't bury them, as they need light to germinate. Press them gently into the soil with your fingers, then mist the surface with water until evenly damp.
Place the container in a bright spot with indirect light, keeping the soil consistently moist but not soggy. Germination can take 3-6 weeks, so be patient. Once seedlings emerge, provide them with gentle care, and you'll have new bleeding heart plants ready to brighten your garden next year.
Tips & tricks for perfect bleeding heart seed pod harvesting
Took me a while to figure these out, so here's what nobody tells you about collecting bleeding heart seeds without the stress.
Timing is Everything: In Step 1, when you're checking for that papery brown color, also look for the pods to be slightly puffy—this indicates they've dried enough inside. I learned this the hard way after collecting pods that were brown but still firm, only to find they didn't contain viable seeds. The dryness test with your fingers is your best friend here.
Harvesting Technique: For Step 2, I've found that using a small pair of scissors instead of pruning shears gives me more control when cutting those delicate stems. The key is to make clean cuts while leaving that 2-inch stem—this prevents the plant from looking like it's been attacked by a lawnmower. Also, harvest in the morning when dew has dried but before the sun gets too intense.
Seed Processing: When you're extracting seeds in Step 3, I recommend placing a fine mesh screen or paper towel over a bowl to catch the seeds while letting debris fall through. This saves time during the cleaning process. And that extra week of air-drying? It's worth it—those seeds will stay viable much longer in storage.
Storage Wisdom: Don't just store seeds in any old container. I've had the best luck with small, resealable plastic bags that have those little silica gel packets included. They keep moisture out and prevent mold. Label each bag with the year and variety—trust me, you'll forget in a couple years when you're ready to plant!
Pro Tips for Bleeding Heart Seed Pods
- Took me a while to figure these out, so here's what nobody tells you about collecting bleeding heart seeds without the stress.
- Timing is Everything: In Step 1, when you're checking for that papery brown color, also look for the pods to be slightly puffy—this indicates they've dried enough inside.
- Harvesting Technique: For Step 2, I've found that using a small pair of scissors instead of pruning shears gives me more control when cutting those delicate stems.
Frequently asked questions
Got questions about harvesting and storing bleeding heart seed pods? You’re not alone—these delicate pods can be tricky! Here are some of the most common concerns and straightforward answers to keep your seeds viable and stress-free.
What’s the best time to harvest bleeding heart seed pods?
Harvest pods when they’re dry and papery but before they split open—usually late summer to early fall. Overripe pods release seeds naturally, so check them weekly. Morning harvests work best when humidity is lower, reducing mold risk.
How do I know if the seeds inside are still good?
Fresh seeds should be plump and firm with a slight sheen. If they’re shriveled, discolored, or crumbly, they’ve lost viability. For testing, soak a few in water—good seeds sink; bad ones float. Store seeds in a cool, dry place for up to 2 years.
Can I harvest pods in cold or rainy weather?
Avoid harvesting in wet or freezing conditions—moisture speeds up mold and rot. If rain’s in the forecast, collect pods early and dry them indoors on paper towels for 2–3 days. A fan on low can speed up the process safely.
What if my bleeding heart plant isn’t producing seed pods?
Pods require cross-pollination—plant multiple varieties nearby or hand-pollinate with a soft brush. Ensure your plant gets full sun and well-draining soil. Over-fertilizing (especially nitrogen-heavy) can reduce flowering. Patience helps—some varieties take 2+ years to mature!
How should I store harvested seed pods long-term?
Place pods in a paper envelope or breathable bag (not plastic!) and store in a cool, dark spot (like a fridge). Label with the harvest date. For extra protection, add a desiccant packet to absorb moisture. Check periodically for pests.
Are there alternatives if I can’t harvest pods myself?
Yes! Buy seeds from reputable nurseries or join local gardening groups—many share harvested pods. Some online seed banks specialize in heirloom varieties. Just confirm the source is disease-free to avoid introducing pathogens to your garden.
Wrapping up and next steps
Harvesting bleeding heart seed pods may seem delicate, but with the right timing and techniques, you can ensure their year-round viability—no stress required! 🌱 These unique pods are a gardener’s secret weapon for propagating new plants, and mastering the process opens doors to endless possibilities.
Whether you’re a seasoned green thumb or a curious beginner, your newfound skills will bring fresh life to your garden.
Ready to take the next step? Start by experimenting with a few pods this season, and soon you’ll be sharing your bleeding heart bounty with fellow gardeners—or even expanding your own collection! 🌸