
Lawn
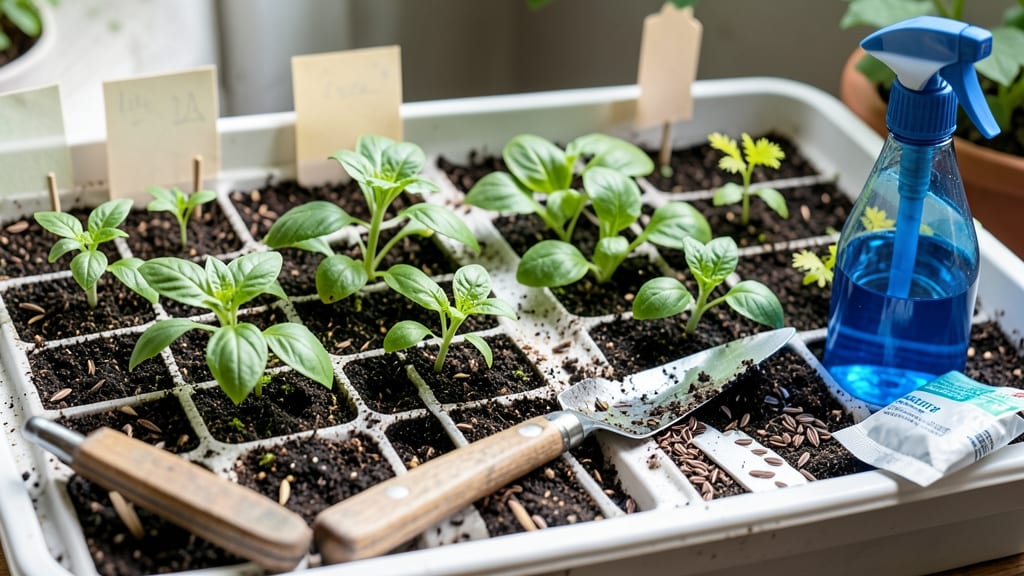
Seed trays with lids transformed my germination rates from hit-or-miss to reliable every time. 🌱 The right lid creates a humidity lock that keeps seeds moist without drowning them, while regulating temperature to speed up sprouting. Without one, my seedlings would either dry out or develop mold before breaking soil.
The key is choosing lids that fit snugly but allow airflow—clear plastic works best for monitoring progress, while DIY options like cut-up milk cartons or repurposed takeout containers can work in a pinch. Just poke a few small holes for ventilation to prevent condensation buildup.
You’ll notice the difference within 3-5 days: seedlings emerge faster and stronger, with fewer leggy or wilted sprouts. The lids stay on until the first true leaves appear, then come off gradually to harden off tender seedlings.
For best results, place trays in a warm spot (70-75°F) and remove lids for 10-15 minutes daily after germination. This prevents over-moisture while maintaining humidity—no more seedling casualties from mold or dehydration.
📚 In This Guide
- What you need
- Instructions
- Tips and common mistakes
- Wrapping up and next steps
What you need
- ● Seed trays: 1–10 trays (depending on your project size), with or without built-in lids. Pro tip: Clear plastic trays work best for monitoring seedling growth!
- ● Lids for seed trays: Store-bought: Humidity domes, clear plastic lids (e.g., humidity tents), or seed-starting kits with lids.
- ● DIY: Clear plastic wrap (e.g., Saran Wrap), plastic sheeting, or repurposed clamshell containers (like berry trays).
- ● Scissors or box cutter: For trimming plastic sheeting or DIY lids to fit trays snugly.
- ● Rubber bands or clips: 2–4 per tray (to secure lids tightly if needed).
- ● Spray bottle with water: For maintaining humidity inside the tray.
- ● Drill or hole punch: To create ventilation holes in store-bought lids (¼-inch diameter, 2–3 holes per side).
- ● Painter’s tape or duct tape: To seal edges of DIY lids and prevent gaps.
- ● Humidity gauge or hygrometer: (Advanced) To monitor internal moisture levels (ideal: 70–90% humidity).
- ● Twine or string: For hanging DIY lids temporarily during watering.
- ● Seed-starting mix (sterilized and moistened).
- ● Seeds planted at the recommended depth for your species.
- ● A warm, bright location (60–75°F) for germination (e.g., a sunny windowsill or grow light setup).
- ● Patience! Some seeds take weeks to sprout—keep lids secure until seedlings emerge.
How to use lids for seed trays effectively
Here's my foolproof method for maintaining perfect humidity without smothering your seedlings.
🌱 Step 1: Select the Right Lid Material
Clear plastic lids work best because they allow light penetration while trapping humidity. I avoid thick, opaque lids—they block too much light and create uneven moisture zones. The lid should fit snugly but not press down on seedlings as they grow. If yours feels loose, prop it up slightly with a small piece of cardboard to maintain that critical air gap.
For seed trays without built-in lids, use clear plastic wrap or a humidity dome instead. Secure it tightly around the edges to prevent moisture from escaping. The goal is to create a mini greenhouse effect that keeps soil consistently moist without waterlogging. You'll notice condensation forming on the inside—this is perfect, as long as you remove the lid daily for 10-15 minutes to refresh air circulation.
💧 Step 2: Create the Ideal Humidity Environment
After sowing seeds, place the lid on immediately to lock in moisture. The enclosed space will raise humidity to 80-90%, which is ideal for germination. I like to mist the soil lightly before sealing—just enough to dampen the surface without creating puddles. Overwatering here leads to mold, so less is more.
Check daily for condensation buildup on the lid's underside. If it's heavy with water droplets, your humidity is spot-on. If you see large water droplets forming on the soil surface, that's a sign of excess moisture—remove the lid for 30 minutes to let the soil dry slightly. The key is balance: seedlings need moisture, but not a swampy environment.
⏰ Step 3: Monitor and Adjust as Seedlings Emerge
Once 50% of seeds have sprouted, remove the lid completely for 2-3 hours daily. This prevents damping-off disease, which thrives in stagnant, high-humidity conditions. You'll see seedlings start to stretch toward the light—this is their signal that they need more air and less confinement.
After 7-10 days, when seedlings show their first true leaves, transition to removing the lid entirely for 4-6 hours daily. Gradually increase this time over 5-7 days until the lid stays off completely. Watch for wilting—if leaves droop slightly, that's your cue to reduce ventilation time. Healthy seedlings should stand upright with glossy, vibrant leaves.
☀️ Step 4: Transition to Independent Growth
By the time seedlings have 2-3 sets of true leaves, they're ready for the lid to come off permanently. This usually happens around 3-4 weeks after sowing, depending on the plant type. Place the tray under bright, indirect light (or a grow light) to prevent leggy growth.
If you notice new growth slowing or leaves yellowing, the transition was too abrupt. Simply replace the lid for 1-2 hours daily until seedlings recover. The goal is to wean them gradually—think of it like tapering off a humidifier for a cold sufferer. Properly acclimated seedlings will handle the drier air without stress.
Tips & tricks for perfect seedling humidity management
Between us, I've lost more seedlings to mold than I care to admit—until I cracked the humidity code with these game-changing tricks.
Condensation is Your Friend: The heavy water droplets on the lid's underside after Step 2 prove you've hit the 80-90% humidity sweet spot. But watch the soil surface too—if you see large droplets forming there, that's excess moisture signaling it's time to remove the lid for your 30-minute ventilation (not the daily 10-15-minute refresh). Think of it like a sauna: perfect when controlled, dangerous when neglected.
Light Penetration Matters: That clear plastic isn't just for looks—it lets 10-15% of ambient light through while maintaining humidity. If your seedlings stretch toward the light (a condition called etiolation), move the tray closer to your light source or supplement with a grow light. Opaque lids block too much light, creating weak, leggy plants that collapse when transplanted.
Gradual Weaning Prevents Shock: The 5-7 day transition period in Step 3 is non-negotiable. I've seen seedlings go from vibrant to wilted overnight when I tried to remove lids too quickly. Start with 2-3 hours daily off, then increase by 1 hour increments—this mimics natural acclimation. Watch for that telltale leaf droop; it's your plant's SOS signal to slow down the process.
Material Matters: While clear plastic dominates, I've had success with humidity domes for larger trays. The key is creating that airtight seal—use rubber bands or tape for plastic wrap if needed. Avoid aluminum foil; it reflects too much light and creates hot spots that can scorch seedlings. When in doubt, test your setup by checking for condensation within 24 hours of sealing.
Pro Tips for Lids For Seed Trays
- Between us, I've lost more seedlings to mold than I care to admit—until I cracked the humidity code with these game-c...
- Condensation is Your Friend: The heavy water droplets on the lid's underside after Step 2 prove you've hit the 80-90%...
- Light Penetration Matters: That clear plastic isn't just for looks—it lets 10-15% of ambient light through while main...
Frequently asked questions
Got questions about using lids for seed trays? You’re not alone! Here are some common concerns—and straightforward answers—to help you grow with confidence.
What’s the best material for seed tray lids to prevent mold?
Opt for clear plastic lids (like those from seed starting kits) or humidity domes made of breathable materials. Avoid thick plastic or metal—they trap too much moisture, leading to mold. If DIY-ing, use translucent plastic wrap (like Saran Wrap) secured loosely with clips for airflow.
How long should I keep the lid on my seed trays?
Once seeds sprout, remove the lid immediately to prevent damping-off disease. For most seeds, keep the lid on until germination (typically 5–14 days, depending on the plant). After that, prop the lid open slightly or use it only during cooler nights to maintain humidity without suffocating seedlings.
Can I reuse lids from store-bought seed trays?
Clean them with hot, soapy water and a 10% bleach solution (1 part bleach to 9 parts water) to kill bacteria. Rinse thoroughly and let dry completely before reuse. Just ensure they’re not warped or cracked—damaged lids can’t regulate humidity properly.
What if my seedlings look wilted under the lid?
Wilting under a lid usually means too much moisture or poor airflow. Lift the lid for 10–15 minutes daily to air out the tray, and check for condensation on the lid’s underside. If trays feel soggy, reduce watering (bottom-watering helps) and ensure the lid isn’t sealing too tightly.
Are there alternatives to plastic lids for seed trays?
Yes! Try these DIY options:
- Glass jars or cloche covers: Place over individual trays for targeted humidity.
- Plastic wrap + clips: Cheap and effective, but remove daily to check moisture.
- Seedling tents: Use a small greenhouse or a repurposed clear plastic storage bin with ventilation holes.
Wrapping up and next steps
Choosing the right lids for seed trays is a game-changer for your gardening success! 🌱 By locking in humidity, you’ll create the perfect environment to keep seeds moist, prevent mold, and give your seedlings the best start.
Whether you opt for plastic lids, clear domes, or DIY solutions, consistency is key—just remember to ventilate as your plants grow!
Ready to take your seed-starting game to the next level? Grab some trays, pick your lids, and get growing! Your future garden will thank you. 🌿