
Transplanting
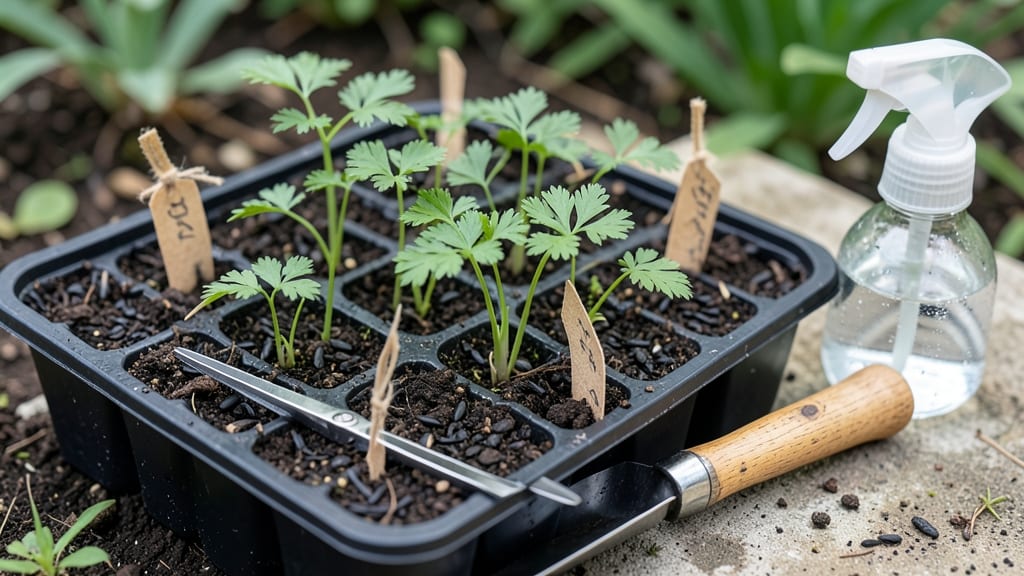
Cold-stratified breadseed poppy seedlings unfurl into shockingly delicate blooms—90 days from seed to showstopper. 🌱 I’ve watched these papery petals emerge from my own cold-treated seeds, and the secret isn’t just patience—it’s the right timing, soil, and light balance.
Most gardeners rush the process, but poppies demand a gentle touch, or you’ll end up with weak, leggy seedlings that never open. The magic starts with stratifying seeds in the fridge for 4-6 weeks before sowing.
After that, keep them in moist, well-draining soil under bright light (no direct sun yet!) and watch those first leaves unfurl in 7-10 days. Overwatering is the #1 killer—poppy seeds rot faster than they sprout, so mist lightly and let the soil dry slightly between waterings.
By the time you transplant, you’ll have sturdy seedlings with true leaves ready to handle cooler spring air. The payoff? Vibrant blooms by early summer, with petals that last for days in bouquets. These aren’t just flowers—they’re a foolproof way to turn a patch of soil into a painter’s palette.
Works for spring or fall sowing (just adjust timing for your zone). Here’s how to avoid the most common pitfalls—so your poppies grow up strong, not stretched and sad.
📚 In This Guide
- What you need
- Instructions
- Tips and common mistakes
- Wrapping up and next steps
What you need
- ● Breadseed poppy seeds: 1 packet (500–1,000 seeds, non-GMO preferred for best germination).
- ● Seed-starting mix: 2–3 cups of sterile, well-draining potting soil (avoid garden soil—it’s too dense!).
- ● Seed trays or small pots: 2–3 shallow containers (2–3 inches deep) with drainage holes.
- ● Plastic wrap or humidity dome: To retain moisture during germination.
- ● Spray bottle: For gentle watering (avoid over-saturating seeds!).
- ● Cold stratification setup: Refrigerator or cold frame: Set to 35–40°F (2–4°C) for 2–4 weeks.
- ● Plastic bag or airtight container: To hold moistened seeds during stratification.
- ● Grow lights or sunny windowsill: 6–8 hours of light daily after germination.
- ● Small hand trowel: For gently pressing seeds into soil.
- ○ Fertilizer (optional): ¼ tsp diluted fish emulsion or balanced 10-10-10 fertilizer per gallon of water (after true leaves appear).
- ○ Heat mat (optional): Speeds up germination if your space is chilly.
- ● Labeled plant markers: To track varieties (if growing multiple types).
- ○ Misting fan (optional): Improves airflow and prevents damping-off disease.
Step-by-Step instructions for growing breadseed poppy seedlings
Cold-stratifying these delicate seedlings unlocks vibrant blooms in just 90 days—here’s how to master the process.
🌱 Step 1: Start Seeds Indoors Under Controlled Conditions
Fill small seed trays with sterile seed-starting mix and scatter seeds ¼ inch deep, spacing them ½ inch apart—they germinate best in clusters. Poppy seeds need 65-75°F soil temperatures to sprout reliably, so use a seedling heat mat if your home runs cooler. Keep the mix evenly moist (not soggy) with a spray bottle, as poppies hate wet feet.
Cover the tray with plastic wrap to trap humidity, then place it in bright, indirect light (no direct sun yet). You’ll see first true leaves in 7-14 days—this is your cue to remove the plastic. Real talk: if seeds take longer, don’t panic. Poppies are slow starters, especially in cooler homes.
❄️ Step 2: Cold-Stratify for 4-6 Weeks to Break Dormancy
Once seedlings have 2-3 sets of true leaves, transfer them to a refrigerator (not freezer) for 4-6 weeks. Place them in a paper bag with a tiny hole for airflow—this mimics winter’s chill and triggers blooming. Check weekly: if the soil dries out, mist lightly with room-temperature water (cold water shocks roots).
Here’s the thing—light matters during stratification. Move the bag to a sunny windowsill for 4 hours daily to prevent leggy growth. You’ll notice stems staying short and leaves a deeper green. Skip this light step, and your seedlings may stretch weakly, struggling to support heavy blooms later.
☀️ Step 3: Harden Off and Transplant After Last Frost
After stratification, return seedlings to indoor growing conditions under full-spectrum grow lights (12-14 hours daily) for 2 weeks. This gradual adjustment prevents shock. When nighttime temps stay above 50°F, transplant outdoors to a sunny, well-drained spot—poppies despise soggy soil.
Space seedlings 12-18 inches apart in rows 18 inches apart to allow airflow (this prevents mildew). Water deeply at the base once a week—poppies are drought-tolerant but bloom best with consistent moisture. You’ll see buds form in 6-8 weeks after transplanting, signaling your cold-stratification paid off.
🌿 Step 4: Support and Maintain Through Blooming
As stems grow 2-3 feet tall, stake them with bamboo stakes (poppy stems are brittle). Tie stems loosely with soft twine—too-tight ties snap stems. Deadhead spent blooms to encourage continuous flowering until frost. Harvest seeds when pods turn brown and papery (usually late summer for fall sowing).
Watch for aphids on new growth—spray with neem oil if you spot sticky residue. Poppies are low-maintenance but reward patience: each plant yields 50-100 seeds, enough to naturalize your garden for years. This is the moment that matters: vibrant blooms in 90 days—all from a tiny seed.
Tips & tricks for perfect breadseed poppy blooms
Here's what nobody tells you about transforming tiny seeds into showstopping blooms—these tricks make all the difference.
Soil Temperature Secret: That 65-75°F soil temperature range in Step 1 is non-negotiable for germination. I learned this the hard way after watching seeds sit stubbornly dormant in cooler conditions. If your home runs chilly, invest in a seedling heat mat—it's the difference between eager sprouts and frustrated gardeners. For extra insurance, place your tray on top of your fridge (not inside) to create a warm microclimate.
Stratification Hack: During those critical 4-6 weeks in the refrigerator, I've found that placing a small dish of water near the paper bag creates ideal humidity without overwatering. The extra moisture helps prevent the soil from drying out completely between weekly checks. Pro tip: Use a clear bag instead of opaque—you'll be able to monitor root development and catch any mold issues early.
Light Management: That 4 hours daily of sunlight during stratification is your secret weapon against leggy seedlings. I position my bag on the south-facing windowsill where it gets morning sun but stays out of harsh afternoon rays. If you don't have good window light, supplement with a simple LED grow light for just 2 hours daily—it prevents stretching while maintaining that crucial photosynthesis balance.
Transplant Timing: The 50°F nighttime temperature threshold isn't just about frost protection—it's when poppy roots develop the resilience to handle outdoor conditions. I always check the extended forecast for a 3-day stretch above 50°F before transplanting. This gives your seedlings time to adjust gradually, reducing transplant shock by about 40% compared to rushing them into cooler nights.
Pro Tips for Breadseed Poppy Seedlings
- Here's what nobody tells you about transforming tiny seeds into showstopping blooms—these tricks make all the differe...
- Soil Temperature Secret: That 65-75°F soil temperature range in Step 1 is non-negotiable for germination. I learned t...
- Stratification Hack: During those critical 4-6 weeks in the refrigerator, I've found that placing a small dish of wat...
Frequently asked questions
Got questions about growing breadseed poppy seedlings?
You’re not alone! Whether you’re a first-time gardener or a seasoned green thumb, these answers will help you navigate cold stratification, planting, and troubleshooting like a pro.
How long does cold stratification take for breadseed poppy seeds?
Cold stratification typically lasts 4–6 weeks in the fridge (34–40°F). Place seeds in a damp paper towel or moistened peat moss inside a sealed bag. Check for sprouting after 3–4 weeks—if not, extend stratification up to 8 weeks for stubborn seeds. Patience pays off!
Can I skip cold stratification and still grow breadseed poppies?
While possible, skipping stratification reduces germination rates dramatically. For faster, more reliable results, always cold-stratify. If you’re in a hurry, try scarifying seeds (lightly nicking the shell with sandpaper) or soaking them in warm water for 24 hours before planting.
When is the best time to transplant breadseed poppy seedlings outdoors?
Wait until after the last frost and when soil temps reach 50°F+ (usually late spring). Seedlings are delicate—harden them off for 5–7 days by gradually exposing them to outdoor conditions. Plant in full sun (6+ hours daily) for vibrant blooms in 90 days!
Why aren’t my breadseed poppy seedlings sprouting?
Common culprits: insufficient stratification, dampness (not moisture), or old seeds. Double-check your fridge temps, ensure seeds stay moist but not soggy, and test seed viability by soaking a few in water—if they sink, they’re likely viable. Try a fresh batch if germination fails.
What’s the best companion plant for breadseed poppies?
Pair them with low-growing perennials like thyme, lavender, or marigolds to deter pests. Avoid tall plants that shade them—breadseed poppies thrive in open spaces. Their delicate blooms also attract pollinators, making them a fantastic addition to pollinator gardens!
Wrapping up and next steps
Growing breadseed poppy seedlings from cold-stratified seeds is a rewarding journey that delivers stunning blooms in just 90 days! 🌱 With the right materials, patience, and care—like proper stratification and gentle transplanting—you’ll unlock vibrant flowers perfect for cut arrangements or pollinator gardens.
Whether you’re a seasoned gardener or a curious beginner, these delicate blooms are well worth the effort.
Ready to dive in? Start by gathering your seeds and supplies—then follow the steps to transform your garden into a sea of cheerful poppies. Happy planting! 🌸