Propagation
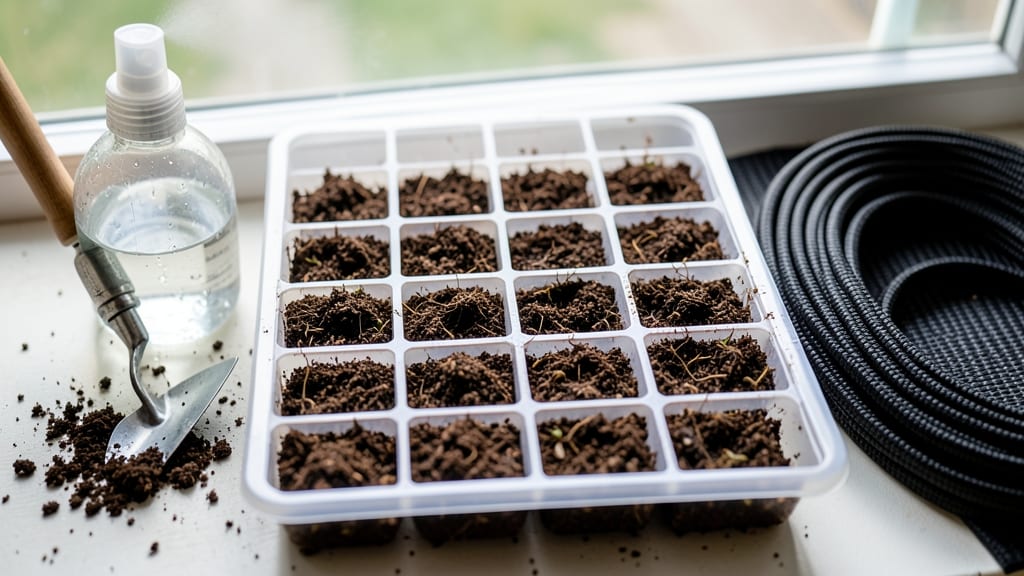
My Burpee seed starting trays saved my first batch of seedlings from the dreaded "damping off" disaster. ✨ These trays aren't just plastic—they're designed with drainage holes, sturdy cells, and a size that actually fits under grow lights without bending.
I went from losing half my seeds to transplanting healthy, stocky seedlings that outcompeted everything at the nursery.
The secret lies in their 128-cell design—perfect for tiny seeds like lettuce or larger ones like tomatoes without wasting space. You'll need seed-starting mix (not garden soil), a spray bottle, and a heat mat if you're growing cool-season crops.
Sterilize the trays with a 10% bleach solution before use, and you're ready to sow.
By week 3, you'll see bold green leaves reaching for the light, and the trays make transplanting effortless—just pop each seedling out with its soil block intact. No root disturbance means less shock, and the durable plastic holds up through multiple seasons.
Compare that to flimsy peat pots or messy soil blocks, and these trays win every time.
Common mistakes? Overwatering (let the mix dry slightly between waterings) and poor light (seedlings stretch toward weak sources). Troubleshoot leggy sprouts by moving them closer to light or adding a grow bulb. Once hardened off, these trays become part of your transplanting toolkit—no waste, just results.
📚 In This Guide
- What you need
- Instructions
- Tips and common mistakes
- Wrapping up and next steps
What you need
- ● Burpee Seed Starting Trays – 1 pack (typically 12–24 cell trays, depending on your needs).
- ● Soil-less seed starting mix – 2–4 cups (lightweight, sterile, and well-draining).
- ● Water – Room-temperature, enough to moisten the mix (avoid soggy soil!).
- ● Spray bottle – For gentle watering post-planting.
- ● Seeds – Your chosen variety (check seed packet for depth/spacing).
- ○ Plastic wrap or humidity dome – To retain moisture (optional but helpful for germination).
- ● Grow lights or sunny windowsill – 6–12 hours of light daily.
- ● Seedling heat mat – For faster germination in cooler climates.
- ● Fertilizer (low-dose) – Like fish emulsion or diluted liquid fertilizer (after sprouts emerge).
- ● Label markers & sticks – To track seed varieties.
- ● Tweezers – For delicate seed placement.
Step-by-Step instructions for using Burpee seed starting trays
Here's how to transform these soil blocks into your germination powerhouse—no fuss, no fail.
🌱 Step 1: Prepare the Soil Blocks for Planting
Remove the Burpee seed starting trays from their packaging and place them on a clean, flat surface. These blocks are pre-mixed with compost and nutrients, but they need hydration to activate. Fill a shallow tray or basin with room-temperature water and arrange the blocks so they're 1-2 inches deep in the water—just enough to saturate them completely.
Let them soak for 10-15 minutes until they expand to roughly double their original size. You'll know they're ready when the surface feels firm but still slightly damp to the touch. Avoid over-soaking—they should never feel soggy or crumble apart. Once expanded, remove them and let any excess water drain away for 5 minutes.
💧 Step 2: Plant Seeds at the Correct Depth
Each soil block has a small dimple designed for seed placement. Use your fingertip to gently press the dimple deeper if needed—this ensures proper seed depth. For most seeds, plant 1-2 seeds per block at a depth of ¼ to ½ inch, depending on the seed size. Tiny seeds like lettuce go in the dimple; larger seeds like beans need a slightly deeper hole.
Cover the seeds lightly with a pinch of the soil block material—just enough to keep them in place. Press down gently but don’t compact the soil. If you’re planting multiple trays, label them with the seed variety and date using a waterproof marker or small wooden stake. I always write on the edge of the tray so it doesn’t block light.
☀️ Step 3: Provide Ideal Germination Conditions
Place the trays in a warm, humid environment—ideally between 70-75°F. A seedling heat mat set to 75°F speeds up germination, especially for slower starters like tomatoes. Cover the trays with a clear plastic dome or humidity tent to retain moisture and warmth. Check daily for condensation on the inside of the dome—this is normal and indicates the right humidity level.
Keep the soil blocks evenly moist but never soggy. Mist lightly with water if the surface feels dry to the touch, but avoid soaking the top layer. Germination typically occurs in 5-14 days, depending on the seed type. Once you see first true leaves (not the initial seed leaves), remove the dome immediately to prevent damping-off disease.
🌿 Step 4: Transition to Light and Care for Young Seedlings
Move the trays to a bright, indirect light source immediately after germination. A grow light positioned 2-3 inches above the seedlings provides the 14-16 hours of light they need daily. Rotate the trays quarter-turn daily to prevent seedlings from leaning toward the light. You’ll notice straight, sturdy stems and dark green leaves—signs of strong, healthy growth.
Water from the bottom by placing the trays in a shallow tray of ½-inch water for 10-15 minutes. This encourages deep root growth and prevents fungal issues. Avoid overhead watering once seedlings emerge—it can dislodge them or cause disease. Fertilize lightly with a diluted liquid fertilizer (half-strength) 2 weeks after germination to support early growth.
⏰ Step 5: Harden Off and Transplant
When seedlings have 3-4 true leaves and are 4-6 weeks old, it’s time to harden them off. Start by moving the trays to an outdoor shaded area for 1-2 hours the first day. Gradually increase exposure over 7-10 days, adding 1-2 hours daily until they can tolerate full sun and wind. Watch for wilting or yellowing—these are signs they’re not ready yet.
Transplant outdoors on a cool, overcast day to reduce stress. Gently press the soil block into the prepared garden bed, ensuring the top remains level with the soil surface. Water deeply at the base to help roots establish. These soil blocks break down naturally, so you can plant directly into the ground without disturbing roots—a huge advantage over plastic trays.
Tips & tricks for perfect seed starting with Burpee soil blocks
Mastering these soil blocks transforms your seed-starting game—here’s how to avoid the common pitfalls that turn hopeful gardeners into frustrated beginners.
Soaking Strategy: In Step 1, those 10-15 minutes of soaking are non-negotiable, but here’s the secret: use room-temperature water (not cold from the tap) to prevent shocking the blocks. If your water is hard (high mineral content), soak for 12-13 minutes instead of the full range—hard water can leave mineral deposits that disrupt drainage. After soaking, pat the bottoms dry with a paper towel before placing them in trays to prevent soggy bottoms during germination.
Seed Depth Precision: Step 2’s ¼ to ½ inch rule is flexible, but tiny seeds like lettuce or basil need just the dimple depth—no deeper. For larger seeds like beans or peas, press the dimple slightly deeper with your fingertip to create a ½-inch pocket. The key is keeping seeds 2-3 times their width below soil—this prevents them from being buried too deep and suffocating.
Germination Environment Hack: The 70-75°F range in Step 3 is ideal, but if your home runs cooler, prop the trays on a seedling heat mat set to 75°F for just the first 3-5 days of germination. This jumpstarts slower seeds like tomatoes without overcooking fast germinators. For humidity, double-layer plastic wrap (instead of a dome) works in a pinch—just poke tiny holes for airflow to avoid fungal buildup.
Light Transition Tip: When moving seedlings to 14-16 hours of light in Step 4, start with 12 hours the first day to avoid shock. If your seedlings stretch (elongate) toward the light, they’re not getting enough—rotate trays every 8 hours (not just quarter-turns) to ensure even growth. For natural light, place them on a south-facing windowsill but supplement with a grow light if you notice pale, leggy stems.
Pro Tips for Burpee Seed Starting Trays
- Mastering these soil blocks transforms your seed-starting game—here’s how to avoid the common pitfalls that turn hopeful gardeners into frustrated beginners.
- Soaking Strategy: In Step 1, those 10-15 minutes of soaking are non-negotiable, but here’s the secret: use room-temperature water (not cold from the tap) to prevent shocking the blocks.
- Seed Depth Precision: Step 2’s ¼ to ½ inch rule is flexible, but tiny seeds like lettuce or basil need just the dimple depth—no deeper.
Frequently asked questions
What’s the difference between Burpee seed starting trays and regular seed trays?
Burpee seed starting trays use soil blocks instead of traditional soil-filled cells. These blocks improve root aeration, reduce transplant shock, and eliminate the need for root pruning. They’re also eco-friendly, biodegradable, and often made from coir or peat, making them a sustainable choice for gardeners.
How long does it take for seeds to germinate in soil blocks?
Germination time varies by seed type, but soil blocks enhance moisture retention and warmth, often speeding up the process. Most veggies (like tomatoes or peppers) sprout in 5–14 days, while herbs (basil, parsley) may take 7–21 days. Check your seed packet for specifics—soil blocks just create the perfect environment!
Can I reuse Burpee soil blocks, or do I need new ones each season?
Unfortunately, soil blocks aren’t reusable—they break down as roots grow. However, they’re compostable! After your plants outgrow them, toss the blocks into your compost bin. For next season, just grab a fresh pack—it’s a small trade-off for healthier transplants.
What if my seeds aren’t germinating in the soil blocks? Troubleshooting tips?
Try these fixes:
- Check moisture: Soil blocks should stay consistently damp (not soggy). Mist lightly if dry.
- Warmth matters: Place trays on a seedling heat mat (70–85°F ideal) or near a sunny window.
- Light exposure: Seeds need 12–16 hours of light daily—use grow lights if natural light is weak.
- Fresh seeds: Old seeds (over 1 year) may fail to sprout. Test viability with a paper towel germination test.
Are Burpee soil blocks worth the investment compared to peat pots or cell packs?
Yes! While they cost more upfront, soil blocks save time and stress by reducing transplant shock and eliminating root circling. Plus, they’re gentler on roots and eliminate the need to remove peat pots later. For serious gardeners, the long-term payoff—healthier, faster-growing seedlings—makes them a smart choice.
Wrapping up and next steps
Starting seeds with Burpee seed-starting trays is a game-changer for gardeners who crave effortless, high-germination success! 🌱 These soil blocks eliminate transplant shock, simplify care, and give your seedlings the perfect head start—whether you're a seasoned pro or a curious beginner.
With the right setup and a little patience, you’ll be harvesting thriving plants in no time.
Ready to level up your seed-starting game? Grab your trays, gather your supplies, and dive in—your future garden will thank you! 🌿 Start planting today!