
Lawn
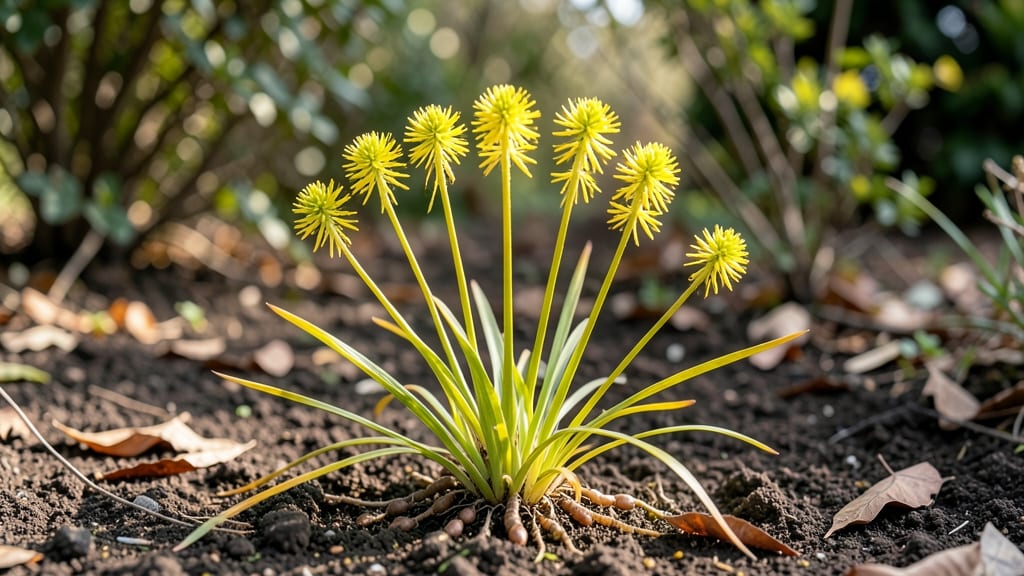
Removing nutsedge seed heads without twisting the plant is the secret to stopping this stubborn weed before it spreads. 🌱 I’ve battled nutsedge for years, and the twist-free method I’ve perfected saves time, prevents regrowth, and protects your garden’s roots—no more struggling with stubborn clumps or leaving pieces behind.
The key? Timing and technique matter more than brute force.
Nutsedge thrives by producing those distinctive triangular seed heads that shoot up like little green arrows. If you let them mature, one plant can become hundreds by next season. But here’s the good news: early removal—before the seed heads form—is far easier than dealing with established clumps.
The twist-free extraction method works by gently loosening the soil around the base while avoiding the plant’s fibrous roots, which break easily.
You’ll walk away with clean soil and no regrowth if you pull at the right angle and depth. The process takes just a few minutes per plant, and the results are immediate: no more nutsedge pushing through your lawn or garden beds.
This method also prevents the plant from sending out new shoots from broken root fragments, which is what makes traditional pulling so ineffective.
For stubborn patches, repeat the process weekly until no more seed heads appear. Combine this with a layer of mulch to block sunlight—nutsedge can’t survive without it—and you’ll break the cycle for good.
Prevention is the real game-changer here, so act fast before those seed heads turn brown and release their next generation.
📚 In This Guide
- What you need
- Instructions
- Tips and common mistakes
- Wrapping up and next steps
What you need
- ● Gloves (heavy-duty) – 1 pair (nitrile or leather to protect your hands from sharp edges and sap).
- ● Pruning shears or sharp scissors – 1 pair (bypass-style for clean cuts, 4-6" blades recommended).
- ● Garden trowel or small hand fork – 1 (for loosening soil around stubborn seed heads).
- ● Plastic bags or bucket – 1-2 (for collecting seed heads and debris).
- ● Garden hose with adjustable nozzle – 1 (for rinsing tools and hands afterward).
- ○ Rake (optional but helpful) – 1 (bendable-head rake to clear loose soil/debris post-removal).
- ● Knee pads – 1 pair (for comfort if kneeling for extended periods).
- ● Spray bottle with vinegar/water mix (1:1 ratio) – 1 (to disinfect tools between cuts).
- ● Compost bin or trash bag – 1 (for proper disposal of seed heads—never compost nutsedge!).
- ● Sunscreen & hat – 1 each (if working outdoors for long periods).
How to remove nutsedge seed heads without twisting or damaging your lawn
Here’s the gentle, effective method I use to eliminate nutsedge seed heads without pulling up your whole yard.
🌱 Step 1: Identify and Wait for the Right Time
Nutsedge seed heads look like tiny, yellowish spikes popping up in your lawn—often in clusters. The best time to remove them is right before they turn brown and release seeds, usually in late summer to early fall. If you wait too long, the seeds will spread, and you’ll have a bigger problem next spring.
I like to check my lawn once a week starting in August. When the seed heads are firm but not yet dry, that’s your window. You’ll see them standing upright, about 1-2 inches tall, with a slight yellowish tint. Grab a pair of gloves—nutsedge roots are slippery and can leave stains on your hands.
✂️ Step 2: Use the Right Tool for Clean Extraction
Never pull nutsedge by hand—you’ll just break off the seed head and leave the roots intact. Instead, grab a sharp pair of pruning shears or long-nose pliers. I prefer pliers because they give me better grip and precision. Cut the seed head just above the base, where it meets the stem, to avoid damaging the surrounding grass.
Work slowly and deliberately. If you rush, you might miss some seed heads or accidentally cut into healthy grass. I like to go over the area two or three times to make sure I’ve gotten every single one. After cutting, leave the seed heads in a small pile—you’ll dispose of them in the next step.
🪴 Step 3: Dispose of Seed Heads Properly
Never toss nutsedge seed heads into your compost or yard waste—they’ll survive and sprout elsewhere. Instead, double-bag them in a heavy-duty trash bag and throw them in the outdoor trash bin. If you have a fire pit, you can burn them (check local regulations first), but bagging is the safest and easiest method.
Here’s the thing—one seed head can produce hundreds of new plants. If you leave even a few behind, you’ll be back to square one next season. I like to mark the spots where I’ve removed seed heads with a small flag or a bit of chalk so I can monitor those areas for new growth.
💧 Step 4: Prevent Regrowth with Targeted Care
After removing the seed heads, water the area deeply to help the grass recover. Nutsedge thrives in moist soil, so reducing water in problem spots can weaken it over time. I aim for 1 inch of water per week, but if your lawn gets rain, adjust accordingly. Avoid overwatering—soggy soil is nutsedge’s favorite environment.
For stubborn nutsedge, I’ve had the best luck with a spot treatment of corn gluten meal in early spring. It’s a natural pre-emergent that prevents seeds from germinating. Apply it evenly over the area where you’ve removed seed heads, following the package instructions. It won’t kill existing nutsedge, but it’ll stop new plants from popping up.
☀️ Step 5: Monitor and Repeat as Needed
Check the treated area every 2-3 weeks for new seed heads. Nutsedge grows fast, so early detection is key. If you see any new spikes, remove them immediately using the same method. Over time, you’ll notice fewer and fewer appearing—consistency is the secret to winning this battle.
I’ve found that combining removal with proper lawn care—like mowing at the right height and aerating in the fall—makes a huge difference. A healthy lawn is less likely to let nutsedge take over. If you’re dealing with a large infestation, consider hand-pulling the entire plant (roots and all) in early spring before it produces seed heads again.
Tips & tricks for natural nutsedge control
These simple strategies will help you tackle nutsedge without damaging your lawn or wasting time.
Timing is Everything: I can't stress this enough—wait until the seed heads are firm but not yet brown to cut them. This usually happens in late summer when they're about 1-2 inches tall. If you wait until they turn brown, you've missed your window and the seeds will have already spread. I check my lawn every week starting in August to catch them at the perfect moment.
Tool Selection Matters: Using pruning shears or long-nose pliers gives you the precision to cut cleanly just above the base. I've tried using scissors, but they don't provide enough leverage for stubborn seed heads. The key is to cut at that precise point where the seed head meets the stem—this prevents damaging the surrounding grass while ensuring you remove the entire seed head.
Prevention Strategy: After removing seed heads, mark those spots with small flags or chalk so you can monitor them closely. I've found that nutsedge often returns to the same spots, so keeping track helps you stay ahead. This simple marking system has saved me countless hours of searching for new growth later.
Long-Term Lawn Care: The secret to winning the battle against nutsedge is maintaining a healthy lawn. I've noticed that areas with thick, well-established grass are much less susceptible to nutsedge. Focus on proper mowing height (about 3 inches for most grasses), regular aeration in fall, and consistent watering (about 1 inch per week). A strong lawn is your best defense against weeds.
Pro Tips for Nutsedge Seed Head
- These simple strategies will help you tackle nutsedge without damaging your lawn or wasting time.
- Timing is Everything: I can't stress this enough—wait until the seed heads are firm but not yet brown to cut them.
- Tool Selection Matters: Using pruning shears or long-nose pliers gives you the precision to cut cleanly just above the base.
Frequently asked questions
Got questions about nutsedge seed heads?
You’re not alone—this pesky weed can be tricky to manage! Here are answers to the most common concerns to help you tackle nutsedge like a pro.
What does a nutsedge seed head look like, and how can I identify it?
A nutsedge seed head resembles a tiny, brown, cigar-shaped spike (about 1–2 inches long) that pokes up from the base of the plant. Unlike grass, it grows in a triangular pattern, and the seed head often appears before the plant’s broad, grass-like leaves. If you see these spikes, you’ve found nutsedge!
When is the best time to remove nutsedge seed heads?
Remove seed heads as soon as they appear—typically in late spring to early summer. This prevents them from spreading seeds and worsening infestations. Pro tip: Don’t wait until fall; nutsedge seeds can lie dormant for years, making late removal less effective.
Can I pull nutsedge by hand, or do I need special tools?
Hand-pulling works for small patches, but nutsedge has deep, fibrous roots (up to 12 inches!). For stubborn clumps, use a digging fork or dandelion weeder to avoid breaking off the root crown. Always wear gloves—nutsedge sap can irritate skin!
Are there natural alternatives to removing nutsedge seed heads?
Yes! Try these non-toxic methods:
- Corn gluten meal (applied in early spring) to prevent seed germination.
- Vinegar spray (20% acetic acid) for spot treatment—test on a small area first.
- Smothering with thick mulch or cardboard to block sunlight.
What should I do if nutsedge keeps coming back after removal?
Persistent nutsedge often means roots or seeds remain in the soil. Try these fixes:
- Recheck the area every 2–3 weeks for regrowth.
- Improve soil health with compost or organic matter to crowd out weeds.
- Consider a pre-emergent herbicide (like corn gluten) in early spring.
Wrapping up and next steps
Mastering the art of nutsedge seed head removal doesn’t have to be a twisty, tangled mess!
With the right tools and techniques—like the twist-free extraction method—you can tackle this pesky lawn invader with confidence. 🌱✨ Remember, patience and precision are key, and soon your yard will be free of those stubborn seed heads.
Ready to take the next step? Grab your gloves and tools, and start transforming your lawn today—one seed head at a time! For even more tips, check out our lawn care resource hub to keep your yard lush and nutsedge-free.