
Propagation
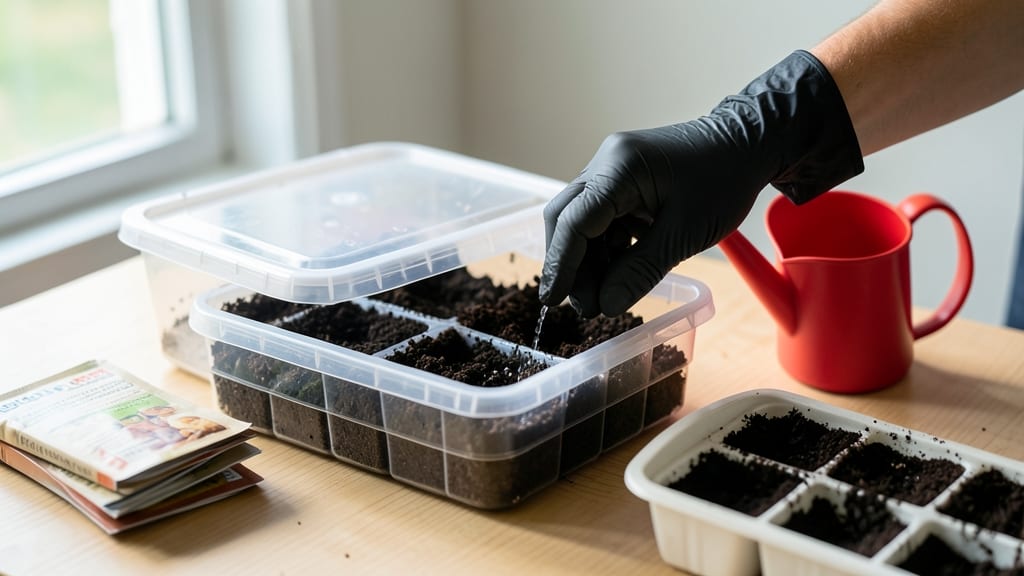
The Burpee Self-Watering Seed Starting System turns finicky seedlings into thriving plants without the guesswork. 🌱 After struggling with dried-out flats and leggy seedlings last spring, I finally found a system that keeps moisture consistent—no more wilting before true leaves even appear.
This clever setup uses a reservoir at the bottom to feed seedlings from below, mimicking natural rainfall. You’ll spend half the time watering, and seedlings develop stronger roots that translate to healthier transplants in the garden. The clear dome traps humidity, creating the perfect microclimate for germination.
What you end up with is a tray of sturdy, evenly grown seedlings ready for transplanting. No more weak stems or uneven growth—just reliable, foolproof results every time. The system even doubles as a hardening-off tray later in the season. Perfect for beginners or anyone tired of seed-starting drama.
Here’s how to set it up right the first time.
📚 In This Guide
- What you need
- Instructions
- Tips and common mistakes
- Wrapping up and next steps
What you need
- ● Burpee Self-Watering Seed Starting System (1 unit – includes a water reservoir, seedling tray, and lid)
- ● Seed starting mix (1 bag, 1-2 cubic feet – lightweight, sterile, and well-draining)
- ● Seeds (quantity depends on your plants, but 50-100 per tray is a good start)
- ● Water (room-temperature, filtered if possible)
- ● Scissors or pruners (for trimming excess seedling mix or tags)
- ○ Spray bottle (optional but helpful for gentle watering before transplanting)
- ● Grow lights (LED or fluorescent, 12-16 hours/day for optimal growth)
- ● Plant labels or markers (to track seed varieties)
- ● Humidity dome or plastic wrap (to retain moisture during germination)
- ● Fertilizer (low-dose) (like fish emulsion or seed-starting nutrients, diluted to half-strength)
- ● Tray stand or saucer (to keep the reservoir elevated and prevent spills)
Step-by-Step instructions for using the Burpee self-watering seed starting system
This system eliminates the guesswork—just fill, plant, and watch your seedlings thrive.
🌱 Step 1: Assemble and Fill the Reservoir
Start by filling the bottom reservoir with water until it reaches the marked fill line. The Burpee system uses a wicking mechanism, so you want the reservoir full enough to maintain consistent moisture without overflowing. I always use room-temperature water—cold water can shock tender roots.
Place the reservoir on a stable, level surface. The system's design relies on gravity, so any tilt will cause uneven water distribution. You'll see the wicking mat inside the seed tray—this is what draws moisture up to your seeds, so make sure it's fully submerged in the reservoir water.
💧 Step 2: Prepare and Plant Your Seeds
Fill the seed tray with the seed-starting mix provided or your preferred sterile growing medium. Press it down gently to remove air pockets but don't compact it—you want it light enough for roots to penetrate easily. The tray should sit snugly on top of the reservoir.
Follow the seed packet instructions for depth—typically ¼ to ½ inch deep—and space seeds appropriately. I like to use the included planting grid to keep things organized, especially when starting multiple varieties. Once planted, lightly mist the surface with water to settle the soil around the seeds.
☀️ Step 3: Position for Optimal Light and Wait for Germination
Place the assembled system in a location with 14-16 hours of light daily. A south-facing window works for most varieties, but I supplement with a grow light if natural light is insufficient. The self-watering feature means you won't need to water again until the reservoir is nearly empty—usually 7-10 days.
Germination time varies by plant, but you'll know it's working when the first green shoots appear. Keep the reservoir topped off as needed—never let it run completely dry. Once seedlings emerge, remove any humidity dome or plastic wrap if you used one initially. The system's wicking action prevents over-moisture while keeping roots hydrated.
🌿 Step 4: Thin Seedlings and Transition to Independent Growth
When seedlings develop their first true leaves (not the initial seed leaves), thin them to the strongest plant per cell. Use scissors to snip unwanted seedlings at soil level—this prevents disturbing the roots of remaining plants. The Burpee system's individual cells make thinning easier than crowded trays.
After thinning, continue using the reservoir system until seedlings are ready for transplanting. You'll know they're ready when they've developed 3-4 sets of true leaves and the roots are filling the cell. At this stage, I start letting the reservoir dry slightly between waterings to encourage stronger root development.
⏰ Step 5: Prepare for Transplanting
Two weeks before your last frost date, begin hardening off seedlings by moving the entire system outside for 1-2 hours daily. Gradually increase exposure time, protecting them from direct sun initially. The self-watering feature makes this transition smoother—you won't have to worry about watering during this critical period.
When transplanting, water the reservoir thoroughly the day before moving plants. The wicking system ensures roots stay hydrated during the transition. Gently remove seedlings from their cells, being careful not to damage the wicking mat. The Burpee system's design makes this process cleaner than traditional seed trays.
Tips & tricks for perfect seed starting with the Burpee system
This clever setup turns even novice gardeners into seedling pros—here’s how to maximize its potential without the usual growing headaches.
Water Temperature Matters: Room-temperature water is non-negotiable in Step 1. Cold water can shock delicate roots, stunting germination. If your tap water runs cold, let it sit in a pitcher for 10 minutes before filling the reservoir. The wicking mechanism works best when water’s at a consistent temperature—think of it like baby bathwater for your seeds.
The Light Factor: Those 14-16 hours of daily light in Step 3 are critical, but quality matters more than quantity. If using natural light, rotate the tray 180 degrees daily so all seedlings get even exposure. For grow lights, position them 2-4 inches above the tray—closer for seedlings, farther as they grow. Yellowing leaves? That’s a classic sign of insufficient light, not overwatering.
Thinning Technique: When you reach Step 4 and need to thin seedlings, use sharp scissors to snip at soil level rather than pulling. This prevents disturbing the roots of your keepers. I’ve found that thinning right after the first true leaves appear (not the initial seed leaves) gives the strongest plants the space they need to thrive without competition.
Hardening Off Hack: For Step 5’s 1-2 hour daily outdoor sessions, start with just 30 minutes on a shady spot. Gradually increase time and sun exposure over 7-10 days. Pro tip: Place the tray on a wheeled dolly or cart—this makes it easy to move seedlings between indoor and outdoor locations without bending over constantly.
Pro Tips for Burpee Self Watering Seed Starting System
- This clever setup turns even novice gardeners into seedling pros—here’s how to maximize its potential without the usual growing headaches.
- Water Temperature Matters: Room-temperature water is non-negotiable in Step 1.
- The Light Factor: Those 14-16 hours of daily light in Step 3 are critical, but quality matters more than quantity.
Frequently asked questions
about the Burpee Self-Watering Seed Starting System—because growing your own plants should be easy, not confusing! Here are answers to the most common questions to help you get started with confidence.How do I know when my seeds need water?
With this system, you’ll rarely need to check! The reservoir holds enough water for weeks, and the wicking action ensures roots stay hydrated. Only top off the reservoir when the water level drops below the base—usually every 7–14 days, depending on humidity and heat. Pro tip: If the soil feels dry 1 inch below the surface, it’s time to refill!
How long does it take for seeds to germinate in this system?
Germination time varies by seed type, but the self-watering feature actually speeds it up by keeping moisture consistent. Most veggies (like tomatoes or peppers) sprout in 5–14 days, while herbs (basil, cilantro) may take 7–21 days. Check your seed packet for specifics—this system just removes the guesswork!
Can I reuse the system after the growing season?
Clean it thoroughly with soapy water and a 10% bleach solution (1 part bleach to 9 parts water) to kill bacteria. Rinse well, let dry, and store it for next year. Bonus: The modular trays make it easy to swap out damaged sections. Just avoid reusing soil—fresh, sterile mix is key for disease prevention!
What’s the best temperature for seed starting in this system?
Most seeds thrive between 65–75°F (18–24°C), but check your seed packet for exceptions (e.g., peppers prefer 80–90°F). Place the system in a sunny window or under grow lights—just avoid direct heat sources (like radiators) that can dry out the soil too fast. A seedling heat mat (70–75°F) can help speed up germination for slow starters!
What do I do if my seedlings look leggy or weak?
Leggy seedlings usually mean too little light or overcrowding. Move them closer to a grow light (12–16 hours/day) or a south-facing window. If trays are packed, thin seedlings to 1–2 inches apart and fertilize lightly with a diluted seedling formula (half-strength). Quick fix: Bury stems deeper when transplanting—they’ll root faster!
| Quick Troubleshooting Guide |
|---|
| Yellow leaves? Overwatering or nutrient deficiency. Let soil dry slightly between waterings. |
| Mold on soil? Too much moisture. Reduce water in the reservoir and improve airflow with a small fan. |
| Seeds not sprouting? Check moisture (soil should be damp, not soggy) and warmth. Some seeds need light to germinate—follow packet instructions! |
Wrapping up and next steps
The Burpee Self-Watering Seed Starting System is your ticket to effortless, thriving seedlings—no guesswork, no overwatering, just perfectly hydrated growth from day one! 🌱 With its built-in reservoir and smart design, you’ll save time, reduce stress, and enjoy a higher success rate for your garden dreams.
Now that you’re equipped with the know-how, it’s time to roll up your sleeves and start planting!
🌱 Your Next Step:
- Grab your kit and follow the steps—your future plants (and future harvests!) will thank you.
- Experiment with different seeds to see what thrives best in your system.
- Share your wins with fellow gardeners (or flex on your neighbors—we won’t judge!).