
Propagation
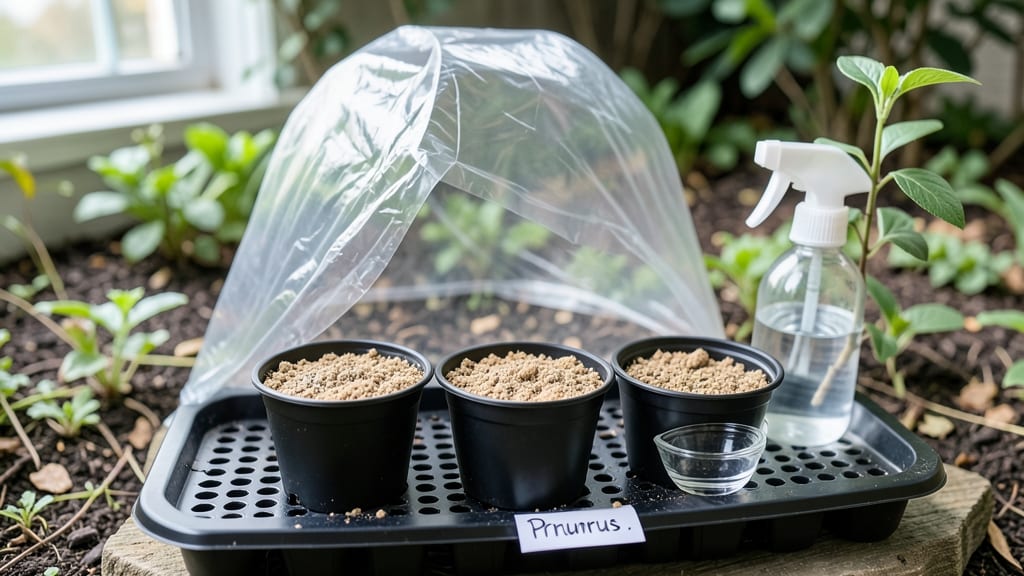
Cherry tree seed germination starts with a 90-day cold soak—the secret to breaking their stubborn dormancy. 🌱 I learned the hard way that skipping this step means waiting years (or never) for sprouts. The process mimics winter's chill, tricking seeds into thinking spring has arrived when it's still deep freeze outside.
You'll need just three things: seeds (fresh is best), a damp paper towel or peat moss, and a sealed container or plastic bag. Place them in the fridge for 3 months, checking monthly to keep them moist but not soggy.
Patience is key—this isn't a quick fix, but it's the only way to guarantee those tiny seeds will wake up when you're ready for them.
After stratification, plant them ½ inch deep in well-draining soil, keeping it consistently moist under a grow light or sunny window. Germination takes 2-4 weeks, and the first shoots are delicate—thin seedlings to the strongest one to avoid overcrowding.
The payoff? A sturdy sapling that could grow into your future shade tree.
This method works for sweet, sour, and wild cherries alike, though some varieties (like Bing) may need extra time. The biggest mistake? Rushing the cold treatment—don't be tempted to speed it up with heat. Trust the process, and you'll see those first green leaves push through soil by early spring.
📚 In This Guide
- What you need
- Instructions
- Tips and common mistakes
- Wrapping up and next steps
What you need
- ● Cherry tree seeds: 5–10 fresh, plump seeds (harvested from ripe, healthy cherries). Pro tip: 💡 Remove seeds from cherries, rinse, and let them dry for 1–2 days before use.
- ● Cold stratification setup: 1 small paper towel or coffee filter
- ● 1 resealable plastic bag (quart-sized or larger)
- ○ 1–2 tablespoons of moist peat moss or sphagnum moss (optional but recommended for humidity)
- ● Germination container: 1 small pot (4–6 inches deep) with drainage holes or
- ● 1 seed tray with a clear lid (to retain moisture)
- ● Potting mix: 1 bag of well-draining seed-starting mix (avoid garden soil—it’s too dense!)
- ● Spray bottle (for gentle watering)
- ● Refrigerator (for cold stratification, set to 34–40°F (1–4°C))
- ● Grow lights or sunny windowsill (for warmth after stratification)
- ● Seedling heat mat (to maintain 70–75°F (21–24°C) during germination)
- ● Humidity dome (to create a mini greenhouse effect)
- ● pH testing kit (ideal potting mix pH: 6.0–7.0)
- ● Fungicide (like hydrogen peroxide or cinnamon powder to prevent mold)
- ● Plant labels & markers (to track seed varieties and dates!)
Step-by-step instructions for germinating cherry tree seeds
Cold stratification is the secret to breaking dormancy—here's how I turn stubborn cherry seeds into sprouts.
🌱 Step 1: Collect and Prepare the Seeds
Harvest fully ripe cherries and remove the pits carefully, cleaning off any remaining fruit. Let the pits dry completely for 3-5 days at room temperature—this prevents mold during stratification. I like to place them on a paper towel in a single layer, checking daily for moisture.
Once dry, store the pits in a sealed container in your refrigerator's crisper drawer. The 35-40°F temperature mimics winter's natural cold period, which is critical for breaking dormancy. This step takes 8-12 weeks, so plan ahead—patience here prevents future frustration.
💧 Step 2: Stratify the Seeds Properly
After cold treatment, soak the seeds in lukewarm water for 24 hours to rehydrate the outer shell. This softens the seed coat and jumpstarts germination. You'll see tiny cracks appear in some seeds—that's your signal the process is working.
Fill a container with moistened peat moss or coconut coir (keep it damp but not soggy) and plant the seeds 1 inch deep. Space them 2 inches apart so roots have room to develop. Cover the container loosely with plastic wrap to maintain humidity while allowing airflow.
☀️ Step 3: Move to Warmth for Germination
Transfer the container to a warm spot—70-75°F is ideal—once you see the first signs of sprouting (4-8 weeks after stratification). I use a seedling heat mat under my growing tray to maintain consistent warmth. Keep the peat moss evenly moist by misting lightly every 2-3 days.
Germination can be uneven, so don't be surprised if some seeds sprout weeks after others. Once the seedlings reach 2-3 inches tall and have their first true leaves, they're ready for their own pots. Watch for leggy growth—this means your light source is too far away or too weak.
✂️ Step 4: Transplant Seedlings Carefully
Gently remove each seedling using a small trowel, being careful not to damage the delicate roots. Plant them in individual 3-4 inch pots filled with a mix of 50% potting soil and 50% perlite to prevent compaction. Bury the stem up to the first set of true leaves—this encourages stronger root development.
Place the pots under grow lights for 14-16 hours daily to prevent stretching. Cherry seedlings are sensitive to transplant shock, so keep them in a humid environment for the first week. You'll know they're thriving when new leaves emerge within 2-3 weeks—this is your reward for the waiting game.
Tips & tricks for perfect cherry tree seed germination
Here's what I learned after struggling through my first few batches of cherry seed germination—these tricks make all the difference.
Timing Secret: The 24-hour soak in lukewarm water is non-negotiable. I learned this the hard way after skipping it—some seeds cracked too late, and others never sprouted. Use a thermometer to confirm the water is 90-95°F; too hot can damage the seed, while too cold won't soften the shell properly.
Temperature Matters: Your refrigerator's crisper drawer should stay at 35-40°F consistently. If your fridge runs warmer, place the sealed container on the bottom shelf where it's coldest. I use a small thermometer inside the container to monitor—fluctuations can break dormancy too soon, causing mold instead of sprouts.
Moisture Management: The peat moss or coconut coir must stay damp but never soggy during germination. I use a spray bottle to mist every 2-3 days and check moisture by squeezing a handful—it should feel like a wrung-out sponge. Overwatering suffocates seeds, while underwatering halts growth. Place the container on a tray with pebbles and water to maintain humidity without direct contact.
Lighting Strategy: Once seedlings reach 2-3 inches, provide 14-16 hours of light daily using grow lights. Position them 2-3 inches above the seedlings and adjust as they grow. I noticed leggy seedlings when lights were too far—now I use a timer to automate the cycle and prevent stretching toward the light source.
Pro Tips for Cherry Tree Seed Germination
- Here's what I learned after struggling through my first few batches of cherry seed germination—these tricks make all ...
- Timing Secret: The 24-hour soak in lukewarm water is non-negotiable. I learned this the hard way after skipping it—so...
- Temperature Matters: Your refrigerator's crisper drawer should stay at 35-40°F consistently. If your fridge runs warm...
Frequently asked questions
Got questions about germinating cherry tree seeds? You’re not alone! Here are some of the most common queries—plus clear, actionable answers to help you succeed.
How long does cherry tree seed germination take?
Patience is key! With cold stratification (the recommended method), germination typically takes 4–12 weeks. Some seeds may sprout faster, while others need extra time. Keep the soil moist and warm (around 70°F) once stratification is complete. If nothing happens after 3 months, the seeds may need to be refreshed or replaced.
Can I skip cold stratification for cherry tree seeds?
Not ideal! Cherry seeds have a hard seed coat that requires cold, moist conditions to break dormancy. Skipping stratification often results in low or no germination. If you’re in a hurry, try soaking seeds in warm water for 24 hours before planting—but cold stratification still yields the best results for reliability.
What’s the best soil mix for germinating cherry tree seeds?
Use a light, well-draining mix like a 50/50 blend of peat moss or coconut coir and perlite. Avoid heavy garden soil, which can compact and suffocate seeds. A seed-starting tray with drainage holes works perfectly—just keep the mix consistently moist (not soggy) during germination.
My cherry seeds are moldy—what went wrong?
Mold is a sign of overwatering or poor airflow. To fix it:
- Stop watering immediately and let the soil dry slightly.
- Remove any visibly moldy seeds (they won’t sprout).
- Repot healthy seeds in fresh, sterile soil and use a spray bottle for gentler watering.
- Consider adding a fungicide like hydrogen peroxide (1 part peroxide to 10 parts water) to prevent future issues.
Will a cherry tree grown from seed taste like store-bought cherries?
Probably not! Seed-grown cherry trees often produce smaller, tart, or less flavorful fruit compared to grafted varieties. If you want sweet, juicy cherries like those at the grocery store, buy a grafted sapling instead. Seed germination is best for ornamental or rootstock purposes—not commercial fruit production.
Wrapping up and next steps
Growing cherry trees from seeds is a rewarding journey that blends patience with science! With the right cold stratification techniques and a dash of care, you’ll soon watch those tiny seeds sprout into vibrant saplings.
Remember, consistency is key—whether it’s moisture levels, temperature, or timing—each step builds the foundation for success.
Now that you’re armed with the knowledge, it’s time to take action! Grab those seeds, follow your blueprint, and let nature work its magic. Soon, you’ll be nurturing a thriving cherry tree—and maybe even sharing fresh fruit with neighbors in just a few years. Happy growing! 🌱✨