
Lawn
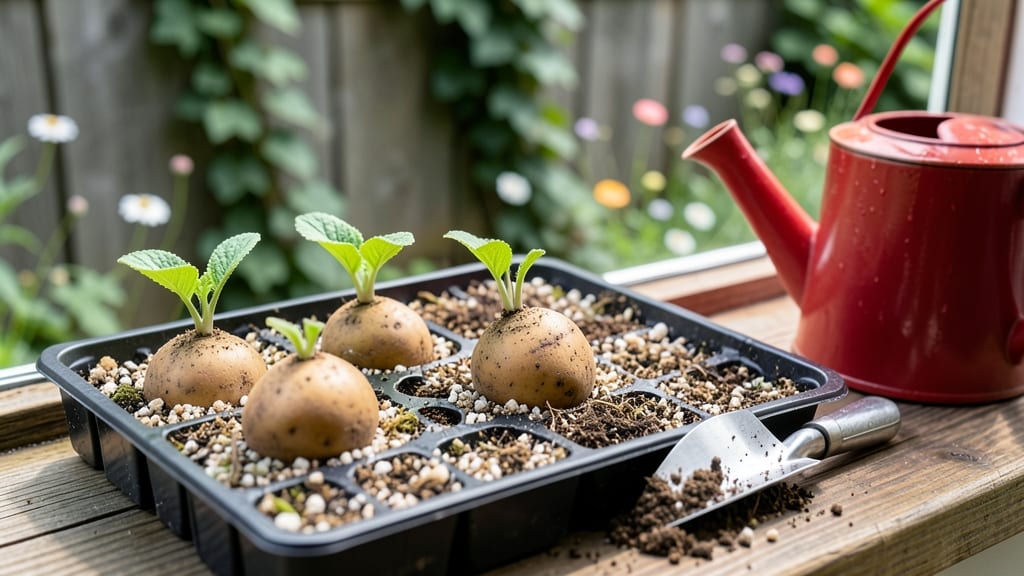
Chitting seed potatoes gives you a 4-week head start on the growing season—no greenhouses or fancy equipment needed. 🌱 I remember my first try, where I impatiently planted unchitted potatoes and watched them lag behind neighbors' lush vines.
That year, I learned the simple trick of sprouting potatoes indoors first, and it changed everything. All you need is a cool, bright spot (like a basement window), a tray or egg cartons, and 4-6 weeks before your last frost.
The process is foolproof: place whole seed potatoes in a tray with their "eyes" facing up, and watch as sturdy sprouts emerge. These chits establish roots faster and produce stronger plants that hit the ground running.
By planting time, you'll have 2-4 inch sprouts ready to go, meaning your potatoes will emerge from the soil 2-3 weeks earlier than unchitted ones. The vines grow taller, the tubers form faster, and you avoid the heartbreak of slow starts in cool spring soil.
Works for all potato varieties—Russets, Yukon Golds, reds—and even saves space if you're short on garden real estate. Let's get those potatoes sprouting!
📚 In This Guide
- What you need
- Instructions
- Tips and common mistakes
- Wrapping up and next steps
What you need
- ● Chitted seed potatoes: 5–10 lbs (or ~10–20 medium-sized tubers), certified disease-free. Choose early, mid-, or late varieties based on your growing season.
- ● Growing containers or garden bed: Containers: 5–10 gallon pots (1 per potato) with drainage holes, or a large bin/trough (10–12" deep).
- ● Garden bed: Loose, well-draining soil (sandy loam ideal) with a pH of 5.0–6.5. Till to 12" deep.
- ● Potting mix or compost: 2–3 bags of high-quality, peat-free mix (or homemade compost with perlite for aeration).
- ● Fertilizer: Balanced organic fertilizer (10-10-10) or potato-specific granules (follow label rates).
- ● Gloves: Heavy-duty gardening gloves to protect hands from soil and sharp potato edges.
- ● Hand trowel or spade: For planting and soil aeration.
- ● Watering can or hose with gentle nozzle: Avoid overwatering—aim for moist (not soggy) soil.
- ● Sunlight access: 6+ hours of direct sunlight daily (south-facing spot or grow lights).
- ○ Optional but helpful: Mulch (straw or grass clippings) to retain moisture.
- ● Potato clips or wire mesh (for hanging bags to prevent greening).
- ● pH testing kit to monitor soil acidity.
Step-by-step instructions for chitting seed potatoes
Here's how to jumpstart your potato harvest with strong, healthy sprouts in just four weeks.
🌱 Step 1: Select and Prepare Your Seed Potatoes
Choose certified organic seed potatoes—avoid grocery store potatoes, which are treated to prevent sprouting. Look for medium-sized tubers with at least one eye (the small dimple where sprouts emerge). I like to pick ones with 2-3 eyes for best results.
Place the potatoes in a cool, bright spot (50-60°F) for 2-3 weeks before chitting. This mimics natural dormancy break and prevents premature sprouting. You'll see tiny green shoots appear—these are your first sign of life. If sprouts grow too long before chitting, they'll be leggy and weak.
⏰ Step 2: Position for Optimal Sprouting Conditions
Once sprouts reach 1-2 inches, it's time to chit. Place the potatoes in a well-lit, cool location (like a sunny windowsill) with temperatures between 50-60°F. I use egg cartons or a shallow tray to keep them organized and easy to monitor.
Position the potatoes with the sprouts facing upward—this encourages straight growth. If sprouts bend toward the light, rotate the container daily so they grow uniformly. You'll see firm, white shoots developing within 1-2 weeks of chitting. Avoid warm spots—heat speeds up growth too quickly, leading to weak stems.
☀️ Step 3: Monitor and Adjust Light Exposure
After 2-3 weeks of chitting, the sprouts should be 2-3 inches long with small green tips forming. This is the perfect stage for planting. If sprouts turn yellow or leggy, they need more light—move them to a sunnier window or under a grow light for 12-14 hours daily.
Watch for mold or soft spots—these mean the potatoes are rotting. Remove any affected tubers immediately. Healthy sprouts will have thick stems and small green leaves at the tips. If your kitchen stays below 50°F, germination slows—patience is key until shoots firm up.
🪴 Step 4: Plant Chitted Potatoes for Strong Growth
When sprouts reach 2-3 inches, they're ready for the garden. Plant them 4-6 inches deep in loose, well-draining soil. Space rows 2-3 feet apart to allow air circulation. I like to plant them 2 weeks before the last frost—this gives roots time to establish before warm weather arrives.
Water lightly after planting to settle the soil, but avoid overwatering—soggy soil drowns tender sprouts. In 3-4 weeks, you'll see vigorous green foliage emerging. If leaves yellow or wilt, check for overwatering or poor drainage—potatoes hate soggy feet. Mulch with straw to keep soil moist and cool.
Tips & tricks for perfect chitted seed potatoes
Here's what nobody tells you about getting those perfect sprouts every time.
Selection Tip: Those "eyes" on your seed potatoes are the key to success. Look for tubers with 2-3 eyes that are evenly spaced—this gives you multiple strong sprouts per potato. Avoid potatoes with deep grooves or cracks, as these can lead to rot during the chitting process. I've learned the hard way that grocery store potatoes won't work—they're treated to prevent sprouting, so stick with certified organic seed potatoes.
Temperature Matters: The 50-60°F range is non-negotiable for that initial 2-3 week pre-chitting period. If your kitchen runs warmer, move them to a basement or garage. I once tried chitting in a 70°F room and ended up with weak, leggy sprouts that broke easily. For the chitting phase itself, maintain that same 50-60°F range—any warmer and you'll get rapid but weak growth.
Lighting Strategy: Natural light is best, but if you're using grow lights, position them 12-14 inches above the potatoes. Too close and you'll scorch the sprouts; too far and they'll stretch toward the light. I rotate my setup daily to prevent uneven growth. Watch for those green tips forming—this tells you the sprouts are getting enough light but not too much. If they turn yellow, they're begging for more light.
Planting Preparation: When your sprouts reach 2-3 inches, handle them gently—they're more delicate than they look. I like to plant them 2 weeks before last frost because those established sprouts give you a 3-4 week head start on the season. The deeper you plant (4-6 inches), the more stable the potato will be against wind and pests. And here's a pro move: plant with the sprouts facing downward slightly—they'll grow straighter and stronger.
Pro Tips for Chitted Seed Potatoes
- Here's what nobody tells you about getting those perfect sprouts every time.
- Selection Tip: Those "eyes" on your seed potatoes are the key to success. Look for tubers with 2-3 eyes that are even...
- Temperature Matters: The 50-60°F range is non-negotiable for that initial 2-3 week pre-chitting period. If your kitch...
Frequently asked questions
Got questions about chitting seed potatoes?
You’re not alone! Here are some of the most common queries—and their straightforward answers—to help you grow a thriving potato patch with confidence.
What exactly does "chitting" mean, and why bother?
Chitting is simply encouraging seed potatoes to sprout before planting by exposing them to light and cool temperatures. It gives your tubers a head start, leading to faster germination, stronger plants, and a bigger harvest. Think of it as giving your potatoes a mini-growth boost before they hit the soil!
How long does it take to chit potatoes, and when should I plant them?
Chitting typically takes 3–4 weeks in a cool, bright spot (like a windowsill). Once sprouts are 1–2 inches long, it’s time to plant them outdoors—2–4 weeks before your last frost date. For most gardeners, this means planting in late March to early April in cooler climates or February to March in warmer zones.
What if my chitted potatoes don’t sprout? Troubleshooting tips!
If your potatoes aren’t sprouting after 2–3 weeks, don’t panic! Check these fixes:
- Light issue: Move them to a brighter spot (but avoid direct sun, which can scorch them).
- Temperature too warm: Ideal chitting temps are 45–55°F. If your home is warmer, try a basement or garage.
- Dormant tubers: Some varieties (like red potatoes) sprout slower. Try gently nicking the skin with a knife to encourage growth.
- Rot or mold: If sprouts look mushy or fuzzy, toss them—they’re likely spoiled.
Still no luck? Try a fresh batch of seed potatoes!
Can I use store-bought potatoes for chitting, or do I need special seed potatoes?
While you can chit store-bought potatoes, they’re not ideal because:
- They’re often treated to prevent sprouting (wax coatings, sprout inhibitors).
- They may carry diseases from storage.
- Seed potatoes are bred for better yields and disease resistance.
For best results, use certified seed potatoes from a nursery. If you’re on a budget, try organic or heirloom varieties from garden centers.
What’s the best way to store chitted potatoes before planting?
Once sprouted, store your chitted potatoes in a cool (45–50°F), dark, and humid place (like a cardboard box with a damp towel) until planting. Avoid refrigeration—it can turn their starches to sugar, making them sweeter and less ideal for planting. Keep them upright in egg cartons or trays to prevent damage.
Do I need to soak chitted potatoes before planting?
Soaking isn’t necessary, but it can help if your soil is very dry or clay-heavy. Soak them in room-temperature water for 1–2 hours before planting to kickstart hydration. Skip this step if your soil is moist—over-soaking can cause rot. Pro tip: Add a pinch of compost tea to the water for a gentle nutrient boost!
Wrapping up and next steps
Growing your own potatoes from chitted seed potatoes is a rewarding way to kickstart a thriving garden in just four weeks! 🌱 With the right prep—like selecting certified seeds, chitting in a bright spot, and ensuring proper moisture—you’ll set the stage for a bountiful harvest.
Whether you’re a seasoned gardener or a curious beginner, this method makes planting effortless and maximizes your success.
Ready to dig in? Start chitting your potatoes today and watch your garden transform into a lush, potato-filled paradise! 🥔✨ Next up: Plant them in well-draining soil, and let nature do the rest.