
Lawn
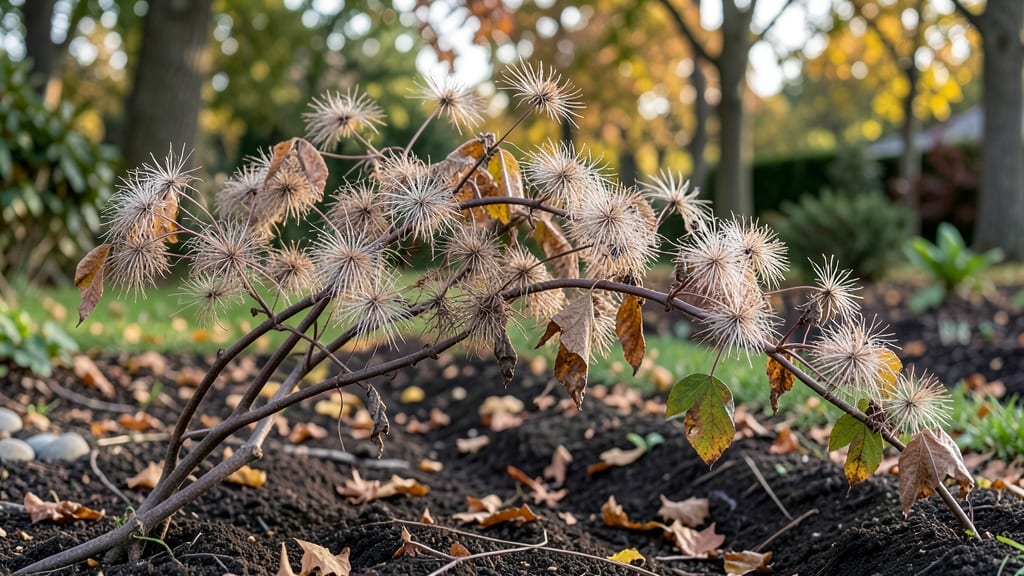
Those feathery clematis seed heads aren’t just pretty—they’re the secret to next year’s fragrant blooms and stunning winter arrangements. 🌿 I used to prune them off without thinking, but now I wait until they turn golden-brown before carefully harvesting.
The process is simple, and the payoff is worth it: dried seed heads that last through winter and seeds for new plants.
Timing matters most—harvest seed heads when they’re fully dry but before they scatter in late fall. You’ll need sharp scissors, brown paper bags for drying, and a cool, dark place to store them.
The key is patience: dried seed heads keep their shape and color for months, making them perfect for winter bouquets or seed-saving projects.
Once dried, you can either store the seeds in envelopes for spring planting or use the seed heads in dried arrangements. The delicate plumes add texture and movement to any display. Plus, saving seeds ensures you’ll have the same fragrant varieties year after year—no store-bought plants needed.
For best results, keep seed heads in a dry spot away from moisture. If you’re saving seeds, label them clearly with the variety and date. This method works for all clematis types, whether you’re growing them on trellises, arbors, or walls.
Ready to turn those seed heads into next year’s garden highlights?
📚 In This Guide
- What you need
- Instructions
- Tips and common mistakes
- Wrapping up and next steps
What you need
- ● Mature clematis seed heads: Harvest when fully brown, dry, and papery (usually late fall/winter). Aim for at least 10–20 healthy heads for best results.
- ● Pruning shears or sharp scissors: 1 pair (sterilized with rubbing alcohol to prevent disease transfer).
- ● Brown paper bags: 5–10 medium-sized bags (kraft paper works best—avoid plastic!).
- ○ Newspaper or dry paper towels: For lining storage containers (optional but helpful for absorbency).
- ● Labeling tags & permanent marker: To track varieties (e.g., ‘Jackmanii’ or ‘Niobe’).
- ● Small mesh bags or organza envelopes: For individual seed head storage (e.g., 5–10 if saving rare cultivars).
- ○ Desiccant packets: 1–2 (optional, for extra-dry climates to prevent mold).
- ● Spray bottle with water: For lightly misting heads if your climate is too dry during drying.
- ● Gloves (nitrile or cotton): Protects hands from clematis sap (can irritate skin).
- ● Timing: Harvest seed heads after the first hard frost (when they’re completely dry but before they shatter).
- ● Drying space: A cool, dark, well-ventilated area (e.g., garage, shed, or basement) with 50–70% humidity.
- ● Patience: Drying takes 4–6 weeks—resist the urge to rush!
How to preserve clematis seed heads for next season’s blooms
Here’s my foolproof method for drying and storing clematis seed heads—so you’ll have fragrant blooms again next year.
🌿 Step 1: Harvest Seed Heads at Peak Maturity
Wait until the seed heads turn a rich, deep brown and begin to split open naturally—this usually happens in late fall after the first frost. I like to harvest on a dry day when the air feels crisp, as moisture can speed up decay. Use clean, sharp scissors or pruning shears to cut stems about 6 inches below the seed head—this extra stem length helps with stability later.
Gently shake each head over a clean sheet of newspaper to remove any loose debris or spent blooms. This keeps your storage area tidy and prevents mold. If some seeds have already fallen, don’t worry—just focus on the intact heads. Store them in a paper bag (not plastic) for the next step.
💧 Step 2: Dry Seed Heads Slowly and Evenly
Spread the harvested seed heads in a single layer on a wire rack or a flat tray lined with paper towels in a warm, dry, well-ventilated spot. I place mine near a sunny window but out of direct sunlight—too much heat can crack the seed pods prematurely. Let them dry for 2-3 weeks, flipping them occasionally to ensure even drying.
You’ll know they’re ready when the seed pods feel lightweight and brittle to the touch. If any pods still feel damp, give them another week. Avoid using a hairdryer or oven—slow drying preserves the seed viability far better than forced heat.
⏰ Step 3: Store in a Cool, Dark Place
Once fully dry, transfer the seed heads to paper envelopes or small brown paper bags—these allow airflow while keeping pests out. Label each envelope with the clematis variety and the year. Store them in a cool, dark closet or seed drawer where the temperature stays between 40-50°F and humidity remains low.
Check the seed heads every few months to ensure no moisture has returned or pests have taken up residence. If stored properly, they’ll stay viable for 1-2 years, though I’ve had luck with some varieties lasting even longer. The key is consistency—don’t let them sit in damp conditions, even briefly.
🌱 Step 4: Plant Seeds in Spring for Next Year’s Blooms
In early spring, fill small pots with seed-starting mix and plant 2-3 seeds per pot at a depth of about ¼ inch. Mist the soil lightly with water to keep it moist but not soggy. Place the pots in a warm spot (around 65-70°F) with bright, indirect light until germination, which typically takes 2-4 weeks.
Once seedlings have 2-3 true leaves, transplant them into individual pots. Keep them indoors under grow lights for another 4-6 weeks before hardening off and planting outside after the last frost. Clematis grown from seed may take 2-3 years to bloom, but the wait is worth it for unique, fragrant varieties!
Tips & tricks for perfect clematis seed head preservation
Here’s what I’ve learned from years of saving clematis seeds—simple tricks that make all the difference between viable seeds and wasted effort.
Harvest Timing: The first frost is your signal, but don’t wait too long—once seed heads turn completely brown and brittle, they lose viability. I’ve found that harvesting right after the first hard frost gives me the best results. If you miss the window, the seeds may scatter naturally, so keep an eye on your plants. The 6-inch stem length matters too—longer stems make handling easier during drying and give you more room for error when attaching labels later.
Drying Conditions: That 2-3 week drying period is non-negotiable, but the environment matters just as much. I’ve ruined batches by placing them in too-humid areas or near heat sources. Aim for a spot with gentle airflow—like an open kitchen shelf away from the stove—rather than a closed cabinet. The paper towel lining on your tray absorbs excess moisture better than plastic, which traps humidity. Flip them weekly to prevent uneven drying, and watch for those brittle pods—they’re your cue to move to storage.
Storage Organization: Labeling isn’t just about variety names—include the harvest year too. I’ve accidentally used 3-year-old seeds before realizing they were past their prime! Store seed heads in small batches (20-30 per envelope) to prevent crushing. If you have multiple clematis varieties, keep them separated—some cross-pollinate, and you might not get the fragrance you expect. The 40-50°F range is ideal, but even a slightly warmer closet works as long as you check for condensation monthly.
Pro Tips for Clematis Seed Heads
- Here’s what I’ve learned from years of saving clematis seeds—simple tricks that make all the difference between viabl...
- Harvest Timing: The first frost is your signal, but don’t wait too long—once seed heads turn completely brown and bri...
- Drying Conditions: That 2-3 week drying period is non-negotiable, but the environment matters just as much. I’ve ruin...
Frequently asked questions
Got questions about saving clematis seed heads for next season?
You’re not alone! Here are answers to the most common queries—so you can confidently collect, store, and grow your own fragrant blooms.
When is the best time to harvest clematis seed heads?
Harvest seed heads after they’ve fully dried on the vine—usually in late fall or early winter. Look for papery, brown pods that split open naturally. Avoid harvesting too soon (green pods won’t store well) or too late (seeds may scatter). Aim for crisp, dry weather to prevent mold.
How do I store clematis seeds to ensure viability?
Store seeds in a cool, dry place (like a sealed envelope or paper bag with silica gel). Keep them in the fridge (35–40°F) for 3–6 months or freeze them for up to a year. Label with the harvest date—seeds typically stay viable for 2–3 years if stored properly.
Can I grow clematis from seed heads instead of buying plants?
While seeds may not always produce identical blooms to the parent plant, they’re a fun (and free!) way to experiment. Stratify seeds in moist sand in the fridge for 4–6 weeks before planting outdoors in spring. Patience is key—germination can take 6–12 months!
What should I do if my seed heads get moldy or bugs?
Discard any seed heads with visible mold, sliminess, or pests (like weevils). To prevent issues, harvest on a dry day and store seeds in a well-ventilated container with a desiccant. If bugs appear, freeze the seeds for 48 hours to kill larvae before storing again.
Will clematis grown from seed heads bloom the first year?
Probably not! Seed-grown clematis often take 2–3 years to mature and bloom. Focus on giving them strong support (like a trellis) and consistent moisture. Deadhead spent blooms in the first year to encourage foliage growth—future flowers will thank you!
Wrapping up and next steps
Clematis seed heads are a gardener’s hidden treasure—packed with potential for next year’s stunning blooms!
By drying and storing them properly, you’re not just preserving beauty; you’re nurturing future growth with minimal effort. Embrace this simple yet rewarding process, and watch your garden flourish with vibrant, fragrant clematis in no time.
Ready to take the next step? Start small—try drying a few seed heads this season, and soon, you’ll be a pro! Share your progress with fellow gardeners or experiment with different storage methods to find what works best for your space. Happy gardening! 🌱✨