
Propagation
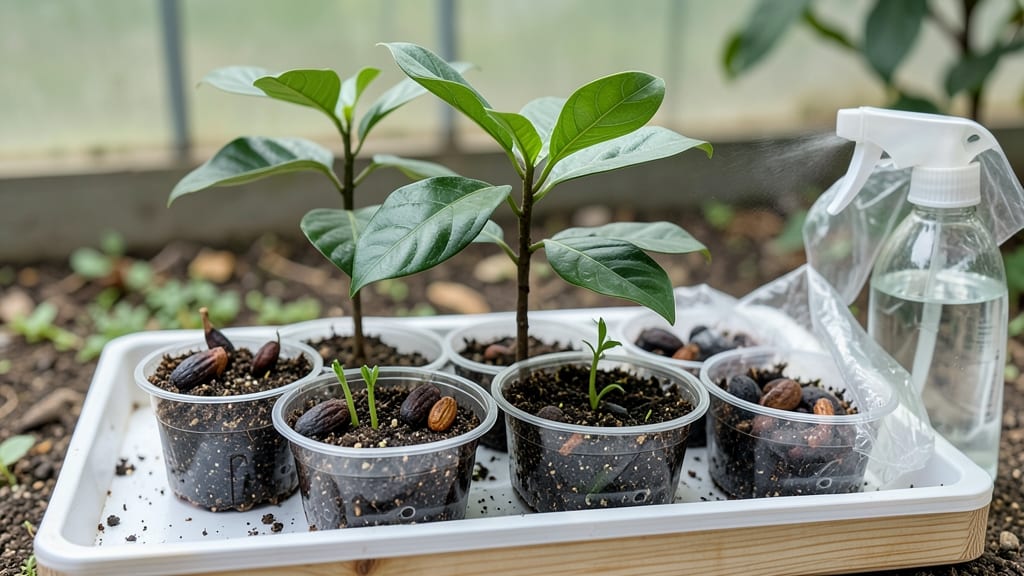
Cocoa seed germination starts with the right seeds and patience—no cold stratification needed. 🌱 I’ve sprouted dozens of cocoa seeds, and the key is mimicking their tropical home’s warmth and humidity.
These seeds don’t need a winter chill; they just need consistent moisture and steady heat, which makes them surprisingly beginner-friendly. The process is simple: soak seeds overnight, plant them shallowly in warm, moist soil, and keep them covered until sprouts appear.
Most seeds crack open within 2-3 weeks, with full germination in 60 days if conditions are perfect. The trick is maintaining 75-85°F soil temps and high humidity without letting the soil dry out. Once those first green leaves push through, you’ll have tiny seedlings ready for their next phase.
They’ll grow fast with proper care, and you’ll soon be transplanting them into larger pots. The real reward? Watching those glossy leaves unfold—proof you’ve cracked the code on tropical propagation. Works best in subtropical climates, but even cooler zones can succeed with a heat mat and clear plastic cover.
Here’s how to avoid the most common pitfalls and keep your cocoa seeds thriving from day one.
📚 In This Guide
- What you need
- Instructions
- Tips and common mistakes
- Wrapping up and next steps
What you need
- ● Fresh cocoa beans (fermented and dried, ideally from a Theobroma cacao variety like Criollo or Forastero). Quantity: 5–10 seeds (for best success rates).
- ○ Biodegradable seed-starting pots (3–4 inches deep) or a seed tray with drainage holes. Optional: Peat pellets or coconut coir for moisture retention.
- ● Well-draining potting mix—mix 50% peat moss or coco coir with 50% perlite or vermiculite (sterilized to prevent mold). Avoid garden soil!
- ○ Spray bottle (for gentle watering) or a fine-mist humidifier (optional but helpful).
- ● Clear plastic dome or plastic wrap (to create a humid microclimate).
- ○ Heating mat (optional but highly recommended for faster germination—set to 75–85°F (24–29°C)).
- ● Thermometer/hygrometer (to monitor temperature and humidity; 60–80% humidity is ideal).
- ○ Small fan (optional, for light air circulation to prevent fungal issues).
- ● Sharp knife or scissors (for nicking seeds if needed—see tips below!).
- ● Plant labels & marker (to track germination dates and varieties).
- ● 🌡️ Temperature is key! Cocoa seeds germinate best in warmth—no cold stratification needed. Use a heat mat or place pots near a sunny window.
- ● 💧 Keep it moist, not soggy. Water lightly daily, ensuring the mix stays damp (not waterlogged).
- ● ✨ Speed up germination: Soak seeds in lukewarm water for 24 hours before planting, or gently nick the seed coat with a knife to encourage sprouting.
Step-by-step instructions for germinating cocoa seeds
Here's how to coax those cocoa seeds into sprouts—no cold treatment needed.
🌱 Step 1: Prepare the Seeds for Planting
First, soak the cocoa seeds in warm water for 24 hours. This softens the tough outer shell and kickstarts germination. I like to use a small bowl with just enough water to cover the seeds completely—no need for fancy equipment. After soaking, drain them and let them sit in a paper towel for another 12 hours to prevent mold.
Here's the thing—cocoa seeds germinate best when they're slightly damp but not soggy. You'll see the seed coats start to split open after that 12-hour rest, which is your signal they're ready for planting. If they don't split, give them another 6 hours in the towel. Patience here pays off—rushing leads to weak sprouts.
🪴 Step 2: Set Up the Germination Container
Fill a small container—4-6 inches deep—with a mix of 50% peat moss and 50% perlite. This lightweight blend drains well but holds enough moisture to keep seeds happy. I use a clear plastic nursery tray because it lets me monitor moisture levels without disturbing the seeds. Moisten the mix until it feels like a damp sponge—squeeze it gently, and just a few drops should come out.
Plant the seeds ½ inch deep, spacing them 2 inches apart in the container. The key here is to avoid burying them too deep, or they'll struggle to push through the soil. After planting, gently press the soil around each seed to ensure good contact. Cover the container with plastic wrap or a humidity dome—this traps warmth and moisture, which cocoa seeds crave for germination.
☀️ Step 3: Provide Warmth and Indirect Light
Place the container in a spot with warmth (75-85°F)—a seedling heat mat works wonders if you have one, but a sunny windowsill near a south-facing window can also work. Avoid direct sunlight at this stage; cocoa seeds need warmth more than light. You'll see tiny sprouts emerge in 7-14 days, but don't be surprised if it takes closer to 21 days—every seed has its own pace.
Check the soil moisture daily. The plastic wrap should keep the environment humid, but if the soil feels dry to the touch, mist it lightly with water. Overwatering now is the biggest mistake—it causes rot before the seeds even sprout. Once the first true leaves appear (not the initial seed leaves), remove the plastic wrap immediately to prevent fungal issues.
💧 Step 4: Transplant Seedlings to Individual Pots
After 4-6 weeks, when seedlings have 2-3 sets of true leaves, it's time to transplant them into 4-inch pots filled with a mix of 60% potting soil and 40% coconut coir. This gives their roots room to grow without competition. Handle the seedlings gently—cocoa roots are delicate, and rough treatment stunts growth. I like to use a small spoon to scoop each seedling out of the germination container, keeping as much soil around the roots as possible.
Plant each seedling 1 inch deeper than it was in the germination container. This encourages stronger root development. Water lightly after transplanting, and place the pots in a spot with bright, indirect light. Avoid cold drafts—cocoa seedlings are tropical and thrive in warmth. You'll notice new growth within 10-14 days, signaling they've adjusted to their new home.
⏰ Step 5: Maintain Ideal Conditions for Growth
Keep the soil consistently moist but never soggy. Stick your finger 1 inch into the soil—if it feels dry, it's time to water. Use room-temperature water to avoid shocking the roots. Cocoa seedlings need high humidity (60-70%), so I place a tray of water near the pots and mist the leaves occasionally. This mimics their natural tropical environment and prevents leaf edges from browning.
Rotate the pots a quarter turn weekly to ensure even growth toward the light. You'll see leggy seedlings if they're stretching toward a light source—this is a sign they need more brightness. If this happens, move them closer to a grow light or a sunnier window. With consistent care, your cocoa seedlings will be ready for larger pots or outdoor planting in 60 days.
Tips & tricks for perfect cocoa seed germination
Here's what nobody tells you about getting those cocoa seeds to sprout like a pro.
Soaking Strategy: The 24-hour warm water soak is non-negotiable—it's what breaks the seed's dormancy. Use a bowl just large enough to cover the seeds completely, and change the water halfway through if it starts looking cloudy. I've found that adding a pinch of cinnamon to the soaking water can help prevent mold during that critical 12-hour towel rest period. This is where most people fail—don't skip this step or you'll end up with weak sprouts.
Container Selection: That 4-6 inch depth isn't arbitrary—it gives roots room to establish before transplanting. I recommend using a clear plastic nursery tray because you can actually see when the soil needs moisture without disturbing the seeds. The 50/50 peat moss and perlite mix is perfect for cocoa seeds because it drains well but still holds enough moisture. If you don't have perlite, you can substitute it with coarse sand, but make sure it's washed and sterilized first.
Warmth Watch: Maintaining that 75-85°F range is crucial for germination. If your home tends to run cooler, consider placing the container on top of your refrigerator (not inside) or using a seedling heat mat. I've seen germination times double when seeds are kept in cooler environments. The key is consistency—fluctuating temperatures can confuse the seeds and delay sprouting. Once you see those first tiny sprouts, you can gradually reduce the heat slightly as they develop.
Transplant Timing: Waiting for 2-3 sets of true leaves before transplanting ensures your seedlings have strong enough root systems to handle the move. I've made the mistake of transplanting too early, and those delicate roots get damaged easily. When you do transplant, that extra inch of depth encourages root growth downward rather than just spreading outward in the container. This creates a stronger plant foundation for when you eventually move them outdoors.
Pro Tips for Cocoa Seed Germination
- Here's what nobody tells you about getting those cocoa seeds to sprout like a pro.
- Soaking Strategy: The 24-hour warm water soak is non-negotiable—it's what breaks the seed's dormancy. Use a bowl just...
- Container Selection: That 4-6 inch depth isn't arbitrary—it gives roots room to establish before transplanting. I rec...
Frequently asked questions
Got questions about germinating cocoa seeds? You’re not alone!
Here are some of the most common queries—plus straightforward answers to help you avoid pitfalls and boost success.
How long does it really take for cocoa seeds to germinate?
Most cocoa seeds sprout within 14–30 days under ideal conditions (warmth, moisture, and humidity). However, some stubborn seeds may take up to 60 days—patience is key! Monitor for a tiny white root (radicle) breaking through the shell first, followed by the shoot. Pro tip: If no sprouts appear after 30 days, gently check for mold or rot and refresh the medium.
Do I need to soak cocoa seeds before planting?
Yes! Soaking seeds for 24–48 hours softens the hard shell and kickstarts germination. Use lukewarm water and change it every 12 hours to prevent mold. Skip this step, and you might delay sprouting by weeks—or worse, deal with seeds that refuse to break open.
What’s the best temperature for cocoa seed germination?
Cocoa seeds thrive in 75–85°F (24–29°C)—think tropical warmth! Use a seedling heat mat or place them near a sunny window (but avoid direct sun). Cold drafts or temps below 65°F (18°C) can stall germination. If your home runs cooler, a clear plastic dome or propagator tray creates a mini greenhouse effect.
Why did my cocoa seeds mold instead of sprouting?
Mold is usually a sign of too much moisture or poor airflow. To fix it:
- Remove affected seeds immediately.
- Let the medium dry slightly between waterings (keep it damp, not soggy).
- Improve ventilation with a small fan on low or by spacing seeds wider.
Prevention tip: Use sterilized potting mix and avoid overcrowding seeds.
Can I use regular potting soil for cocoa seed germination?
Not ideal! Cocoa seeds need well-draining, sterile, and slightly acidic (pH 5.5–6.5) soil. Mix 50% perlite or coco coir with 50% peat moss or seed-starting mix for the best results. Regular potting soil can compact, suffocate roots, and invite fungus. Skip the shortcut—your seeds will thank you!
What if my cocoa seed sprouts but the stem looks weak or leggy?
Leggy stems happen when seedlings don’t get enough light. Move them to a bright, indirect light source (like an east-facing window) or use a grow light 12–14 hours daily. Avoid direct sun, which can scorch tender leaves. Support weak stems with a small stake if needed, but don’t overhandle—cocoa seedlings are delicate!
Wrapping up and next steps
Mastering cocoa seed germination without cold stratification is totally doable—just follow the right steps!
With patience, consistency, and the right conditions, you’ll see those little sprouts emerge in 60 days or less. 🌱 Whether you’re a hobbyist or aiming for a thriving cacao grove, your efforts will pay off in delicious, homegrown potential.
Ready to take the next step? Start small—plant a few seeds today and refine your technique. Before you know it, you’ll be harvesting your own cocoa beans and sharing the joy of propagation with others! 🎉