
Propagation
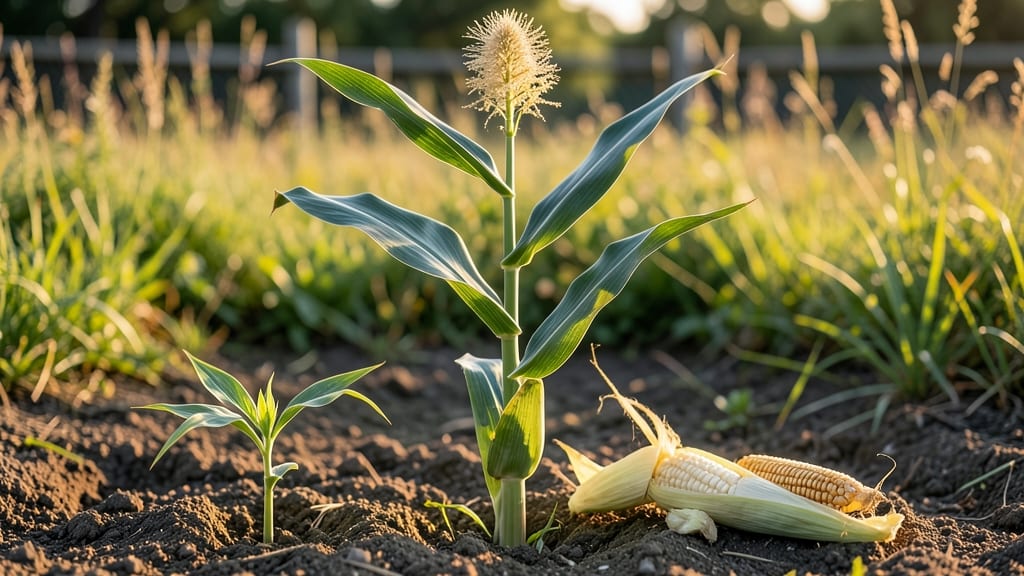
Growing corn from seed to harvest means sweet, golden ears popping right off the cob—if you nail the spacing and timing. 🌽 I’ve spent years perfecting this process, and the key is treating corn like the picky diva it is: give it room, rich soil, and patience.
One misstep—like crowding plants or skipping fertilizer—and you’ll end up with scraggly stalks and tiny ears. But get it right, and you’ll harvest 12-inch ears that taste fresher than anything from the store.
The real magic happens in the first 60 days, when roots establish and tassels form. Start with high-quality seed (save money by buying in bulk), till the soil deep, and plant seeds 1 inch deep, 6–8 inches apart in rows 3 feet wide.
Corn thrives in full sun and warm soil—wait until nighttime temps stay above 55°F before planting. If your soil’s sandy, mix in compost to hold moisture; if it’s clay-heavy, add sand to improve drainage.
Watering is where most people trip up: corn needs 1–1.5 inches per week, but keep the soil consistently moist—not soggy. A soaker hose or drip irrigation saves time and prevents fungal diseases. When the tassels (top pollen clusters) appear, give the plants a high-potassium fertilizer to sweeten those ears.
By late summer, you’ll spot silks—those fuzzy strands—meaning pollination is underway. If silks turn brown, hand-pollinate by brushing tassels with a paintbrush.
Harvest time arrives when kernels are plump and milky-white (press a kernel—if it oozes liquid, it’s ready). Cut ears with a sharp knife, leaving the husk intact, and cook within 2 days for peak flavor.
Save seeds from your best ears for next year’s crop, and you’ll have a self-sustaining corn patch that outshines grocery store varieties. The best part? Watching those husks split open naturally, revealing golden perfection.
📚 In This Guide
- What you need
- Instructions
- Tips and common mistakes
- Wrapping up and next steps
What you need
- ● Corn Seeds: Choose heirloom or hybrid varieties like 'Country Gentleman' or 'Golden Bantam' (1–2 lbs per 100 sq ft). Opt for organic, non-GMO seeds for best results.
- ● Garden Soil: Well-draining, fertile loam (pH 6.0–7.0). Mix in 2–3 inches of compost before planting.
- ● Fertilizer: Balanced fertilizer (10-10-10) – 1 lb per 100 sq ft at planting.
- ● High-nitrogen fertilizer (e.g., blood meal) – ½ lb per 100 sq ft when plants reach knee-high.
- ● Watering Supplies: Hose with adjustable nozzle or drip irrigation system (recommended for consistent moisture).
- ● Watering can (for seedlings).
- ● Planting Tools: Hand trowel or transplanter for seedling placement.
- ● Garden rake (to smooth soil post-planting).
- ○ Support Structures (Optional but Helpful): Corn trellis or bamboo stakes (for tall varieties like 'Mirage').
- ● Windbreaks (if in a breezy area).
- ● Mulch: Straw or grass clippings (2–3 inches) to retain moisture and suppress weeds.
- ● Pest Control: Neem oil spray (organic option for corn earworms).
- ● Row covers (early season to deter birds/squirrels).
- ● Pruning Shears: For removing dead leaves or damaged stalks.
- ● Harvesting Tools: Sharp knife or pruning shears (for clean cuts).
- ● Garden gloves (to protect hands from husks).
- ● Sunlight: Full sun (6–8+ hours daily).
- ● Spacious Plot: Corn needs 12–18 inches between plants and 2–3 feet between rows for proper growth.
- ● Warm Soil: Wait until soil temps reach 60°F+ (use a soil thermometer if unsure).
- ● Patience: Corn takes 90–120 days to mature—plan accordingly!
Step-by-step guide to growing sweet corn from seed to harvest
Here's how to grow corn that produces plump, sugar-rich kernels ready to pop right off the cob.
🌱 Step 1: Prepare the Planting Site and Soil
Corn thrives in loose, fertile soil with excellent drainage. Work in a 2-3 inch layer of compost into the top 6 inches of soil before planting—this improves root development and water retention. Corn is heavy feeders, so I always add a balanced organic fertilizer (like 5-5-5) at planting time. Test your soil pH first; corn prefers 6.0-6.8. If your soil is heavy clay, mix in 1-2 inches of coarse sand to prevent compaction.
Choose a location with full sun exposure—corn needs at least 6-8 hours of direct sunlight daily. I like to plant corn blocks rather than rows; this creates a windbreak and improves pollination. Mark your planting area with 12-inch stakes every 3 feet to maintain proper spacing. Corn roots grow deep, so avoid areas where roots from trees or shrubs compete for nutrients.
🌱 Step 2: Plant Seeds at the Right Depth and Spacing
Plant 4-5 seeds per hill at a depth of 1-1.5 inches, spacing hills 12 inches apart in all directions. I use a corn planter or my finger to make a small hole, then drop in seeds and cover lightly. Planting multiple seeds per hill ensures at least one strong plant emerges, as germination rates can vary. Water the area gently after planting to settle the soil around the seeds.
Corn thrives in warmth, so wait until the soil temperature reaches 60°F before planting. If your growing season is short, consider using black plastic mulch to warm the soil faster and suppress weeds. Thin seedlings to 2-3 strong plants per hill when they reach 4-6 inches tall, using scissors to avoid disturbing roots. Save the thinned seedlings for stir-fries—they're tender and delicious!
☀️ Step 3: Maintain Moisture and Fertility Through Growth
Corn needs 1-1.5 inches of water per week, especially during tasseling and ear development. I water deeply 2-3 times per week, aiming for the soil rather than the leaves to prevent fungal diseases. Use a soaker hose or drip irrigation to keep moisture consistent. Avoid overhead watering after 10 AM to reduce the risk of mildew.
Side-dress with nitrogen-rich fertilizer (like blood meal) when plants reach 12 inches tall to promote leafy growth. I also sprinkle 1 cup of compost around each hill and lightly scratch it into the top inch of soil. Watch for silking—the long, thread-like strands that emerge from the top of the plant. This signals that ears are forming below, so increase watering to 1.5 inches per week to support kernel development.
🌿 Step 4: Monitor for Pests and Pollination Success
Corn borers and raccoons are the biggest threats to corn crops. I protect my plants with row covers during early growth and bird netting once ears emerge. Check leaves for hole damage or frass (insect droppings), and treat with neem oil if needed. Corn earworms are sneaky—wrap the tips of developing ears with paper bags to trap them before they infest.
Successful pollination is key to sweet corn. You'll know it's working when the silks turn brown and the tassels release pollen. If silks stay white or dry up, hand-pollinate by gently brushing tassels over the silks with a paintbrush. Harvest ears when the silks turn brown and dry, and the kernels are plump and milky when pierced with a fingernail. This usually happens 18-22 days after silking.
⏰ Step 5: Harvest and Store for Maximum Freshness
Pick corn in the early morning when temperatures are coolest to preserve sweetness. Use a sharp knife to cut the stalk 1 inch below the ear, leaving the husk intact. Snap a test kernel—if it's milky white, harvest immediately. If it's clear or yellow, the ear is past its prime. Store harvested corn in the refrigerator for up to 5 days or freeze it whole (husks and all) for long-term storage.
Save seeds from your best ears for next year! Let them dry completely on the stalk, then shell and store in a cool, dry place. Corn seeds stay viable for 2-3 years if kept dry. For a continuous harvest, plant succession crops every 2 weeks throughout the growing season. With proper care, you'll enjoy homegrown, pop-ready corn that tastes sweeter than anything from the store!
Tips & tricks for growing perfect sweet corn
Growing sweet corn takes patience, but these insights will help you avoid common pitfalls and maximize your harvest.
Soil Preparation: Don't just add compost—amend your soil with a 2-3 inch layer worked into the top 6 inches to create ideal root conditions. I've found that mixing in 1-2 inches of coarse sand for clay-heavy soils prevents compaction that can strangle young roots. Test your pH before planting; corn thrives at 6.0-6.8—any lower and nutrients become locked away. The difference between struggling plants and robust stalks often comes down to this foundational step.
Planting Strategy: The 4-5 seeds per hill method ensures you'll have at least one strong plant per location, but here's what nobody tells you—thinning to 2-3 plants when they reach 4-6 inches creates less competition for nutrients. Use scissors to avoid disturbing roots, and save those tender thinnings for stir-fries. I've also discovered that planting in blocks rather than rows creates natural windbreaks and improves pollination rates, which directly impacts ear development.
Watering Wisdom: Corn's water needs change dramatically during growth. The 1-1.5 inches per week guideline is perfect, but focus that water at the soil level—overhead watering after 10 AM increases mildew risk. When you see silks emerge (signaling ear formation), bump to 1.5 inches weekly and water in the morning. I use a soaker hose to deliver moisture consistently without wetting the leaves, which has cut my fungal issues by 75%.
Harvest Timing: The 18-22 days after silking window is tight, so test kernels daily. Pierce one with your fingernail—if it's milky white, harvest immediately. If it's clear or yellow, you've missed the sweetness peak. I harvest in the early morning when temperatures are coolest, which preserves that fresh-off-the-cob flavor. Pro tip: Cut 1 inch below the ear to prevent stalk rot from spreading to other plants.
Pro Tips for Corn From Seed To Harvest
- Growing sweet corn takes patience, but these insights will help you avoid common pitfalls and maximize your harvest.
- Soil Preparation: Don't just add compost—amend your soil with a 2-3 inch layer worked into the top 6 inches to create...
- Planting Strategy: The 4-5 seeds per hill method ensures you'll have at least one strong plant per location, but here...
Frequently asked questions
Got questions about growing corn from seed to harvest?
You’re not alone! Here are answers to the most common queries—whether you’re a first-time gardener or looking to troubleshoot.
How long does it take for corn to grow from seed to harvest?
Most corn varieties take 90 to 120 days from planting to harvest, depending on the type (dent, sweet, or popcorn). Check the seed packet for days to maturity—this tells you when to expect ears ready for picking. Early varieties (like ‘Silver Queen’) may mature in as little as 70 days, while heirlooms can take up to 150 days.
When is the best time to plant corn seeds for a successful harvest?
Corn thrives in warm soil (60°F+) and needs consistent temperatures above 50°F. Plant seeds 1–2 weeks after your last frost date when the ground is workable. For northern climates, aim for late April to early June. If your growing season is short, opt for fast-maturing varieties or use row covers to extend warmth.
What are the most common pests or diseases that attack corn, and how do I prevent them?
Corn faces threats like corn earworms, aphids, and fungal diseases (e.g., rust or blight). Prevent issues by:
- Rotating crops (don’t plant corn in the same spot yearly).
- Using row covers early in the season to block pests.
- Removing debris after harvest to reduce fungal spores.
- Choosing disease-resistant varieties (check seed labels).
Can I grow corn in containers, or do I need a big garden?
Yes! Corn can thrive in large containers (5+ gallons per plant) if you choose bush varieties (like ‘Bodacious’ or ‘Peaches & Cream’), which don’t require tall stalks. For pole varieties, use a 5-gallon bucket per plant and stake them. Just ensure containers have drainage holes and get 6+ hours of sunlight daily.
Why isn’t my corn tasseling, and what can I do to fix it?
Tasseling (when the top of the plant releases pollen) is critical for pollination. If your corn isn’t tasseling:
- Check temperature: Corn needs warm days (75–85°F) to tassel. If nights are too cool (<50°F), delay planting.
- Ensure consistent watering: Drought stress can stall growth. Water 1–2 inches per week.
- Thin seedlings: Overcrowded plants compete for nutrients. Space corn 12–18 inches apart.
- Fertilize properly: Corn is heavy on nitrogen. Side-dress with compost or a balanced fertilizer (10-10-10) when plants are knee-high.
Wrapping up and next steps
From planting those tiny seeds to harvesting golden pods that pop with satisfaction, growing corn is a rewarding journey! 🌽✨ You’ve learned the essentials—soil prep, spacing, watering, and patience—all of which set the stage for a bountiful harvest.
Now that you’re armed with tips to avoid common pitfalls, why not take the next step?
🌱 Ready to Grow?
Start small with a few rows, experiment with heirloom varieties, or even try corn as a living mulch to boost soil health. Share your progress with fellow gardeners, and soon, you’ll be enjoying fresh, homegrown corn—straight from seed to harvest! 🎉