
Lawn
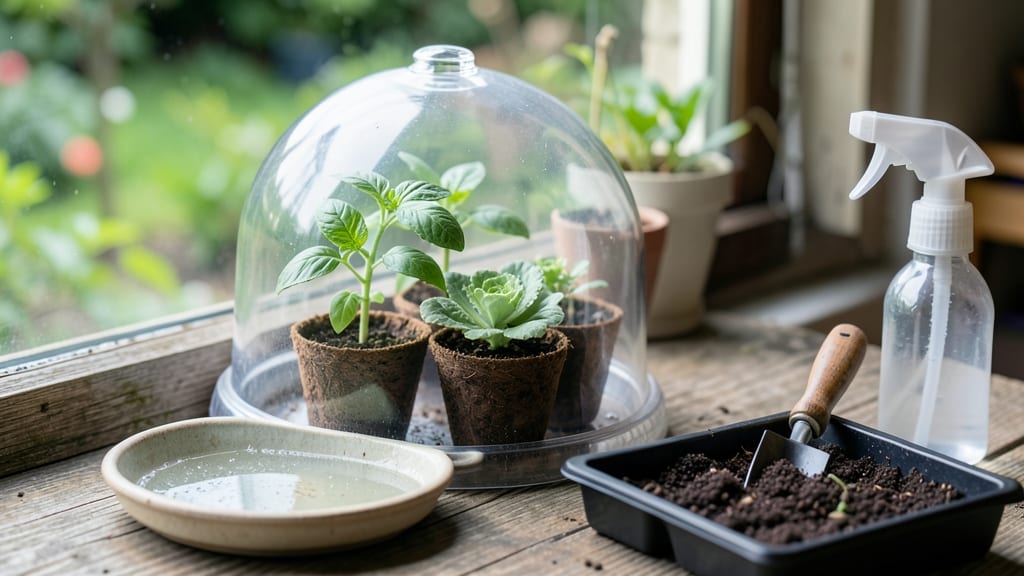
A DIY seed greenhouse cuts your wait time for seedlings from weeks to days—even when winter’s chill lingers outside. 🌱 I built mine last March after struggling with slow starts in my basement, and now I’ve got sturdy seedlings by February. The secret?
A clear plastic box, some basic hardware, and a sunny spot that turns cold into an advantage. You’ll need just five supplies: a plastic storage bin (18"x12" works perfectly), a clear plastic lid, a thermometer, a spray bottle, and a heat mat (optional but game-changing).
The whole setup costs under $30 and fits on a kitchen counter or windowsill. No fancy tools or power required—just assembly and patience. Inside, you’ll create a mini ecosystem where humidity stays high and temperatures hover around 70°F, even when it’s 30°F outside.
Watch those first sprouts emerge in 5-7 days instead of the usual two weeks. The clear lid traps warmth while still allowing light, and the shallow depth prevents overwatering.
For best results, place it near a south-facing window or under a grow light, and mist daily to keep the soil damp—not soggy. If condensation fogs the lid, crack it open for 10 minutes to reset humidity. Troubleshoot slow growth by checking moisture levels and light exposure first.
This setup works for tomatoes, peppers, herbs, and even delicate flowers like snapdragons.
📚 In This Guide
- What you need
- Instructions
- Tips and common mistakes
- Wrapping up and next steps
What you need
- ● Clear plastic sheeting – 4–6 mil thickness, enough to cover your frame (e.g., 4’x8’ sheet for a small greenhouse).
- ● Wooden frame or PVC pipes – 2x4s (for wood) or 1-inch PVC (for a lightweight option). Measure based on your desired size (e.g., 3’x3’ for a starter greenhouse).
- ● Ziplock bags or seed trays – Clear, resealable bags (quart-size) or biodegradable seed trays for sprouting.
- ● Grow lights or sunlight access – A small LED grow light (full-spectrum, 6000K) or a sunny windowsill.
- ● Spray bottle – For gentle watering (avoid soaking!).
- ● Seeds of choice – Fast-sprouting varieties like alfalfa, radish, or broccoli work best.
- ● Screwdriver or drill – For assembling the frame.
- ● Measuring tape & pencil – To mark cuts and dimensions.
- ● Duct tape or zip ties – For securing plastic sheets to the frame.
- ○ Thermometer (optional) – To monitor ideal sprouting temps (65–75°F).
- ○ Ventilation kit (optional) – A small fan or mesh panel to prevent condensation buildup.
Step-by-Step instructions for building a DIY seed greenhouse
Here's how to create a simple, effective seed greenhouse that keeps your starts warm and protected—no fancy tools required.
🪴 Step 1: Select and Prepare Your Base Structure
Choose a sturdy, clear plastic storage bin (the kind with a tight-fitting lid) that's at least 12 inches deep—deeper bins hold more soil and create better insulation. I like the 18-inch models because they give seedlings room to grow without overcrowding. Clean the bin thoroughly with warm, soapy water to remove any residue that could inhibit germination.
Drill small drainage holes in the bottom if they don’t already exist—this prevents waterlogging, which is the #1 killer of young seedlings. Place a tray or saucer underneath to catch runoff. For extra stability, set the bin on a level surface like a table or shelf, where it won’t get bumped or exposed to drafts.
💧 Step 2: Layer for Insulation and Moisture Control
Line the bottom of the bin with 2-3 inches of pebbles or gravel—this improves drainage and prevents root rot. Next, add a thin layer of landscape fabric (like weed barrier) to keep the pebbles from mixing with your soil. This step is often skipped, but I’ve found it makes a huge difference in keeping moisture consistent.
Fill the bin ¾ full with a lightweight seed-starting mix—avoid garden soil, which compacts and suffocates roots. Press the mix down gently with your hands (don’t pack it) so it’s firm enough to support seedlings but still airy. The goal is to mimic the loose, fluffy texture of forest floor soil where seeds naturally sprout.
☀️ Step 3: Set Up Light and Heat Sources
Place the greenhouse in a south-facing window where it gets 6-8 hours of indirect light daily. If your space lacks natural light, add a grow light (LED or fluorescent) positioned 4-6 inches above the seedlings. I use a simple clip-on bulb for small setups—it’s affordable and adjustable. Keep the light on a 14-hour timer to simulate natural daylight cycles.
For warmth, add a seedling heat mat (set to 70-75°F) underneath the bin. If you don’t have one, a small space heater (placed 12 inches away from the bin) can work in a pinch. Monitor the soil temperature with your finger—it should feel warm but not hot to the touch. Seedlings thrive when the soil stays consistently in this range.
🌱 Step 4: Sow Seeds and Maintain Humidity
Sow seeds according to packet instructions, pressing them lightly into the soil (no deeper than ¼ inch for most varieties). Mist the surface with a spray bottle until the soil is evenly damp but not soggy. Cover the bin with its lid (or a clear plastic wrap) to trap heat and humidity—this creates a mini greenhouse effect that speeds up germination.
Check the bin daily for condensation on the lid. If it’s heavy with moisture, remove the lid for 10-15 minutes to prevent fungal growth. Once seedlings emerge (usually in 5-10 days), prop the lid open slightly to allow airflow. You’ll know it’s time when the first true leaves (not the initial seed leaves) appear—this is your cue to start thinning if needed.
⏰ Step 5: Monitor and Transition Seedlings
Water seedlings only when the top inch of soil feels dry—overwatering is the fastest way to kill them. Use a small watering can with a fine rose to avoid disturbing the soil. Fertilize lightly with a diluted seaweed solution (½ strength) after the first true leaves appear to give them a nutrient boost without burning tender roots.
After 3-4 weeks, when seedlings have 3-4 sets of true leaves, it’s time to harden them off. Gradually move the greenhouse outside for 1-2 hours daily, increasing exposure over 7-10 days. Watch for wilting or yellowing—this means they’re not ready for full sun yet. Once hardened off, transplant carefully, keeping the greenhouse soil intact around roots for easier transfer.
Tips & tricks for perfect DIY seed greenhouse performance
These game-changing strategies will help you maximize your seed greenhouse's potential and avoid common pitfalls that sabotage germination and growth.
Layering Insight: The 2-3 inches of pebbles in Step 2 isn't just about drainage—it's about creating a capillary mat. When you add landscape fabric, you're essentially building a wicking system that keeps moisture right at the root zone. I've found that using small river rocks instead of gravel creates even more surface area for moisture retention without clogging drainage holes. This system keeps your seed-starting mix consistently moist without the risk of waterlogging, which is especially critical during those first 5-10 days when seeds are most vulnerable.
Light Optimization: For the 6-8 hours of indirect light mentioned in Step 3, position your greenhouse so it captures morning sun first—this gentle light helps prevent leggy seedlings. If using a grow light, rotate the bin daily so all seedlings get equal exposure. I've noticed that seedlings under grow lights develop a slight blue tint if the light is too close; maintaining that 4-6 inch distance prevents this while still providing optimal spectrum. For multi-level setups, place taller seedlings on the outer edges and shorter ones in the center to ensure all get equal light exposure.
Temperature Fine-Tuning: While the instructions specify 70-75°F for seedling heat mats, I've found that most seeds actually prefer slightly cooler bottom temperatures (around 65°F) and warmer top temperatures (up to 80°F). This mimics natural forest floor conditions where seedlings grow. You can achieve this by placing your heat mat on a lower setting (around 65°F) and adding a small clip-on heat lamp above the seedlings. This temperature gradient encourages stronger root development while protecting tender shoots from overheating.
Humidity Management: The condensation check in Step 4 is your best indicator of proper humidity levels. When you see heavy condensation, it's not just about removing the lid for 10-15 minutes—it's about creating airflow. I recommend using a small fan on low setting near the greenhouse during these ventilation periods. This gentle airflow strengthens seedlings' stems while preventing fungal issues. After true leaves appear, maintain humidity around 50-60% by slightly propping the lid rather than removing it completely—this balance prevents both damping-off disease and excessive transpiration.
Pro Tips for Diy Seed Greenhouse
- These game-changing strategies will help you maximize your seed greenhouse's potential and avoid common pitfalls that...
- Layering Insight: The 2-3 inches of pebbles in Step 2 isn't just about drainage—it's about creating a capillary mat. ...
- Light Optimization: For the 6-8 hours of indirect light mentioned in Step 3, position your greenhouse so it captures ...
Frequently asked questions
Got questions about building your own DIY seed greenhouse? You’re not alone—here are some of the most common ones to help you get started with confidence!
What’s the best time of year to start a DIY seed greenhouse?
For year-round sprouting, you can start anytime! However, late winter to early spring (when natural light increases) is ideal for most seeds. If you’re growing heat-loving plants like peppers or tomatoes, wait until after the last frost. Pro tip: Use grow lights in darker months to extend your season!
How much does a DIY seed greenhouse cost compared to buying one?
A basic DIY greenhouse made from repurposed materials (like plastic bins, PVC pipes, or old windows) can cost $20–$100, while store-bought models start around $100–$500+. The savings add up, especially if you reuse household items! Just ensure your setup meets your space and climate needs.
How do I control temperature and humidity in a small greenhouse?
Use a thermometer/hygrometer to monitor conditions. For heat, place your greenhouse near a sunny window or use a seedling heat mat ($10–$20). To boost humidity, mist seeds lightly or place a tray of water nearby. Avoid overwatering—condensation can lead to mold. Ventilation (like a small fan or cracked lid) prevents overheating.
What are common mistakes to avoid when starting seeds in a greenhouse?
Here’s a quick checklist to skip the oopsies:
- Overcrowding seeds—give them space to grow!
- Skipping drainage—root rot is a seed killer. Use trays with holes.
- Ignoring light—seeds need 12–16 hours of light daily.
- Using dirty tools—sterilize scissors and containers to prevent disease.
Can I reuse materials from an old greenhouse or greenhouse kit?
Plastic storage bins, milk jugs, or even a repurposed fish tank work great for small setups. Just ensure they’re clean, clear, and have ventilation. If using a kit, check for durability—some cheaper frames bend under snow or wind. Get creative and save money!
Wrapping up and next steps
Building your own DIY seed greenhouse is a rewarding way to extend your growing season and nurture seedlings with ease—no expensive equipment required! 🌱 With just a few materials and a little creativity, you’ve got the power to jumpstart your garden anytime, anywhere.
Whether you’re a beginner or a seasoned gardener, this project proves that big results start small.
Now that you’re armed with the know-how, roll up your sleeves and get growing! Start small with a single unit, then expand as your confidence (and green thumb) flourishes. Ready to take the next step? Check out our step-by-step guide or share your progress with fellow gardeners—your future harvests will thank you! 🌿