
Lawn
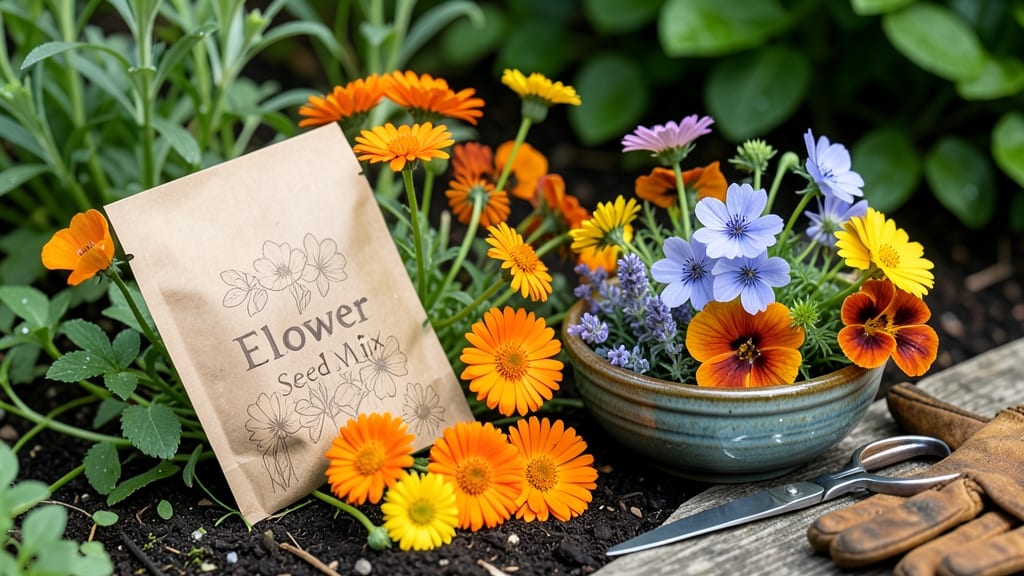
Cold-stratified edible flower seeds mix transforms your lawn into a colorful, edible garden in just 60 days—no greenhouse needed. 🌸 I’ve grown this mix for years, and the secret lies in mimicking winter’s natural chilling process before planting.
The result? Vibrant blooms that double as garnishes for salads, teas, or cocktails, all while attracting pollinators to your yard.
Start with a sunny patch of soil—at least 6 hours of sunlight daily—and loosen the top 6 inches to improve drainage. Mix in compost for nutrients, then scatter seeds lightly over the soil.
A thin layer of mulch or straw keeps them moist until germination. Varieties like nasturtiums, calendulas, and pansies thrive in this mix, offering both beauty and culinary versatility.
Water gently to avoid displacing seeds, and keep the soil consistently moist but not soggy. Within 10-14 days, you’ll see the first sprouts emerge. Once established, these flowers need minimal care—just occasional watering and deadheading to encourage more blooms.
The petals add a peppery kick to salads, while calendula tea soothes sore throats.
Watch for slugs and aphids, which love tender young leaves. A simple spray of soapy water or neem oil keeps pests at bay. By mid-summer, your lawn will be a fragrant, edible masterpiece—ready to harvest petal by petal. The best part? You’ll never buy flowers again.
📚 In This Guide
- What you need
- Instructions
- Tips and common mistakes
- Wrapping up and next steps
What you need
- ● Edible flower seeds: Choose a mix of fast-growing varieties like calendula, nasturtium, borage, pansies, and violas. Aim for 1–2 pounds total (enough to cover 100–200 sq. ft. of lawn). Opt for organic, non-GMO seeds for the best results!
- ● Cold stratification tray or seed-starting kit: A shallow tray with drainage holes (or a repurposed plastic container with holes drilled in the bottom). Size should fit your seed quantity comfortably.
- ● Potting soil or seed-starting mix: 1–2 cubic feet of lightweight, well-draining soil (avoid garden soil—it’s too dense!). Look for a mix labeled "seed-starting" or "organic potting soil."
- ● Watering can or spray bottle: With a fine mist nozzle to keep seeds moist without displacing them.
- ● Plastic wrap or humidity dome: To maintain moisture during stratification (a clear plastic bag or a store-bought propagation dome works).
- ● Labeling tags or markers: To track seed varieties and planting dates.
- ○ Gloves: Protect your hands from soil and seeds (optional but recommended!).
- ○ Seedling heat mat (optional): If your space is chilly (below 40°F/4°C), a heat mat can speed up germination.
- ● Grow lights or sunny windowsill: For post-stratification growth (if transplanting indoors before outdoor planting).
- ● Organic fertilizer (low-nitrogen): Like fish emulsion or compost tea, to boost early growth once seedlings emerge.
- ○ Lawn soil tester kit (optional): To check pH and nutrient levels before transplanting (ideal pH for edible flowers: 6.0–7.0).
- ● Mulch or straw: To retain moisture and suppress weeds after transplanting.
Step-by-Step guide to growing cold-stratified edible flowers
Here's how to coax vibrant, edible blooms from seeds in just 60 days—no greenhouse needed.
🌱 Step 1: Prepare Seeds with Cold Stratification
Place your edible flower seeds in a sealed container with a damp paper towel or vermiculite. I like to use a plastic bag with a twist tie—just make sure it's not waterlogged. Seal it and refrigerate for 4-6 weeks at 34-40°F. This mimics winter's chill, breaking seed dormancy so they'll germinate reliably.
Check weekly for mold—if you see fuzzy growth, toss the batch and start fresh. The goal is damp, not soggy. Once 50% of seeds have sprouted (usually after 3-4 weeks in the fridge), remove them immediately. Waiting too long turns viable seeds into mushy messes.
🪴 Step 2: Sow in Prepared Growing Medium
Fill your seed trays with sterile potting mix (never garden soil—it's too dense). Press the mix down lightly so it's firm but not compacted. Scatter seeds ¼ inch deep—edible flowers like nasturtiums and borage need light to germinate, so don't bury them too deep. I use a small spoon to create tiny furrows and drop 2-3 seeds per spot.
Gently cover with a fine mist of water until the surface looks damp but not wet. A spray bottle works best—heavy watering will displace seeds. Label your trays immediately with the variety and date. After 7 days, you'll see tiny green shoots poking through—this is your cue to stop misting and switch to bottom-watering only.
☀️ Step 3: Provide Controlled Light and Temperature
Move trays to a bright, indirect light spot (a south-facing window works). If your space is dim, add a grow light positioned 4-6 inches above the seedlings. Keep temperatures between 65-75°F during the day and no lower than 55°F at night. Cold snaps will stall growth—watch for leaves turning purple as a warning sign.
Rotate trays a quarter turn daily so seedlings grow straight instead of leaning toward the light. You'll see first true leaves (not the initial seed leaves) appear in 10-14 days. At this stage, thin seedlings to 2 inches apart—use small scissors to snip extras at soil level rather than pulling, which disturbs roots.
💧 Step 4: Harden Off and Transplant
Two weeks before your last frost date, start hardening off by placing trays outside in partial shade for 1-2 hours the first day. Gradually increase exposure by 1 hour daily, moving to full sun by day 10. Watch for wilting—if leaves droop, they're not ready for the heat yet. Transplant after 4-6 weeks when seedlings have 3-4 sets of leaves.
Choose a sunny spot with well-draining soil. Dig holes twice as wide as the root ball and space plants 12-18 inches apart (check your seed packet for variety-specific spacing). Water deeply at planting to settle soil around roots. Mulch with 1 inch of straw to retain moisture and suppress weeds—this is especially important in dry climates.
✂️ Step 5: Maintain Through Bloom and Harvest
Water at the base in the morning to prevent fungal diseases. Edible flowers need 1 inch of water weekly, but check soil—if the top 1 inch feels dry, it's time to water. Deadhead spent blooms by snipping stems ½ inch above the next set of leaves to encourage continuous flowering. You'll see new buds form within 7-10 days.
Harvest flowers in the morning after dew has dried. Use clean scissors to cut stems at a 45-degree angle just above a leaf node. Rinse gently in cold water and pat dry with a paper towel—never soak edible blooms. Store in a paper bag in the fridge for up to 3 days, or dry on a screen for later use in culinary dishes.
Tips & tricks for perfect cold-stratified edible flowers
Here's what nobody tells you about growing edible flowers from seed—these tricks will transform your 60-day garden into a vibrant, harvestable paradise.
The Cold Stratification Secret: If your refrigerator runs warmer than 40°F, place your sealed container on the bottom shelf where it's coldest. I've seen seeds fail when the fridge's thermostat was set to 38°F but the actual temperature hovered around 45°F—always check with a thermometer. The goal is consistent 34-40°F for that full 4-6 weeks. For extra reliability, place a small bowl of water in the fridge near your seeds to maintain humidity without over-saturating the paper towel.
Seedling Survival Strategy: In Step 2, when you're sowing your seeds, create a mini greenhouse effect by placing clear plastic domes or even plastic wrap over your seed trays. This traps warmth and humidity, helping those delicate seeds germinate faster. Just remember to remove the cover after 7 days when you see those first shoots—too much moisture after germination can cause damping off. I like to prop the plastic slightly off the trays to allow airflow while maintaining humidity.
Lighting Hacks for Small Spaces: If you don't have a south-facing window, don't despair! A simple LED grow light on a timer (14-16 hours of light daily) works wonders. Position it just 4-6 inches above seedlings and adjust as they grow. I've used basic 10-watt LED bulbs for small trays—no need to invest in expensive equipment. For even better results, add a small fan nearby to create airflow, which strengthens stems and prevents leggy growth.
Transplanting Timing: The 4-6 week transplant window in Step 4 is your sweet spot for success. Look for seedlings with 3-4 sets of true leaves—these are sturdy enough to handle outdoor conditions. I always transplant on an overcast day or in the late afternoon to reduce stress on the plants. After transplanting, give them a week to acclimate before fertilizing, as the shock of moving can be enough to handle without added nutrients.
Pro Tips for Edible Flower Seed Mix
- Here's what nobody tells you about growing edible flowers from seed—these tricks will transform your 60-day garden into a vibrant, harvestable paradise.
- The Cold Stratification Secret: If your refrigerator runs warmer than 40°F, place your sealed container on the bottom shelf where it's coldest.
- Seedling Survival Strategy: In Step 2, when you're sowing your seeds, create a mini greenhouse effect by placing clear plastic domes or even plastic wrap over your seed trays.
Frequently asked questions
What’s the best time to plant an edible flower seed mix for a vibrant lawn?
Plant your mix in early spring (March–April) or late summer (August–September) for optimal results. Cold-stratified seeds (like those in your mix) germinate faster in cooler weather. Avoid planting in extreme heat—seeds may dry out before sprouting. If you’re in a warm climate, opt for late fall planting for a spring surprise!
Do I need to cold-stratify the seeds myself, or are they pre-treated?
Your edible flower seed mix is pre-cold-stratified—no extra chilling required! The seeds have already undergone the process to break dormancy, so you can plant them directly. Just follow the package instructions for soil prep and watering. Pro tip: If planting in hot weather, lightly mist the soil daily until germination (usually 7–14 days).
Can I mix edible flowers with regular grass seed?
Yes! Edible flowers thrive in lawns and add color, pollinator appeal, and culinary benefits. For best results, use a 50/50 blend of grass seed and edible flower seeds. Avoid overcrowding—space flowers 6–12 inches apart for easy harvesting. Bonus: Flowers like nasturtiums and calendula self-seed, so you’ll get free blooms next year!
What should I do if my edible flowers aren’t germinating?
First, check these common issues:
Soil too dry? Keep soil consistently moist (not soggy) until sprouts appear.
Poor sunlight? Most edible flowers need 6+ hours of sun daily.
Seeds too deep? Plant no deeper than ¼ inch—they need light to sprout.
Old seeds? If your mix is over a year old, try fresh seeds.
If problems persist, try a soil test—some flowers prefer slightly alkaline soil.Which edible flowers in the mix are safe for pets?
Not all edible flowers are pet-friendly! Safe options in most mixes include:
- Calendula (non-toxic, anti-inflammatory)
- Borage (mildly safe in small amounts)
- Nasturtium (pet-safe, but avoid large quantities)
Wrapping up and next steps
Transforming your lawn into a vibrant, edible garden is easier than you think! With a cold-stratified edible flower seed mix, you’ll enjoy stunning blooms in just 60 days—plus the bonus of fresh, organic ingredients for your kitchen.
Whether you're a green thumb or a curious beginner, this project is rewarding and delicious.
Ready to take the next step? Grab your seeds, follow the steps, and watch your lawn bloom into a feast for the eyes—and your taste buds! 🌸🌱