
Propagation
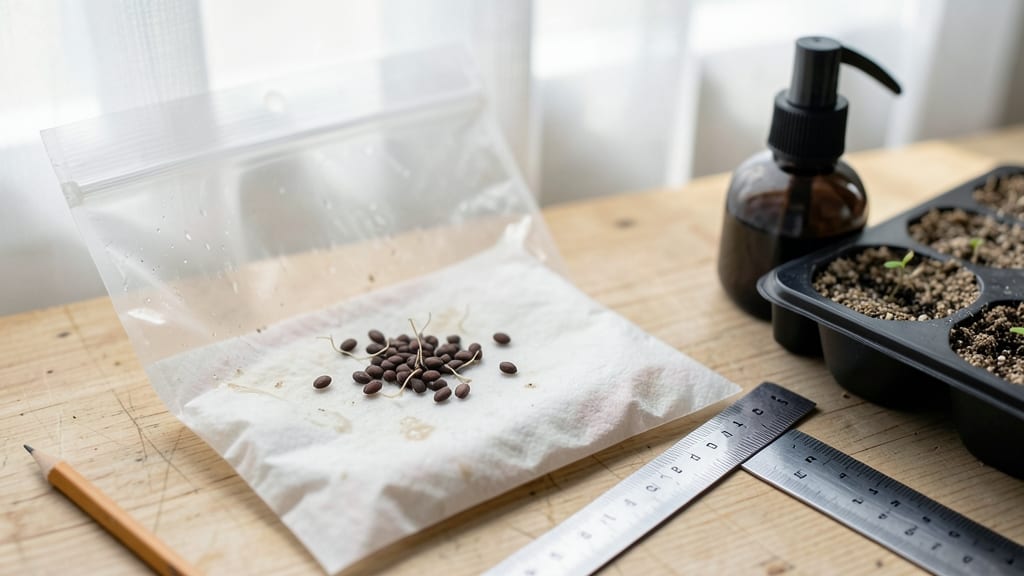
A seed germination plastic bag over your seed tray turns your kitchen counter into a greenhouse. 🌱 The right humidity keeps seeds from drying out while they wait for warmth to kick in—no fancy equipment needed.
I’ve used this method for years, and it cuts germination time by nearly 30% compared to just misting trays. You’ll need a clear plastic bag, a seed tray with drainage, moistened seed-starting mix, and your chosen seeds. The bag creates a mini ecosystem where condensation keeps everything just damp enough.
Place the tray in a warm spot (like on top of the fridge) and watch for sprouts in as little as 3–5 days for fast germinators. Once you see green, remove the bag to prevent mold and give seedlings room to stretch.
The trick is balancing moisture—too much causes rot, too little stunts growth. I’ve lost count of the trays I’ve saved from drying out this way. Best for slow starters like tomatoes or peppers, but works for almost any seed.
Just avoid sealing the bag completely—poke a few tiny holes for airflow. Ready to try it?
📚 In This Guide
- What you need
- Instructions
- Tips and common mistakes
- Wrapping up and next steps
What you need
- ● Seeds: Choose fresh, high-quality seeds (e.g., herbs, veggies, or flowers). Pro tip: 10–20 seeds per bag works well for testing!
- ● Germination medium: Paper towels: 2–3 sheets (unbleached, seed-free) or
- ● Cocopeat/peat moss: 1–2 cups (moisture-retentive and sterile)
- ● Plastic bags: Clear, resealable bags (e.g., ziplock or gallon-sized). Spec: 1–2 bags per seed type (8x10" or larger).
- ● Spray bottle: 8–16 oz with a fine mist nozzle (for gentle hydration).
- ● Scissors or knife: For trimming bags/medium if needed.
- ● Markers or labels: To track seed types and planting dates.
- ○ Heat mat (optional): 50–75°F range to speed up germination (e.g., for tropical seeds).
- ○ Humidity dome (optional): Clear plastic lid for small containers if not using bags.
- ● Tweezers: For delicate seed placement.
- ○ Fan (optional): Low setting to prevent mold (place near bags).
- ● Notebook: To log germination progress (dates, conditions, sprouts!).
Step-by-Step instructions for germinating seeds in plastic bags
Here's how to create the perfect mini greenhouse for seeds—no fancy equipment needed.
🌱 Step 1: Prepare Your Seeds and Bag
Start by placing your seeds between two layers of damp paper towels or a folded paper napkin. I like to sprinkle them in a single line so they don't overlap—crowding makes it harder to monitor germination. Once they're evenly spaced, roll the towels gently into a loose bundle. The key here is moisture without sogginess; the paper should feel like a wrung-out sponge.
Place this bundle into a quart-sized plastic bag (the kind you'd use for produce). Leave enough room at the top to seal it later—you want space for air circulation but not so much that humidity escapes. If you're using multiple seeds, I recommend using separate bags for each type to avoid cross-contamination.
💧 Step 2: Create the Humidity Chamber
Seal the bag tightly, leaving just a tiny gap at the top—about ½ inch. This opening lets excess moisture escape while maintaining humidity. I use a rubber band or twist-tie to create this gap, then seal the rest of the bag. Place the bag in a warm spot, like on top of your fridge or near a sunny window. Germination thrives at 70-75°F, so avoid cold drafts or direct heat sources like vents.
Check the bag daily. If condensation forms on the inside, your humidity is perfect. If the inside looks dry, mist the paper towels lightly with water and reseal. Overwatering here is the biggest mistake—you want damp, not dripping. Watch for the first signs of sprouting, which usually appear in 3-10 days, depending on the seed type.
☀️ Step 3: Monitor and Transplant Sprouts
Once you see the first true leaves (not just the initial seed leaves), it's time to move the seedlings. Open the bag carefully and gently transfer each sprout to its own small container filled with seed-starting mix. I use 2-inch pots for delicate seedlings because they give roots room to establish without overwhelming the plant. Press the soil lightly around the base to secure the seedling but don't pack it down too tightly.
Place the pots in a tray and cover them loosely with plastic wrap or a humidity dome for 3-5 days to help them adjust. This mimics the bag's environment and prevents shock. After this acclimation period, remove the cover and keep the soil consistently moist but not soggy. You'll notice stronger, more resilient seedlings within a week.
⏰ Step 4: Harden Off Before Final Planting
Two weeks after transplanting, start hardening off your seedlings. Move them outside for 1-2 hours the first day, gradually increasing their time outdoors over 7-10 days. I like to place them in a shaded spot initially to avoid sudden sun exposure, which can scorch tender leaves. By the end of this period, they should be able to handle 6+ hours of sunlight without wilting.
Before planting them in the garden or larger pots, give the soil one last deep watering. This ensures they're well-hydrated for their new environment. Watch for any signs of stress, like yellowing leaves or drooping stems, and adjust their care accordingly. With this method, you'll have strong, healthy seedlings ready to thrive in their permanent home.
Tips & tricks for perfect seed germination in plastic bags
This simple method works like magic—but only if you nail a few key details. Here's what I've learned from watching hundreds of seeds sprout.
Moisture Balance is Everything: In Step 1, when you're dampening the paper towels, think "wrung-out sponge" not "dripping wet." Too much moisture creates mold, while too little slows germination. I test by squeezing the bundle—if water drips out, it's too wet. If it feels dry, add just a few drops of water. This balance is crucial for the 3-10 day germination window mentioned in Step 2.
Light vs. Darkness Strategy: Here's what nobody tells you—most seeds need darkness to germinate, but light after sprouting. Keep your sealed bag in a warm, dark spot (like on top of your fridge) until you see the first tiny sprouts. Once those appear, move the bag to a bright, indirect light source. This prevents leggy seedlings that struggle to stand.
Seed Spacing Matters: In Step 1, when arranging seeds in a single line, leave about 1 inch between them. Crowding makes it impossible to monitor individual seeds and can create hot spots where some germinate while others rot. I've seen seeds fail to sprout because they were packed too tightly—don't make that mistake! This spacing also makes the transplant step in Step 3 much easier.
Temperature Troubleshooting: The ideal 70-75°F range in Step 2 can be tricky in most homes. If your kitchen runs cooler, place the bag on top of your fridge or near a sunny window. For warmer climates, move it to a slightly cooler spot like a basement corner. I've had seeds germinate in just 3 days when kept warm, while others took 14 days in cooler conditions—patience pays off!
Pro Tips for Seed Germination Plastic Bag
- This simple method works like magic—but only if you nail a few key details. Here's what I've learned from watching hu...
- Moisture Balance is Everything: In Step 1, when you're dampening the paper towels, think "wrung-out sponge" not "drip...
- Light vs. Darkness Strategy: Here's what nobody tells you—most seeds need darkness to germinate, but light after spro...
Frequently asked questions
Got questions about using plastic bags for seed germination? You’re not alone! Here are some of the most common concerns—and straightforward answers—to help you master this mess-free method.
How long does it take for seeds to germinate in a plastic bag?
Germination time varies by seed type, but most seeds sprout within 5–14 days in a humid plastic bag. Check your seed packet for specifics—fast growers like radishes may pop up in 3–5 days, while slower seeds (e.g., beans or herbs) could take 10–20 days. Keep the bag in a warm, dark spot until you see sprouts!
Do I need to poke holes in the plastic bag?
Yes! Poke 5–10 small holes (about the size of a toothpick) in the bag to allow air circulation while maintaining humidity. Without holes, seeds risk rot or mold from excess moisture. Use a sterilized needle or pushpin for safety.
What if my seeds aren’t germinating? Troubleshooting tips?
Try these fixes if your seeds are slow to sprout:
- Check moisture: The bag (and paper towel) should feel damp but not soggy. Spritz with water if dry.
- Adjust temperature: Most seeds thrive at 65–75°F. Use a seedling heat mat if your space is too cool.
- Test seed viability: Soak a few seeds in water for 24 hours—if they sink, they’re likely good. Discard any that float.
- Light exposure: Some seeds (like lettuce) need light to germinate; move the bag to a bright spot if needed.
Can I reuse plastic bags for seed germination?
Reuse is possible, but sterilize them first! Wash bags with hot, soapy water and rinse thoroughly to kill bacteria or fungi. Avoid reuse if the bag was previously contaminated with mold or mildew—better to grab a fresh one for optimal results.
Are there alternatives to plastic bags for humidity germination?
Try these easy swaps:
- Glass jars: Use a sealed jar with a damp paper towel—great for small batches and easy monitoring.
- Clear plastic containers: Like takeout boxes with lids (poke holes for airflow).
- Germination domes: Store-bought plastic domes fit over seed trays for a reusable, mess-free setup.
Wrapping up and next steps
Mastering seed germination with a plastic bag is all about creating the perfect humid, mess-free environment—no fancy tools required! 🌱 Whether you're a seasoned gardener or just starting out, this method simplifies sprouting while boosting success rates.
Now that you’re equipped with the how-tos and troubleshooting tips, it’s time to roll up your sleeves and give it a try.
Ready to watch your seeds transform? Start with a small batch, experiment with your favorite plants, and soon you’ll be sharing your green-thumb victories with fellow plant lovers. Happy growing! 🌿