
Lawn
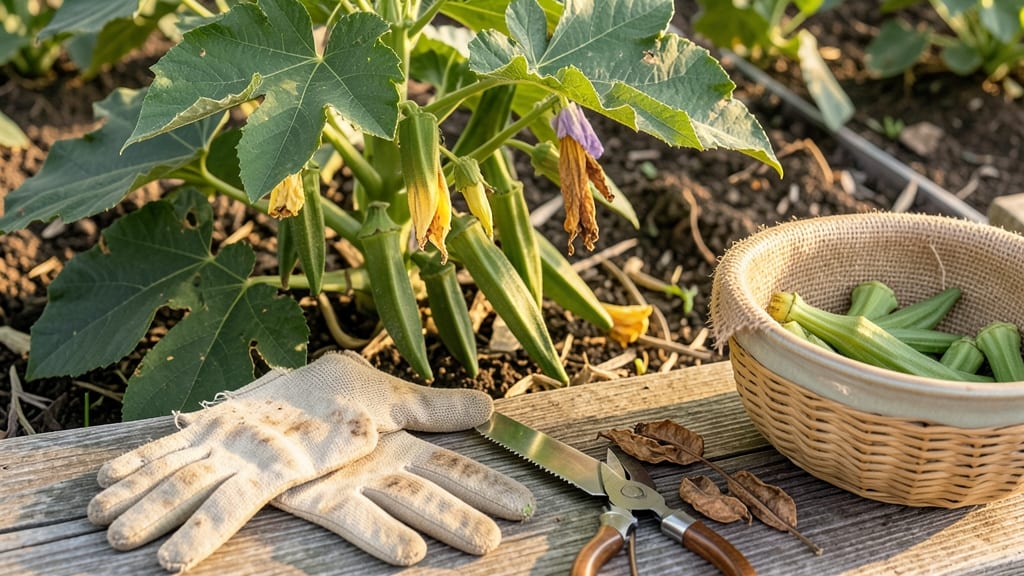
Growing edible seed pods turns scraps into next year's harvest. 🌱 I learned the hard way—discarding those pods meant missing out on free seeds and extra harvests. The right plants (okra, peas, sunflowers) transform your garden into a self-sustaining seed bank.
You'll need full sun, well-draining soil, and patience—these pods mature over weeks. Harvest when dry but before they split open; store seeds in paper envelopes for 2-3 years of viability. The pods themselves are edible too: crisp okra, sweet pea pods, and sunflower seed treats.
Start with 3-5 plants per variety for a good seed yield. Thin seedlings early to avoid competition. The first batch of seeds might be small, but each year your collection grows—literally. By year two, you'll have enough seeds to share with neighbors.
Watch for pests like aphids on young pods and mold in damp storage. When in doubt, test a few seeds on toast before saving them all. This method cuts grocery bills while keeping your garden thriving year after year.
📚 In This Guide
- What you need
- Instructions
- Tips and common mistakes
- Wrapping up and next steps
What you need
- ● Seed pods: Choose from edible varieties like okra, chili peppers, or peas (ensure they’re organic or pesticide-free if eating raw). Quantity: 5–10 pods per plant (depending on species).
- ● Potting soil: High-quality, well-draining mix (e.g., 50% potting soil + 50% compost). Quantity: 1–2 gallons per pot.
- ● Containers: Pots (6–12 inches deep) or garden beds with full sun (6+ hours/day). Size: 1–2 plants per 12-inch pot.
- ● Watering can: With a fine rose nozzle for gentle hydration.
- ● Fertilizer: Balanced organic fertilizer (e.g., 10-10-10) or compost tea. Frequency: Every 4–6 weeks.
- ● Pruning shears: For harvesting pods and shaping plants.
- ● Grow lights: If starting indoors (LED or fluorescent, 12–16 hours/day).
- ● Trellis or stakes: For vining plants like peas or pole beans.
- ● pH test kit: To monitor soil acidity (ideal: 6.0–7.0 for most pods).
- ● Seed-saving envelopes: For storing viable seeds post-harvest.
- ● Gloves: To protect hands when handling spicy or prickly pods (e.g., chili peppers).
Step-by-step guide to harvesting edible seed pods for next year
Here’s how to save seeds from your garden’s best performers—no fancy tools required.
🌱 Step 1: Identify and Select Healthy Seed Pods
Wait until pods turn fully mature on the plant—usually when they’ve changed color from green to brown or tan. Look for pods that are dry to the touch and feel papery or brittle. Avoid any that show signs of mold, pests, or damage, as those seeds won’t grow well. I like to harvest pods on a dry, sunny morning when the plants are at their peak health.
If you’re unsure which pods to pick, check the seed company’s guidelines or compare your pods to photos online. Some plants, like peas or beans, have pods that split open naturally—harvest them before they release seeds to the ground. Others, like tomatoes or peppers, need to be picked intact.
✂️ Step 2: Harvest and Dry the Pods Properly
Use clean, sharp scissors or pruners to snip pods from the stem, leaving a small portion attached. This prevents bruising and keeps seeds intact. Place them in a single layer on a tray lined with paper towels or a mesh screen. Avoid stacking pods—this traps moisture and encourages mold.
Find a warm, dry spot with good airflow, like a sunny windowsill or a well-ventilated room. Let the pods dry for 2-4 weeks, flipping them occasionally to ensure even drying. You’ll know they’re ready when the seeds rattle inside when shaken. If pods feel damp or soft, they need more drying time.
🌿 Step 3: Extract and Clean the Seeds
Once pods are completely dry, gently crush them by hand or roll a pin over them to release the seeds. For tough pods like sunflowers, place them in a paper bag and shake vigorously. Sift the mixture through a fine-mesh strainer to separate seeds from chaff. Discard any debris or damaged seeds.
For extra cleanliness, spread seeds on a clean cloth or paper towel and let them air-dry for another 1-2 days. This final step ensures moisture doesn’t linger, which could cause seeds to spoil. Store them in a labeled envelope or small jar—write the plant variety and harvest year on the outside.
🪴 Step 4: Store Seeds for Long-Term Viability
Keep seeds in a cool, dark place like a pantry or refrigerator. A sealed container with a desiccant packet (like silica gel) helps prevent moisture buildup. Under ideal conditions, most seeds stay viable for 2-5 years, though some, like onions, last only a year. Check stored seeds annually—discard any that smell musty or look shriveled.
Labeling is key here. I use small sticky notes on jars or write directly on envelopes with a permanent marker. Include the plant name, harvest date, and any notes about performance (e.g., "disease-resistant" or "slow to germinate"). This saves time next planting season.
Tips & tricks for perfect seed pod harvesting
Here's what nobody tells you about saving seeds that'll actually grow next year.
Selection Tip: Harvest pods when they've fully matured but before they split open naturally. For plants like beans or peas, this means picking them when they're completely dry to the touch but still intact. I've learned the hard way that waiting too long means seeds scatter everywhere—sometimes even before I notice! For tougher pods like sunflowers, wait until they turn completely brown and feel brittle when squeezed gently.
Drying Strategy: The 2-4 week drying period in Step 2 is your best defense against moldy seeds. I've found that placing pods in a single layer on a mesh screen with good airflow (like a sunny windowsill) works best. Flip them every few days to ensure even drying—this prevents uneven moisture levels that can cause some seeds to spoil while others stay damp. If you're in a humid climate, consider using a small fan on low to speed up the process safely.
Cleaning Hack: After extracting seeds, don't skip the extra 1-2 days of air-drying mentioned in Step 3. This final drying step removes any lingering moisture that could cause seeds to rot in storage. I store my seeds in small envelopes with a tiny hole poked in the corner for ventilation—this prevents condensation buildup that often happens in completely sealed containers.
Storage Wisdom: For long-term viability, store seeds in the refrigerator or freezer if you live in a warm climate. While the instructions mention 2-5 years, I've had seeds last up to 7 years in the freezer (especially for hardy varieties like beans). Just remember to label everything with the plant name, harvest date, and any special notes—next year's you won't thank present-you for the mystery seeds!
Pro Tips for Edible Seed Pods
- Here's what nobody tells you about saving seeds that'll actually grow next year.
- Selection Tip: Harvest pods when they've fully matured but before they split open naturally. For plants like beans or...
- Drying Strategy: The 2-4 week drying period in Step 2 is your best defense against moldy seeds. I've found that placi...
Frequently asked questions
Got questions about growing and harvesting edible seed pods?
Here are some of the most common ones—plus quick answers to help you succeed!
What are the easiest edible seed pods to grow for beginners?
Start with snap peas, sugar snap peas, or dwarf runner beans—they’re hardy, fast-growing, and produce abundant pods. Okra is another great option if you love a slightly crisp, tangy texture. All thrive in warm climates and reward with a bountiful harvest!
How long does it take for edible seed pods to mature?
Most edible seed pods mature in 45–90 days, depending on the variety. Peas and beans are quick (6–8 weeks), while okra or tomato pods may take 2–3 months. Check seed packets for exact timelines—overripe pods can turn tough or bitter!
What do I do if my seed pods turn tough or stringy?
Tough pods usually mean they’re overripe. Harvest earlier—when pods are firm but still tender. For okra, pick when 3–4 inches long; for peas, snap them before seeds bulge. Blanching (covering plants with fabric) can also improve tenderness by slowing growth slightly.
Can I save seeds from store-bought edible pods for next year?
Yes! Let pods fully mature on the plant, dry them indoors, and extract seeds. Store in a cool, dry place (like a paper envelope) for up to 3 years. Note: Hybrid varieties may not produce true-to-type seeds—stick to heirloom or open-pollinated pods for reliable results.
Are edible seed pods safe for kids to eat?
Pods like snap peas and sugar snaps are crunchy, sweet, and kid-friendly. Always supervise young children to avoid choking hazards (especially with small seeds). Start with fully cooked pods (steamed or stir-fried) to ease them into the texture.
Wrapping up and next steps
Edible seed pods offer a zero-waste, sustainable way to enjoy nature’s bounty while ensuring a fresh harvest next season. Whether you’re growing peas, okra, or chili peppers, embracing these pods reduces food waste and connects you deeper to the gardening cycle. 🌱
Ready to take the next step? Start by planting a few seed pods this season—experiment with flavors and varieties, and share your harvest with friends or family. Your garden (and the planet) will thank you!