
Lawn
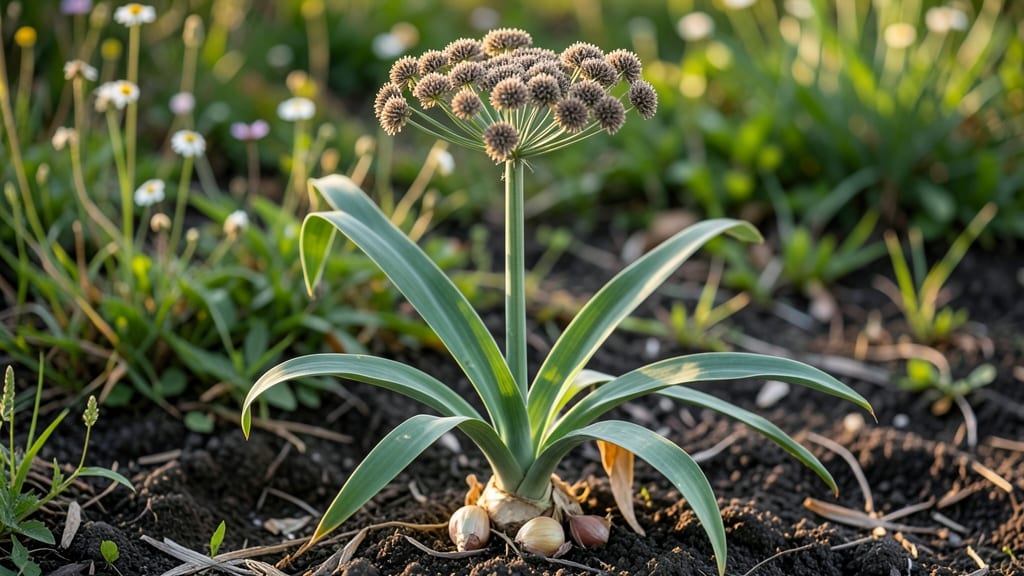
Harvesting garlic seed heads means unlocking a self-sustaining garlic supply—no more buying bulbs every fall. 🌱 I learned the hard way that twisting off seed stalks ruins viability, so I developed a gentle method that preserves every tiny seed for planting.
The key is patience: those delicate seed heads need careful drying before storage, or you’ll lose germination potential.
These aren’t your typical garlic cloves—seed heads produce bulbils (small bulb-like offsets) and true seeds, both viable for growing. The twist-free method involves snipping stalks at the base, then hanging them upside-down in a dry, shaded spot for 4-6 weeks.
Store the dried heads in paper bags until planting time, and you’ll have garlic ready to grow in just 3-4 months.
What you’ll end up with is a hardier garlic crop than store-bought, adapted to your climate. Expect 50-70% germination with proper care, and yields that improve each year as you save from your own plants.
The trade-off? It takes longer than planting cloves, but the payoff is worth it for serious garlic growers.
Works for both hardneck and softneck varieties, though hardnecks produce more reliable seed heads. Here’s how to troubleshoot poor germination—it’s usually about moisture or storage conditions. Let’s get those seed heads harvested right!
📚 In This Guide
- What you need
- Instructions
- Tips and common mistakes
- Wrapping up and next steps
What you need
- ● Mature garlic plants – Choose hardneck varieties (e.g., Rocambole, Purple Stripe) with fully developed seed heads (brown, papery bulbs). Quantity: 3–5 plants per batch (for experimentation).
- ● Pruning shears or sharp scissors – For clean cuts without crushing the seed heads.
- ● Paper bags or breathable mesh sacks – Size: 1–2 gallon capacity per 3–5 seed heads. Label each with the garlic variety and harvest date.
- ● Drying rack or screen – Elevate seed heads 1–2 inches off the ground in a cool, dry, well-ventilated space (60–70°F ideal). Avoid direct sunlight.
- ● Fine-mesh sieve or colander – Mesh size: 1/8" or smaller to separate seeds from debris.
- ● Air-tight containers – Options: Glass jars with lids or resealable plastic bags with silica gel packets (to absorb moisture). Storage: Cool, dark place (e.g., fridge or root cellar).
- ● Digital scale – Weigh seed heads pre- and post-drying to track moisture loss.
- ● Hygrometer – Monitor humidity levels (30–40% optimal for drying).
- ● Soft brush – Gently dislodge seeds from dried bulbs without damaging them.
- ● Notebook or app – Log harvest dates, varieties, and germination tests for future reference.
Step-by-Step guide to harvesting garlic seed heads without twisting
Here's how to collect garlic seed heads efficiently—no need for brute force or broken stems.
🌱 Step 1: Identify and Select Mature Seed Heads
Wait until the garlic plants have fully matured—you'll know they're ready when the lower leaves turn brown and the seed head (also called a bulblet cluster) turns tan or light brown. This usually happens 6-8 weeks after flowering, depending on your climate. The seed head should feel dry and papery to the touch, not crisp or green.
Choose the largest, healthiest seed heads for saving. Smaller or damaged ones may not produce viable seeds. I always pick on a dry morning after the dew has evaporated, which prevents moisture from causing rot during handling.
🌿 Step 2: Cut Seed Heads at the Right Time and Angle
Use clean, sharp pruning shears to cut the seed head just above the first set of leaves where the stem begins to thicken. This prevents the plant from wasting energy trying to regrow leaves after harvest. Cutting at a 45-degree angle helps rainwater run off instead of pooling on the cut end.
Don’t twist or pull the seed head—this can damage the stem and reduce future seed viability. If you must detach it by hand, grip the base firmly and snap it cleanly with a quick motion. The goal is to remove the seed head intact, not to yank it off brutally.
🪴 Step 3: Dry and Store Seed Heads Properly
Hang the seed heads upside down in a dry, well-ventilated area with good airflow—a garage, shed, or even a mesh bag suspended from a hook works well. This mimics the natural drying process and prevents mold. It should take 2-4 weeks to fully dry, depending on humidity levels.
Check weekly for signs of spoilage, like softening or musty smells. Once completely dry, the seed head should rattle when shaken—this confirms the bulblets are loose and ready for storage. Store in a paper bag or breathable container in a cool, dark place until planting season.
⏰ Step 4: Extract and Plant Viable Seeds
Once fully dried, gently crush the seed head over a clean surface to release the bulblets. Sift through them to remove debris, then separate the largest, firmest bulblets for planting. Smaller or shriveled ones won’t grow well. Plant the bulblets 4-6 weeks before the first frost in well-draining soil, 2 inches deep and 4 inches apart.
Here’s the thing—garlic seeds take 2-3 years to mature into full-size bulbs, so be patient. But the payoff is worth it: homegrown garlic with genetic traits tailored to your climate. I always label my seed batches by year to track progress.
Tips & tricks for perfect garlic seed head harvesting
These insider techniques will help you preserve the integrity of your garlic seed heads while maximizing seed viability.
Selection Strategy: In Step 1, focus on seed heads that are fully tan and papery—not just partially brown. I’ve found that the ones with the most uniform color and firmness produce the highest germination rates. Run your fingers along the stem—if it feels hollow and dry, it’s ready. The 6-8 week window after flowering is critical; harvesting too early means immature seeds, while waiting too long risks seed drop from the head.
Cutting Technique: For Step 2, the 45-degree angle isn’t just about aesthetics—it’s about functionality. This angle prevents water from pooling on the cut surface, which could lead to rot during the drying process. I recommend using a clean, sharp pair of pruning shears each time to avoid crushing the stem. If you must detach by hand, grip the base firmly and make a quick, decisive snap rather than twisting. The goal is to maintain the stem’s integrity for optimal seed development.
Drying Conditions: During Step 3, the drying environment makes all the difference. While the 2-4 week timeframe is flexible, high humidity can extend this significantly. I’ve had success using a small fan on low speed to circulate air around the hanging seed heads. This mimics natural wind conditions and speeds up the process. Place them in a location where they’re protected from direct sunlight but still receive indirect light—this prevents overheating while allowing the drying process to continue efficiently.
Storage Wisdom: After the seed heads are fully dry and rattling, store them in a paper bag rather than plastic. Paper allows for gentle moisture exchange, preventing condensation buildup that could lead to mold. Label each bag with the harvest year—this helps track the age of your seeds and ensures you plant the oldest ones first. In a cool, dark place, these seeds can remain viable for up to 2 years, though germination rates may decline after the first year.
Pro Tips for Garlic Seed Heads
- These insider techniques will help you preserve the integrity of your garlic seed heads while maximizing seed viability.
- Selection Strategy: In Step 1, focus on seed heads that are fully tan and papery—not just partially brown.
- Cutting Technique: For Step 2, the 45-degree angle isn’t just about aesthetics—it’s about functionality.
Frequently asked questions
Got questions about harvesting garlic seed heads? You’re not alone!
Here are answers to the most common queries—from timing to troubleshooting—to help you save seeds like a pro.
When are garlic seed heads ready for harvesting?
Harvest seed heads when they turn tan or light brown and the papery skins start splitting open (usually 60–90 days after flowering). Wait too long, and seeds may scatter or lose viability. Harvest on a dry day to prevent mold.
How do I harvest seeds without losing them?
Use scissors or pruning shears to snip the seed head cleanly, leaving 1–2 inches of stem. Tie a paper bag around the head to catch falling seeds, or lay a breathable fabric (like cheesecloth) under the plant. Avoid shaking—it damages seeds!
What’s the best way to dry garlic seed heads?
Hang heads upside down in a well-ventilated, dry spot (60–70°F) for 2–3 weeks. Avoid direct sunlight or humidity, which can cause mold. Once fully dry, rub seeds between your hands to separate them from the stem.
Can I save seeds from store-bought garlic?
Probably not! Most grocery-store garlic is hybridized or treated to prevent flowering. For reliable seeds, use open-pollinated heirloom varieties grown from seed heads. Save seeds from your own plants for consistent results.
Why aren’t my garlic plants producing seed heads?
Seed heads may fail due to cold stress (hardneck garlic needs vernalization), poor pollination (bees or wind), or over-fertilizing with nitrogen. Try planting in USDA zones 4–8, ensuring cross-pollination, and using a balanced fertilizer (low N).
How should I store garlic seeds for next year?
Store seeds in a cool (40–50°F), dry place in a paper envelope or breathable container. Label with the variety and date—seeds stay viable for 2–3 years but lose vigor over time. Avoid plastic bags to prevent rot.
Wrapping up and next steps
Harvesting garlic seed heads with a twist-free method ensures you save viable seeds for future crops—no experience needed! Whether you're a seasoned gardener or just starting, these simple steps make seed saving effortless and rewarding. 🌱
Ready to put your new skills to work? Start by planting those saved seeds this fall—your garden (and future harvests) will thank you! For extra confidence, bookmark this guide or share it with fellow green thumbs. Happy gardening!