
Lawn
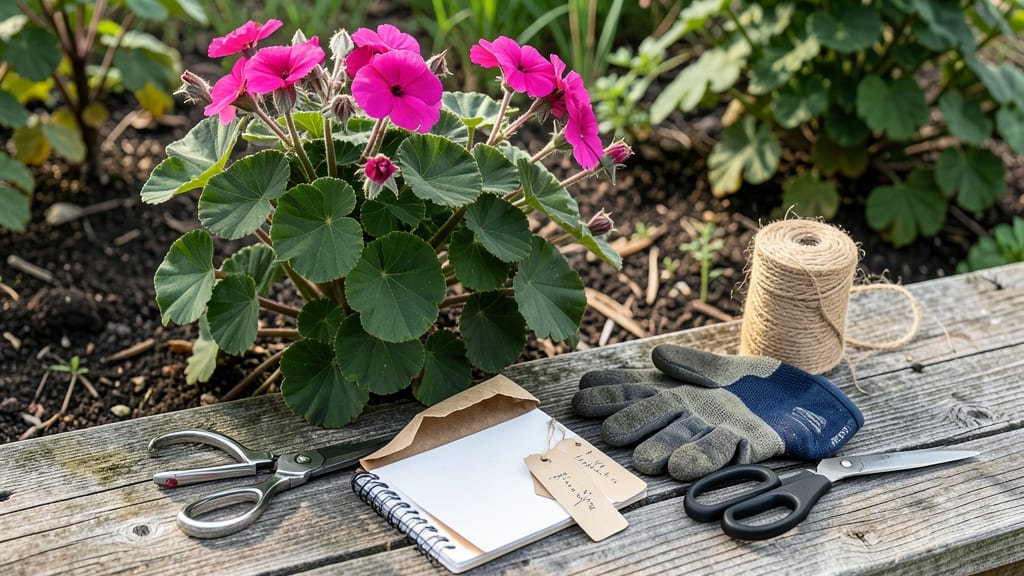
Geranium seed collection isn’t about twisting pods—it’s about waiting for them to open naturally. 🌿 I’ve watched these delicate seed heads transform from fuzzy green balls into dry, papery husks that split open on their own, revealing tiny brown seeds ready for harvest. The key is timing: you’ll know they’re ready when the pods turn brown and start cracking open without any help.
All you need is a pair of scissors, a paper bag, and patience. Once the pods split, gently shake them over the bag to catch the seeds—no need to rush. If you miss the natural opening, you can carefully snip open dried pods, but the seeds will be less viable.
Store them in a cool, dry place until spring, and you’ll have a fresh batch of geraniums growing in just a few weeks.
These seeds stay viable for about 2 years if stored properly, so you can save them for multiple growing seasons. The first flush of seedlings will be small but sturdy, and with the right care, they’ll grow into the same vibrant blooms you love.
No twisting, no fuss—just nature doing the work for you.
Perfect for gardeners who want to propagate their favorite varieties without buying new plants. Here’s how to do it right the first time—no guesswork involved.
📚 In This Guide
- What you need
- Instructions
- Tips and common mistakes
- Wrapping up and next steps
What you need
- ● Mature geranium plants: Healthy, fully bloomed plants (preferably Pelargonium varieties) with seed pods forming.
- ● Seed collection bags: Breathable paper or mesh bags (1-2 per plant, ~6x8 inches each).
- ● Pruning shears or scissors: Sharp, clean tools (sterilize with rubbing alcohol).
- ○ Gloves (optional but recommended): Lightweight gardening gloves to protect hands from prickly stems.
- ● Labeling tags: Waterproof labels + marker to note plant varieties and collection dates.
- ● Drying tray or screen: Elevate pods to dry (e.g., a wire rack or wooden frame).
- ○ Small fan (optional): For faster drying in humid climates.
- ● Seed storage containers: Airtight jars or envelopes with silica gel packets for long-term storage.
- ● Camera or notebook: Document pod maturity stages for future reference.
- ● Humidity monitor: Track drying conditions (ideal: 40-50% humidity).
- ● Seed viability test kit: Test germination rates if saving seeds for next season.
How to collect geranium seeds from naturally opening pods
Geraniums make seed collection easy—just wait for the pods to pop open on their own.
🌿 Step 1: Identify Mature Seed Pods
Look for geranium seed pods that have turned from green to a papery brown color. These pods will naturally split open when fully dry, revealing tiny seeds inside. Avoid harvesting pods that are still green—they won’t have mature seeds yet. I like to check my plants in late summer or early fall, just before the first frost, when most pods have dried but haven’t yet released their seeds.
Gently squeeze a pod between your fingers—if it crumbles easily, it’s ready. If it feels firm or resists, wait a few more days. The pods should open with just a light touch, revealing clusters of tiny, dark seeds inside. This is your signal that collection time has arrived.
⏰ Step 2: Harvest Seeds at the Right Time
Collect seeds on a dry, sunny morning when the pods are fully open but before birds or wind can scatter them. I like to work with a small bowl or envelope nearby to catch the seeds as they fall. Hold the plant stem firmly with one hand while gently shaking the seed head over the container—this prevents the pods from breaking off and ensures you capture as many seeds as possible.
Don’t rush this step. If you harvest too early, the seeds may not be fully viable. If you wait too long, they might scatter naturally. Aim for a time when most pods are open but still attached to the plant. You’ll know you’ve timed it right when your container fills with tiny, dark seeds that look like miniature coffee beans.
🪴 Step 3: Dry and Store the Seeds Properly
Spread the collected seeds on a clean, dry paper towel or a piece of parchment paper in a single layer. Let them dry in a warm, dry place for 3-5 days, stirring them occasionally to ensure even drying. Proper drying prevents mold and ensures long-term viability. You’ll know they’re dry enough when they feel light and brittle between your fingers.
Once dry, transfer the seeds to a small envelope or airtight container. Label it with the geranium variety and the harvest date—this helps track germination rates later. Store the seeds in a cool, dark place, like a seed drawer or even the fridge, where they’ll stay viable for 2-3 years. The key here is keeping them dry and protected from moisture, which can cause them to spoil.
🌱 Step 4: Test Germination Before Planting
Before you plant, test a few seeds to confirm they’re still viable. Place 5-10 seeds in a small container with moist potting mix, cover lightly with soil, and keep them in a warm spot (70-75°F). Check for sprouts in 7-14 days. If most seeds germinate, your collection is ready for planting. If not, the seeds may have lost viability and need to be replanted fresh.
Once you’ve confirmed germination, you’re ready to sow the seeds in well-draining soil under bright, indirect light. Keep the soil consistently moist but not soggy, and you’ll see new geraniums in 4-6 weeks. This step ensures you’re not wasting time on seeds that won’t grow, giving you a head start on next season’s garden.
Tips & tricks for perfect geranium seed harvesting
These simple insights will help you maximize your seed yield while avoiding common pitfalls that can turn a good harvest into a frustrating one.
Timing is Everything: In Step 1, when checking for mature pods, look for that subtle papery texture—it's the key indicator. I've learned the hard way that pods that still feel firm won't release seeds properly. The ideal time is just before your first frost, when the pods have dried but haven't yet released their seeds to the elements. This window is usually late September to early October in most climates, but always check your local frost dates.
Harvest Technique That Works: For Step 2, I can't stress enough how important it is to work with a dry plant. Even a little morning dew can make seeds stick to the pods or scatter unpredictably. I've found that using a small, lightweight container—like a paper envelope or even a coffee filter—catches the most seeds with minimal mess. The gentle shaking motion should be just enough to release the seeds without damaging the pods.
Drying Strategy: During Step 3's drying process, don't be tempted to rush it. Those 3-5 days are crucial for preventing mold and ensuring seed viability. I like to place my drying seeds on a screen or mesh surface to allow airflow from all sides. This helps prevent any moisture buildup that could cause spoilage. Stirring them every 24 hours ensures even drying throughout the batch.
Storage Wisdom: When storing your seeds in Step 3, consider adding a small silica gel packet to your airtight container. These packets absorb any residual moisture that might cause the seeds to spoil. I've had great success storing my seeds in the fridge's vegetable drawer—it's cool enough to preserve viability but not so cold that it affects germination rates.
Pro Tips for Geranium Seed Collection
- These simple insights will help you maximize your seed yield while avoiding common pitfalls that can turn a good harvest into a frustrating one.
- Timing is Everything: In Step 1, when checking for mature pods, look for that subtle papery texture—it's the key indicator.
- Harvest Technique That Works: For Step 2, I can't stress enough how important it is to work with a dry plant.
Frequently asked questions
Got questions about collecting geranium seeds? You’re not alone! Here are some of the most common queries—and their straightforward answers—to help you master the process without the fuss.
When is the best time to collect geranium seeds?
Timing is everything! Harvest seeds when the pods turn brown and start splitting open—usually late summer to early fall. If you wait too long, the seeds may scatter or sprout prematurely. Pro tip: Morning is ideal for collecting, as dew keeps pods moist and easier to handle.
How do I know if the seeds are ready to harvest?
Look for dry, papery pods that crack open naturally—this signals maturity. Inside, you’ll find tiny, brown or black seeds. If the pods are still green or closed, they’re not ready yet. Troubleshooting: If pods stay closed, they may need more sunlight or warmth to mature.
Can I store geranium seeds for next year?
Once collected, let seeds dry completely (1–2 weeks in a cool, dry place), then store them in a paper envelope or airtight container with a desiccant (like silica gel). Keep them in a dark, cool spot (below 40°F/4°C) for up to 2–3 years. Label them to avoid mix-ups!
What if my geranium pods don’t open on their own?
Sometimes, pods resist opening due to humidity or lack of sunlight. Try these fixes:
- Gently twist the pod to release seeds (but avoid damaging them).
- Move the plant to a sunnier spot to encourage natural drying.
- Use a paper bag over the plant to collect scattered seeds.
Are there alternatives if I can’t collect seeds?
No worries! If seed collection isn’t an option, you can:
- Buy seeds from a nursery (opt for heirloom varieties for true geranium traits).
- Propagate from stem cuttings in water or soil—geraniums root easily!
- Swap seeds with fellow gardeners or local plant clubs.
Wrapping up and next steps
Collecting geranium seeds from twist-free pods is a rewarding way to propagate these vibrant plants—no fuss, just nature’s clever design! 🌱 By following the right timing, tools, and techniques, you’ll ensure a bountiful harvest of high-quality seeds for future gardens.
Now that you’re equipped with the know-how, grab those pods, get growing, and share your newfound skills with fellow gardening enthusiasts!
Ready to dive deeper? Experiment with different geranium varieties or explore seed-saving tips to expand your green thumb even further!