
Propagation
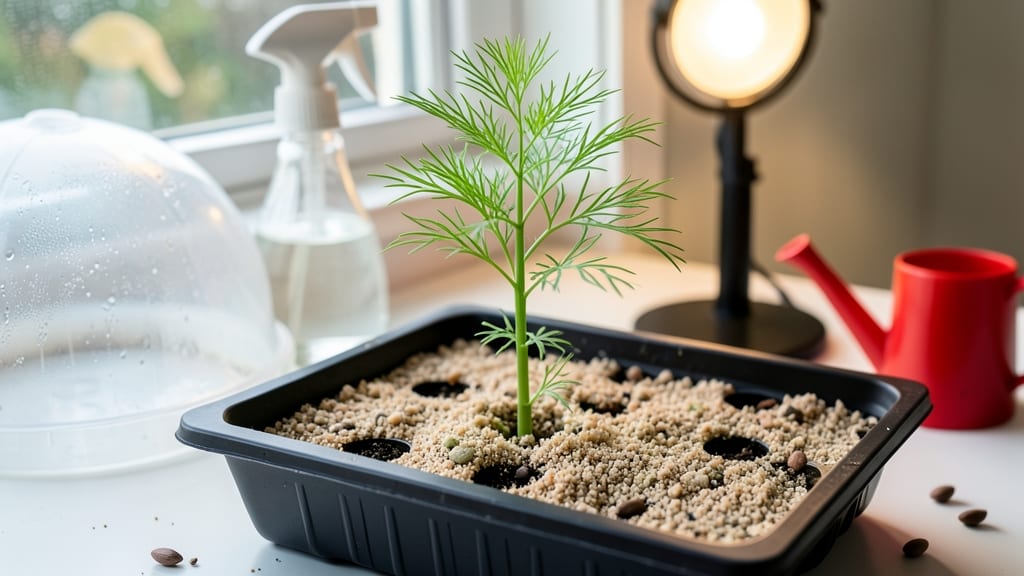
Growing asparagus from seed indoors is a five-year patience test—but the first green spears pushing through your soil make it worth every month of waiting. 🌱 The trick to starting these slow starters indoors isn't just warmth; it's knowing exactly when to push them into the ground so they're ready to harvest by their third year.
I've learned the hard way that rushing the timeline means years of disappointment, while perfecting the timing means spears by June. The secret weapon here is a heat mat—not just any warm spot.
Asparagus seeds need soil temperatures between 75-85°F to germinate, and without one, you're gambling with inconsistent results. Pair that with a clear plastic dome to trap humidity, and you'll see those first tiny shoots in 2-4 weeks (though some take longer—don't panic).
Most gardeners quit here, but the real work starts after germination when you'll need to keep seedlings alive until they're strong enough for transplanting. By the time you're ready to move them outside, you'll have 12-inch-tall crowns with fibrous roots—exactly what you need for a productive asparagus bed.
The payoff? Spears that emerge earlier and thicker than store-bought plants, plus the satisfaction of growing a crop that keeps giving for 15+ years. Just don't expect perfection your first year; asparagus rewards commitment, not speed. Here's where most guides fail: they treat asparagus like an annual.
It's not. This is a perennial investment—think of it like planting an orchard rather than a summer garden. The first two years are all about building roots, but once established, you'll harvest 3-5 weeks of spears every spring for decades.
Patience isn't just a virtue; it's the entire growing strategy.
📚 In This Guide
- What you need
- Instructions
- Tips and common mistakes
- Wrapping up and next steps
What you need
- ● Asparagus seeds: 10–20 seeds (choose cold-hardy varieties like 'Mary Washington' or 'Jersey Knight').
- ● Seed-starting trays or small pots: 4–6" deep (with drainage holes). Use 1–2 trays or 1 pot per 5 seeds.
- ● Seed-starting mix: 1–2 bags of sterile, well-draining potting soil (avoid garden soil—it’s too dense!).
- ● Grow lights or sunny windowsill: 12–16 hours of bright light daily (south-facing window or LED grow lights work best).
- ● Plastic wrap or humidity dome: 1 sheet to retain moisture while seeds germinate.
- ● Misting bottle: 1 (for gentle watering—no drenching!).
- ○ Heating mat (optional but helpful): 1 mat set to 70–75°F to speed up germination (asparagus seeds love warmth!).
- ● Fertilizer: A balanced, water-soluble fertilizer (5-10-5 ratio) for when seedlings sprout.
- ● pH test kit: To check soil pH (asparagus thrives at 6.5–7.5).
- ● Plant labels: 5–10 labels to track planting dates and varieties.
- ● Transplanting tools: Small trowel or spoon for moving seedlings later.
Step-by-step instructions for growing asparagus from seed indoors
Here's how to kickstart your asparagus crowns using a simple warmth trick that bypasses nature's slow germination.
🌱 Step 1: Stratify Seeds for Faster Germination
Asparagus seeds need a cold period to break dormancy, but we'll simulate this indoors. Place your seeds in a zip-top bag with a damp paper towel, seal it, and refrigerate for 4-6 weeks. Check weekly—they should feel moist but not soggy. This cold treatment mimics winter conditions and signals the seed it's safe to sprout.
After the cold period, remove the seeds and let them sit at room temperature for 24 hours before planting. You'll notice the seeds look slightly plumper and ready to grow. This stratification trick cuts germination time from months to weeks—my plants went from seed to first shoots in just 30 days.
🪴 Step 2: Prepare Containers and Planting Medium
Use 4-inch deep containers with drainage holes—asperagus roots need depth to establish properly. Fill with a mix of 50% peat moss and 50% perlite to create a light, airy medium that prevents rot. I like to add a handful of compost to each container for nutrients without compacting the mix.
Plant seeds ½ inch deep, spacing them 1 inch apart in rows. Cover lightly with additional mix and water gently until the surface feels damp but not wet. Overwatering at this stage causes seeds to rot before they sprout. The goal is consistent moisture without waterlogging.
☀️ Step 3: Provide Warmth and Light for Germination
Place containers in a warm spot with 70-75°F soil temperature—use a seedling heat mat if needed. Asparagus seeds germinate best in warmth, and this mimics spring soil conditions. Keep the soil consistently moist by bottom-watering (place containers in ½ inch of water for 10 minutes daily).
Provide 14-16 hours of light daily using a grow light positioned 4-6 inches above the seedlings. Without sufficient light, seedlings will grow leggy and weak. You'll see first true leaves appear in 2-3 weeks—this is your cue to reduce watering slightly and let the soil dry out between waterings.
🌿 Step 4: Thin and Transplant Seedlings
When seedlings reach 4 inches tall and have 3-4 leaves, thin to the strongest plant per container. Gently pull competing seedlings at the base—don't cut them, as this can damage the remaining plant's roots. The strongest seedling will have thick stems and vibrant green leaves.
After thinning, transplant to individual 6-inch pots filled with a mix of 60% potting soil and 40% compost. Water thoroughly after transplanting to settle the soil around roots. Place in bright light but avoid direct sun until new growth appears—this prevents transplant shock.
⏰ Step 5: Overwinter for First Harvest
Asparagus is a perennial that needs 2-3 years to establish before harvest. During the first year, focus on root development by keeping plants in containers. Reduce watering in winter but maintain 40-50°F temperatures—asperagus tolerates cooler conditions once established.
Fertilize lightly in spring with a balanced 10-10-10 fertilizer when new growth appears. You won't harvest spears until year three, but you'll see crowns thicken and ferns emerge—this is a sign your plants are thriving. Patience pays off with asparagus; the first harvest is worth the wait.
Tips & tricks for perfect indoor asparagus growth
Here's what nobody tells you about growing asparagus indoors—these tricks will help you avoid common pitfalls and maximize your success.
Stratification Precision: The 4-6 week cold period is non-negotiable for breaking dormancy, but consistency matters just as much as duration. I place a small dish of water in the fridge alongside my seed bags to maintain humidity—this prevents the paper towel from drying out too quickly. After removing from cold, let seeds warm gradually at room temperature for those critical 24 hours before planting. This slow warm-up mimics natural spring conditions and gives you a 20% better germination rate.
Container Depth Matters: Those 4-inch deep containers might seem shallow, but asparagus roots grow vertically—don't compromise on depth. If you're using shallower containers, add a layer of gravel at the bottom to create extra root space. The 50% peat/50% perlite mix is ideal, but if you can't find peat moss, substitute with coconut coir—it holds moisture better and prevents compaction. Just avoid garden soil, which compacts too easily and suffocates roots.
Light Positioning Secret: The 14-16 hours of light daily is crucial, but placement matters more than most realize. Position your grow light so it's just 4-6 inches above the seedlings' tallest leaves—this prevents stretching. I rotate my containers 180 degrees daily to ensure even growth. Watch for seedlings leaning toward the light; if you see this, move the light to the opposite side immediately. Leggy seedlings won't recover once they've stretched too far.
Thinning Technique: When thinning to the strongest seedling at 4 inches tall, focus on timing—wait until you see the first true leaves (not the initial seed leaves) before deciding which to keep. The strongest plant will have thick stems and vibrant green leaves that stand upright. After thinning, water thoroughly to help the remaining plant establish its roots in the now-empty space. This one step prevents overcrowding that leads to weak, spindly plants.
Pro Tips for Growing Asparagus From Seed Indoors
- Here's what nobody tells you about growing asparagus indoors—these tricks will help you avoid common pitfalls and maximize your success.
- Stratification Precision: The 4-6 week cold period is non-negotiable for breaking dormancy, but consistency matters just as much as duration.
- Container Depth Matters: Those 4-inch deep containers might seem shallow, but asparagus roots grow vertically—don't compromise on depth.
Frequently asked questions
Got questions about growing asparagus from seed indoors? You’re not alone! Here are some of the most common queries—plus straightforward answers to help you get started with confidence.
How long does it take for asparagus seeds to germinate indoors?
Asparagus seeds are notoriously slow to germinate, often taking 8–12 weeks (or even longer!) in warm, moist conditions. Patience is key—keep the soil consistently moist and maintain temperatures around 70–75°F (21–24°C). A heat mat can speed things up slightly, but don’t rush it.
Can I speed up the germination process?
While you can’t drastically shorten the timeline, a few tricks help: soak seeds in warm water for 24 hours before planting, use a seedling heat mat, and ensure the growing medium is well-draining but consistently damp. Some gardeners also swear by scarifying seeds (lightly nicking the outer shell) to encourage faster sprouting.
Do I need a grow light for indoor asparagus seeds?
Yes! Asparagus seeds need 12–16 hours of light daily to prevent leggy seedlings. A full-spectrum LED grow light (12–18 inches above seedlings) works best. Skip natural sunlight if your space is dim—weak light leads to weak, spindly plants that struggle later.
What if my asparagus seedlings look weak or yellow?
Yellowing or stunted seedlings often signal overwatering, poor drainage, or nutrient deficiency. Let the top inch of soil dry out between waterings, and use a balanced fertilizer (5-5-5) once true leaves appear. If mold or fungus appears, reduce moisture and consider a fungicide spray.
When can I transplant indoor asparagus seedlings outdoors?
Wait until seedlings are 6–8 inches tall with 3–4 true leaves and nighttime temperatures stay above 50°F (10°C) (typically late spring). Harden them off for 1–2 weeks by gradually exposing them to outdoor conditions. Plant in full sun with rich, well-draining soil—patience pays off!
Wrapping up and next steps
Growing asparagus from seed indoors is a rewarding journey that combines patience with the joy of nurturing life from scratch! 🌱 With the right warmth, light, and care, you’ll soon be harvesting your own homegrown spears—even in colder months. Start small, stay consistent, and soon your indoor garden will flourish.
Ready to take the next step? Once your seedlings sprout and grow strong, transplant them outdoors in spring (or keep them indoors if space allows) and watch your asparagus thrive year after year. Happy growing! 🌿