
Propagation
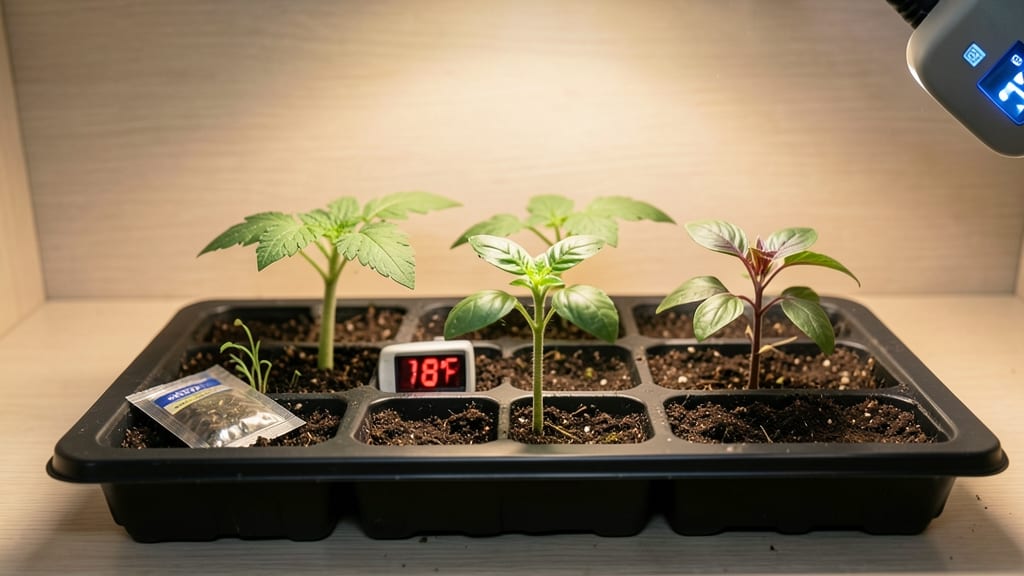
My seed starting game changed when I discovered heating pads designed for germination—those little warmth boosts cut my wait time for sprouts from weeks to days. 🌱 The difference between a slow, uneven start and a fast, synchronized batch of seedlings comes down to consistent bottom heat, and these pads deliver exactly that.
You'll need a heating mat, a seed tray, and a reliable thermometer to keep temps between 70-80°F—most seeds thrive in that range. Place the mat under your tray, plug it in, and watch as tiny roots push through the soil within 3-7 days, depending on the plant.
No more waiting for nature to warm up on its own. The payoff is obvious: stronger seedlings, fewer leggy stretchers, and a head start that translates to bigger harvests. Peppers, tomatoes, and herbs especially love the extra warmth, but even cool-season crops benefit from a temporary boost.
Works with any seed-starting setup, from windowsill trays to grow lights. Here's how to get it right the first time!
📚 In This Guide
- What you need
- Instructions
- Tips and common mistakes
- Wrapping up and next steps
What you need
- ● Heating pad for seed starting – Choose a thermostatically controlled pad (8"–12" wide) with adjustable heat settings (ideally 70°–85°F). Look for low-voltage options (100–150W) for safety.
- ● Seed-starting trays or containers – Use clear plastic seed trays (with domes) or biodegradable peat pots (3"–4" deep). Quantity depends on your seed volume (e.g., 100+ cells for bulk starts).
- ● Seed-starting mix – 1–2 quarts of a sterilized, lightweight mix (e.g., 50% peat moss + 50% perlite/vermiculite). Avoid garden soil—it’s too dense!
- ● Seeds – Pre-soaked or dry seeds (follow packet instructions for depth). Pro tip: 💡 Label trays with seed types and planting dates!
- ● Spray bottle – For gentle watering (avoid over-saturating the mix).
- ● Thermometer – A soil thermometer (0°–120°F range) to monitor pad temperature accurately.
- ● Plastic wrap or humidity dome – Keeps moisture in until seeds sprout (remove once germination starts).
- ○ Timer or smart plug – Optional but helpful for 12–16 hours of daily heat (mimics natural conditions).
- ● Grow lights – LED full-spectrum bulbs (12–16 hrs/day) for seedlings once they sprout.
- ● Heat mat with built-in thermostat – Eliminates guesswork (e.g., Vivosun or Grower’s Solution models).
- ● Humidity tray – Adds extra moisture for pickier seeds (like orchids or herbs).
- ● Seedling heating cable – For smaller setups (e.g., under a single tray).
- ● Notebook or app – Track germination dates, temps, and seedling progress (e.g., Gardenate or Seed to Seed app).
Step-by-Step instructions for using heating pads to speed up germination
Here’s how to use a seed-starting heating pad to coax faster, stronger sprouts every time.
🌱 Step 1: Set Up Your Heating Pad and Trays
Place your seed-starting trays directly on the heating pad, ensuring the bottoms of the containers make full contact with the warm surface. I like to use a shallow tray underneath to catch any condensation that forms—this keeps things tidy and prevents moisture from pooling. Most heating pads have a thermostat, so set it to the recommended temperature for your seeds (usually 75-85°F for most vegetables).
If your pad doesn’t have a built-in thermostat, use a separate one placed near the trays to monitor the temperature. You’ll want to keep it consistent—fluctuations can slow germination or even kill delicate seeds. I always run the pad for 12-24 hours a day during the germination phase, then reduce to 8-10 hours once sprouts appear.
💧 Step 2: Prepare Your Seeds and Soil for Warmth
Before placing your trays on the heating pad, make sure your soil is moist but not soggy—think of a damp sponge. Overwatering before germination can lead to rot, especially with the extra warmth. I like to use a spray bottle to mist the soil evenly, then let it sit for 10-15 minutes so the moisture distributes without pooling.
If you’re sowing seeds directly into the trays, press them into the soil at the correct depth (usually twice the seed’s diameter). Cover lightly with a fine layer of soil or vermiculite—just enough to keep them in place. Once the trays are on the pad, you’ll see condensation form on the inside of the dome or plastic wrap (if you’re using one). This is normal and helps maintain humidity.
☀️ Step 3: Monitor Temperature and Humidity for Optimal Germination
Check the temperature daily—some seeds (like peppers or tomatoes) thrive at the higher end of the range (80-85°F), while others (like lettuce) prefer 70-75°F. If your pad doesn’t have precise controls, adjust the thermostat setting slightly and wait 24 hours to see how the seeds respond. You’ll know it’s working when condensation forms on the inside of the dome or when the soil feels warm to the touch.
Humidity is just as critical as warmth. If the air feels dry, mist the inside of the dome or the soil surface lightly with water. You’ll see the first signs of germination in 3-10 days, depending on the seed type. The moment you spot the first true leaves (not just the initial sprouts), reduce the heating pad’s runtime to 8 hours a day—too much heat now can cause leggy growth.
⏰ Step 4: Transition to Normal Growing Conditions
Once your seedlings have 2-3 sets of true leaves (usually 10-14 days after germination), it’s time to taper off the heat. Gradually reduce the pad’s runtime by 1 hour every 2 days until you’re using it only for 4-6 hours at a time. This slow transition prevents shock and helps seedlings adjust to room temperature.
Watch for signs of stress—if leaves turn pale or stems stretch too quickly, your light source might be too far away or too weak. Move seedlings under grow lights or a sunny window within 4 inches of the plants. At this stage, water from the bottom of the tray to encourage strong root development. You’ll know you’re on the right track when seedlings stand upright with dark green, sturdy leaves.
Tips & tricks for perfect warmth-controlled germination
Here's what nobody tells you about using heating pads to get seeds sprouting like clockwork.
Temperature Consistency is Key: The 75-85°F range in Step 1 is your sweet spot, but don't just trust the thermostat. I place a small thermometer right in the soil—this gives you the real story. Some heating pads run hotter in spots, so rotate your trays daily to prevent uneven germination. You'll notice seeds on the cooler edges lagging behind their warm-center neighbors if you don't.
Humidity Hack for Stubborn Seeds: If you're not seeing condensation form within 24 hours after setting up your trays (Step 2), your humidity levels are too low. I've found that placing a small dish of warm water near the trays helps maintain that critical moisture balance. For seeds like lettuce that prefer cooler temps (70-75°F), you might need to mist the soil surface every 12 hours instead of waiting for condensation to appear naturally.
Transition Timing Matters: Those 10-14 days until you see 2-3 sets of true leaves (Step 4) can feel like forever, but rushing the heat reduction is worse. I've seen seedlings go from sturdy to leggy overnight when people cut the heat too fast. The 1 hour every 2 days reduction schedule works because it mimics natural temperature fluctuations plants experience outdoors, preparing them for transplanting.
Pro Tips for Heating Pads For Seed Starting
- Here's what nobody tells you about using heating pads to get seeds sprouting like clockwork.
- Temperature Consistency is Key: The 75-85°F range in Step 1 is your sweet spot, but don't just trust the thermostat.
- Humidity Hack for Stubborn Seeds: If you're not seeing condensation form within 24 hours after setting up your trays (Step 2), your humidity levels are too low.
Frequently asked questions
Got questions about using heating pads for seed starting? You’re not alone—warmth, timing, and setup can feel tricky at first! Below are answers to the most common queries to help you grow confident (and sprouts) faster.
How warm should a heating pad be for seed starting?
Aim for 65–75°F (18–24°C) for most seeds—check the packet for specifics (some, like peppers, prefer 80°F+). Use a thermometer to monitor temps; heating pads rarely exceed 85°F, but avoid overheating (above 90°F can kill seeds).
How long do seeds need to stay on a heating pad?
Most seeds germinate in 5–14 days with consistent warmth, but remove them once sprouts appear (usually 2–3 inches tall). Overheating after germination can stunt growth. Pro tip: Keep lights 2–3 inches above seedlings to balance warmth and light.
Can I use a heating pad without a seed tray?
Yes! Place a damp paper towel or moistened seed mat directly on the pad, then lay seeds on top. For trays, ensure they’re flat and heat-conductive (plastic or ceramic work best; wood may insulate too much). Always add a thermometer to avoid guesswork.
What if my seeds aren’t germinating on the heating pad?
Check these first:
- Moisture: Soil should feel like a wrung-out sponge—not soggy, not dry.
- Depth: Plant seeds twice as deep as their width (shallow seeds need light!).
- Temp consistency: Fluctuations below 60°F can stall germination. Try a secondhand thermostat for precision.
- Seed viability: Test old seeds with a paper towel germination test.
Are there alternatives to electric heating pads?
Try these low-cost, eco-friendly options:
DIY Warmth
How-To
Pile of compost
Place trays on a moist, active compost pile (60–70°F). Cover with a clear lid to trap heat.
Reusable heat sink
Fill a thermos or insulated bottle with warm (not hot!) water, wrap in a towel, and nest trays around it.
Bottom-watering with warm water
Use a spray bottle or watering can with 70°F water to gently warm soil from below.
Note: These methods may not match electric pads’ consistency but work in a pinch!
Wrapping up and next steps
Heating pads for seed starting are a game-changer for gardeners eager to see faster, healthier sprouts! 🌱 By providing consistent warmth, they mimic ideal germination conditions—no more waiting weeks for seeds to break through the soil.
Whether you're a beginner or a seasoned pro, these tools make the process simpler, more reliable, and way more rewarding.
Now that you’re armed with the right knowledge, it’s time to roll up your sleeves and start planting! Grab a heating pad, set up your seed trays, and watch your garden dreams take root—literally. Happy growing! 🌿