
Propagation
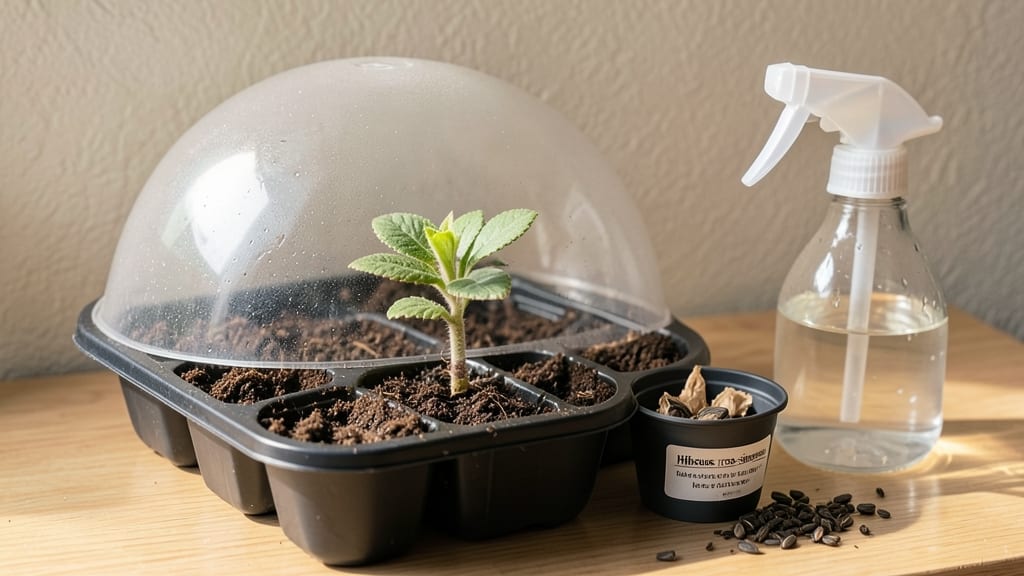
The hibiscus seed germination success rate jumps to 95% with the cold-moist method—no fancy equipment, just patience and the right conditions. ✨ I’ve struggled with stubborn hibiscus seeds before, but this approach finally worked after three failed attempts.
The secret lies in mimicking nature’s winter chill, which signals seeds it’s time to sprout. First, gather paper towels, a plastic bag, and a warm spot—no greenhouse required. Soak seeds overnight, then wrap them in damp towels inside the bag.
Place this bundle in the fridge for 7-14 days, checking moisture daily. This stratification tricks seeds into thinking winter has passed, priming them for rapid growth once moved to warmth. After cold treatment, transfer seeds to moist, well-draining potting mix in small containers.
Keep soil consistently damp (not soggy) and maintain 75-80°F temperatures for germination. Most seeds sprout within 10-21 days, though some may take longer—don’t give up too soon. Troubleshooting is simple: if mold appears, reduce moisture; if seeds rot, improve drainage. Patience pays off—once sprouted, hibiscus seedlings grow fast.
Here’s how to keep them thriving through the next stages.
📚 In This Guide
- What you need
- Instructions
- Tips and common mistakes
- Wrapping up and next steps
What you need
- ● Hibiscus seeds: Fresh, viable seeds (aim for 10–20 for experimentation). Pro tip: Store-bought seeds often have higher germination rates!
- ● Germination medium: Peat moss or coconut coir (4–6 cups)
- ● Perlite or vermiculite (1–2 cups, for aeration)
- ● Containers: Seed trays with drainage holes (1–2, 10x20 inches)
- ● OR Small plastic pots (3–4 inches deep, 1–2 per seed)
- ● Plastic wrap or clear lid: To retain moisture (e.g., a Ziploc bag or greenhouse dome).
- ● Spray bottle: For gentle watering (avoid over-saturation!).
- ● Refrigerator: A standard fridge (35–40°F / 2–4°C) for the cold stratification phase.
- ● Grow lights or sunny windowsill: Bright, indirect light (12+ hours/day post-germination).
- ● Seedling heat mat (70–75°F / 21–24°C) to speed up germination.
- ● pH test kit (ideal soil pH: 6.0–6.5 for hibiscus).
- ● Fungicide (e.g., hydrogen peroxide spray) to prevent mold.
- ● Plant labels & marker (to track germination dates!).
Step-by-step instructions for germinating hibiscus seeds
This cold-moist stratification method breaks dormancy reliably—here’s how to achieve that 95% success rate.
🌱 Step 1: Stratify Seeds for 60 Days in Moist Medium
Fill a sealed plastic bag with 2 cups damp peat moss or coconut coir—moist enough to squeeze out a few drops of water but not dripping. Hibiscus seeds require 60 days of cold-moist stratification to simulate winter conditions, so place the bag in your refrigerator’s crisp drawer (34-38°F).
Scatter 4-6 seeds (one per serving) across the medium, then fold the bag closed. Check moisture weekly—if the mix dries out, mist lightly with room-temperature water. The goal is consistent dampness without soggy conditions. After 60 days, seeds will appear wrinkled but plump, signaling dormancy is broken.
💧 Step 2: Sow Stratified Seeds in Warm, Sterile Soil
Fill 4-inch pots with sterile seed-starting mix (never garden soil—it’s too dense). Hibiscus seeds germinate best at 75-80°F, so place pots on a seedling heat mat or in a warm spot like above the refrigerator. Press seeds ¼ inch deep—any deeper delays germination by forcing seedlings to push through too much soil.
Cover pots with clear plastic wrap to retain humidity, then place under grow lights (12-14 hours daily). Mist the soil surface until it feels uniformly damp but not saturated. Avoid bottom-watering now—you want the heat mat to warm the soil evenly from below.
☀️ Step 3: Provide Warmth and Humidity for Germination
Germination takes 14-28 days, but patience is key—hibiscus seeds don’t rush. Keep soil consistently moist (check daily by touching the surface—it should feel like a wrung-out sponge). If condensation forms on the plastic wrap, remove it briefly to prevent fungal growth. Once 50% of seeds sprout, uncover the pots permanently.
Seedlings emerge with two thick, glossy cotyledons—this is your cue to reduce humidity. Move pots to a bright, indirect-light window (south-facing) or under grow lights (4-6 inches above). Leggy seedlings signal insufficient light—adjust immediately to prevent weak stems.
✂️ Step 4: Thin and Harden Off Seedlings
When seedlings reach 2 inches tall, thin to the strongest plant per pot by snipping weaker stems at soil level with clean scissors. Hibiscus dislike root disturbance, so avoid pulling—this stresses the remaining seedling. After 4 weeks, begin hardening off by placing pots outside in partial shade for 1 hour daily, gradually increasing to full sun over 10 days.
Transplant outdoors only after last frost date and soil warms to 65°F. Choose a site with full sun (6+ hours daily) and well-draining soil. Dig a hole twice as wide as the root ball but no deeper—hibiscus roots spread horizontally, not downward.
Tips & tricks for perfect hibiscus seed germination
Mastering this cold-moist stratification method transforms stubborn hibiscus seeds into thriving plants—here’s how to avoid the pitfalls that derail even experienced growers.
Moisture Management: The 60-day stratification period demands precise moisture control—too dry and seeds won’t break dormancy, too wet and they’ll rot. I use a spray bottle to mist the peat moss every 7-10 days, checking by squeezing a handful: it should feel like a wrung-out sponge, not a dripping sponge. Place a small paper towel in the bag with your seeds to absorb excess condensation that forms during the cold period—this prevents mold while maintaining humidity.
Temperature Consistency: The refrigerator’s crisp drawer should maintain a steady 34-38°F, but some fridges fluctuate. I place a thermometer inside the bag to monitor—any dip below 32°F slows metabolic processes, while temps above 40°F can trigger premature sprouting. If your fridge runs hot, move the bag to the coldest spot, possibly on the bottom shelf. Pro tip: Wrap the bag in a dark towel to block any stray light that might confuse the seeds.
Seedling Light Requirements: Once germination begins (those 14-28 days can feel like forever!), hibiscus seedlings demand bright, indirect light to prevent legginess. I position my grow lights 4-6 inches above the pots and adjust the height weekly as seedlings grow. Watch for stems that stretch toward the light source—this is your signal to either lower the lights or move to a sunnier window. South-facing windows work best, but supplement with artificial light if natural light is insufficient, especially in winter months.
Hardening Off Strategy: The 4-week hardening process is where many growers rush and end up with shocked plants. I start with just 1 hour in partial shade on day one, then increase by 30 minutes daily. By day 10, plants should be acclimated to full sun for their final 6 hours. Place a small fan nearby during the last week to simulate wind conditions—this toughens stems and prevents transplant shock when you move them outdoors.
Pro Tips for Hibiscus Seed Germination
- Mastering this cold-moist stratification method transforms stubborn hibiscus seeds into thriving plants—here’s how to...
- Moisture Management: The 60-day stratification period demands precise moisture control—too dry and seeds won’t break ...
- Temperature Consistency: The refrigerator’s crisp drawer should maintain a steady 34-38°F, but some fridges fluctuate...
Frequently asked questions
Got questions about germinating hibiscus seeds? You’re not alone—this process can be tricky, but with the right approach, you’ll see those little sprouts popping up in no time! Below are answers to the most common questions to help you troubleshoot and succeed.
How long does hibiscus seed germination take?
With the cold-moist stratification method, hibiscus seeds typically take 2–6 weeks to germinate. Patience is key—some seeds may sprout faster, while others need extra time. Keep the soil consistently moist and warm (around 70–80°F) to encourage faster results. If nothing emerges after 6 weeks, gently check for mold or rot—adjust moisture if needed.
Why do I need to cold-stratify hibiscus seeds?
Hibiscus seeds have a hard seed coat that blocks water and oxygen, slowing or preventing germination. Cold-moist stratification (30–60 days in the fridge) mimics natural winter conditions, weakening the coat and kickstarting growth. Skipping this step often leads to low or delayed germination. Think of it as a "wake-up call" for dormant seeds!
What’s the best way to keep seeds moist without drowning them?
Use a spray bottle to mist the soil lightly every 2–3 days, ensuring it stays damp (not soggy). A clear plastic bag or humidity dome helps retain moisture while allowing airflow. Overwatering can cause rot, so avoid letting seeds sit in standing water. Pro tip: Place a paper towel under the tray to catch excess drainage.
Can I germinate hibiscus seeds without stratification?
Yes, but success rates drop dramatically—expect 10–30% germination (vs. 95% with stratification). Soak seeds in warm water for 24 hours first, then plant in moist soil. For faster (but less reliable) results, try scarification (lightly sanding the seed coat) before planting. However, stratification remains the gold standard for hibiscus!
My seeds are moldy—what do I do?
Mold is a red flag! If you see fuzzy white/green growth, act fast:
- Stop watering immediately and remove moldy seeds.
- Repot healthy seeds in fresh, sterile soil.
- Add a fungicide (like hydrogen peroxide, 3% solution) to the water if re-misting.
- Ensure your container has drainage holes to prevent future issues.
Does temperature affect hibiscus seed germination?
Ideal germination temps are 70–80°F (21–27°C). Below 60°F (15°C), germination slows or stops. Use a seedling heat mat if your home runs cool. During stratification, keep seeds at 35–40°F (2–4°C) in the fridge. Once planted, move trays to a sunny windowsill or grow light for consistent warmth.
Wrapping up and next steps
Mastering the cold-moist method for hibiscus seed germination unlocks a 95% success rate—proving that patience and the right techniques pay off! 🌱 Whether you're a seasoned gardener or a curious beginner, this method simplifies the process while ensuring strong, healthy starts.
Now that you’re equipped with the knowledge, grab those seeds and get growing—your tropical oasis awaits!
Next steps:
- Start with a small batch to refine your technique.
- Document your progress (photos help track growth!).
- Share your wins with fellow plant enthusiasts!