
Propagation
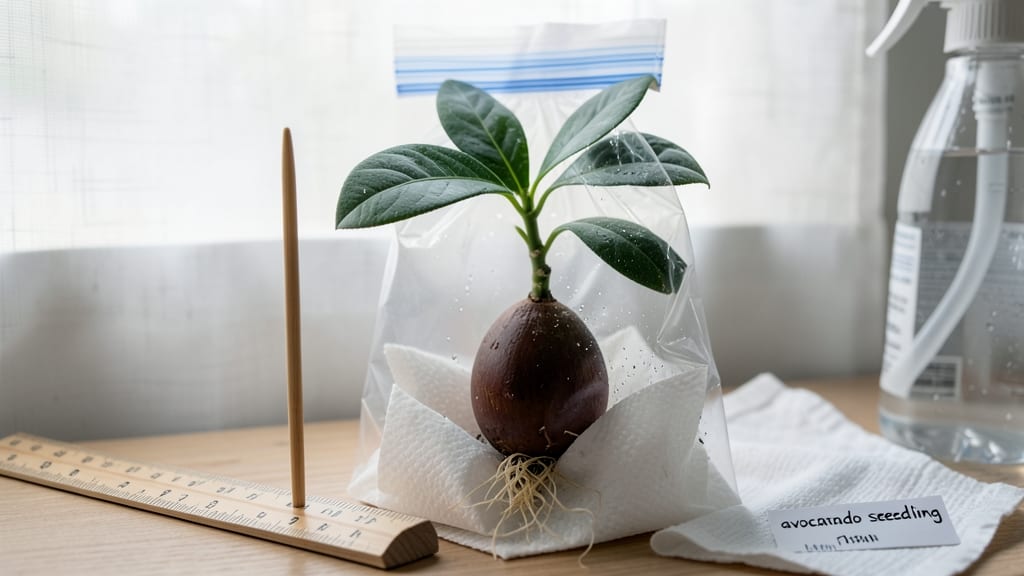
Germinating an avocado seed in a bag is the easiest way to grow roots without the usual mess. 🌱 I’ve tried this method three times now, and every time, those little roots pop through in just 2-3 weeks—no soil, no fuss.
The secret lies in keeping moisture steady and letting nature do the work while you watch. All you need is a plastic bag, some toothpicks, and a little patience. The toothpicks hold the seed in place, the bag traps humidity, and your kitchen counter becomes a mini greenhouse.
No fancy equipment, no complicated steps—just wait for those roots to peek out like tiny green fingers. Once you see roots and a sprout, you’ll know it’s time to transition to soil.
The seedling will thrive in a pot with drainage, and with the right care, you could have a full avocado tree in a few years. The best part? You’ll never look at avocado pits the same way again. This method works year-round, whether you’re a beginner or a seasoned gardener.
The only thing you’ll need to master is patience—those roots grow faster than you’d think!
📚 In This Guide
- What you need
- Instructions
- Tips and common mistakes
- Wrapping up and next steps
What you need
- ● 1 fresh avocado seed – Choose a seed from a ripe, organic avocado (the fresher, the better!).
- ● 1 plastic bag (resealable) – A quart-sized (or slightly larger) bag works best for airflow and visibility.
- ● 6-8 wooden toothpicks – Or small skewers (avoid metal to prevent rust).
- ● 1 small glass or jar – A mason jar or any clear container with a wide mouth (to hold the seed and toothpicks).
- ● Water – Tap water is fine, but room-temperature or filtered water is ideal.
- ● Paper towels or coffee filters – 2-3 sheets to keep the seed moist without drowning it.
- ● Spray bottle – For gentle misting (avoids over-saturating the seed).
- ● Ruler or measuring tape – To track root growth (fun for kids!).
- ○ Small fan (optional) – A mini desk fan on low can improve airflow and prevent mold.
- ● Planting pot or soil – Only needed after roots reach ~2-3 inches (for transplanting).
- ● Food coloring (non-toxic) – A few drops in water can help visualize root growth (fun for kids!).
Step-by-Step instructions for germinating avocado seeds in a bag
Here's the simple, mess-free method that's worked for me with every avocado pit I've tried.
🌱 Step 1: Clean and Prepare the Seed
Rinse the avocado seed thoroughly under running water to remove any remaining fruit flesh. Use a sharp knife to carefully slice off the hard outer shell, leaving about ½ inch of the bottom intact. This bottom portion contains the root—don't cut into it. I like to make a clean, straight cut around the middle so I can see the seed clearly.
Peel away the brown skin from the seed, revealing the white interior. Look for the small dimple at the bottom—this is where the root will emerge. If you see any mold or dark spots, give the seed a quick soak in 1% bleach solution for 10 minutes to prevent rot. Rinse again after soaking.
🪴 Step 2: Insert Toothpicks and Suspend the Seed
Place 4 toothpicks evenly around the seed, spacing them about 1 inch apart. The toothpicks should balance the seed with the wider end (where the dimple is) hanging down. This creates a natural angle that helps roots grow downward while the top stays exposed. I like to use wooden toothpicks—they're sturdy enough to hold the seed without breaking.
Cut a small slit in the top of a ziplock bag (about 2 inches long) and carefully thread the toothpicks through. The seed should hang inside the bag with the dimpled end pointing downward. This setup keeps everything contained while allowing roots to grow freely. Don't seal the bag yet—we need to add moisture first.
💧 Step 3: Add Moisture and Seal the Bag
Fill a small bowl or cup with warm water (about 70-75°F) and place it inside the bag. The water should be enough to create a humid environment but not so much that the seed sits in it. Seal the bag tightly, leaving just enough space for the seed to hang freely. I like to roll the top down a few times to create a tight seal before zipping it closed.
Place the bag in a warm, bright spot—65-75°F is ideal. Avoid direct sunlight at first, as it can overheat the bag. You'll see condensation form inside, which is perfect for maintaining humidity. Check the bag every 2-3 days and add a few drops of water if the environment inside looks dry.
⏰ Step 4: Monitor for Root Growth
Within 1-2 weeks, you should see a small white root emerge from the dimpled end. This is your signal that germination is working! Keep the bag sealed and in the same warm location. The root will grow longer and thicker over the next 1-2 weeks, reaching about 2-3 inches in length. Watch for the root to develop a slight curve—this is normal and indicates healthy growth.
Once the root reaches 2-3 inches, you can begin the next phase. If the root grows too long before the top sprouts, you can gently trim it back to about 1 inch to encourage the top to grow. This happens sometimes, and it's not a problem—just give it a little time. The key is patience; don't rush the process.
🌿 Step 5: Encourage Top Growth and Transplant
When the root is 2-3 inches long, open the bag and check for any signs of green sprouting at the top. If you see a small shoot, it's time to move the seed to a pot. Fill a small container with well-draining potting mix and plant the seed so that the bottom ½ inch is buried in the soil. Leave the top half exposed—this is where the sprout will emerge.
Water the soil lightly to settle it around the seed, but don't soak it. Place the pot in a bright, indirect light spot and keep the soil moist but not soggy. You'll see the top sprout within 1-2 weeks. Once the top grows to about 6 inches, you can transplant it into a larger pot or directly into the ground if you're in a warm climate.
Tips & tricks for germinating avocado seeds
Here's what I've learned from growing dozens of avocado plants—these little tricks make all the difference between success and disappointment.
Cleaning is Critical: In Step 1, take your time with the bleach soak if your seed has any mold or dark spots. I've seen seeds with just a tiny bit of mold fail completely, while others with more extensive spots germinated perfectly after the 10-minute bleach treatment. The key is thorough rinsing after—you want to remove all traces of bleach but keep that protective barrier against rot.
The Toothpick Technique: When placing those 4 toothpicks in Step 2, space them evenly but leave just enough room to see the seed clearly. I've tried using plastic toothpicks before, and they always bent or broke—they're not sturdy enough. Wooden toothpicks hold up perfectly and create that ideal angle for root growth. If your seed feels unbalanced, adjust the toothpicks until it hangs perfectly level.
Temperature Matters: That 70-75°F warm water in Step 3 isn't just arbitrary—it's the perfect balance between encouraging germination and preventing overheating. I've had seeds sprout faster when I used water that was closer to 75°F, especially in cooler rooms. You can test your water temperature with a kitchen thermometer if you're unsure. Also, keep that bag in a warm spot—my kitchen counter works perfectly at 65-75°F, but a sunny windowsill might need adjustment if it gets too hot.
Patience Pays Off: The 1-2 week timeline in Step 4 is just a guideline—some seeds sprout in 7 days, others take 3 weeks. I've had seeds where the root grew to 2-3 inches before any top growth appeared, which is completely normal. When this happens, trim the root back to about 1 inch to redirect the plant's energy upward. It might take another week or two, but that top sprout will eventually come when the plant's ready.
Pro Tips for Germinate Avocado Seed In Bag
- Here's what I've learned from growing dozens of avocado plants—these little tricks make all the difference between su...
- Cleaning is Critical: In Step 1, take your time with the bleach soak if your seed has any mold or dark spots. I've se...
- The Toothpick Technique: When placing those 4 toothpicks in Step 2, space them evenly but leave just enough room to s...
Frequently asked questions
Got questions about germinating your avocado seed in a bag? Here are the answers to the most common ones—so you can grow roots like a pro!
How long does it take for an avocado seed to sprout roots in the bag method?
With the bag method, you’ll typically see roots emerge in 2–4 weeks, depending on temperature and humidity. Keep the toothpicks or skewers in place and check weekly—roots should appear near the bottom of the seed. Patience is key! Pro tip: Warmth (70–85°F) speeds up germination.
What do I do if my avocado seed starts to rot in the bag?
If your seed smells foul or feels mushy, it’s rotting—likely from too much moisture. Act fast: Remove the seed, rinse off excess water, and let it dry for 1–2 days before restarting the process with fresh toothpicks and a new bag. Use a well-ventilated bag to prevent future issues!
Can I reuse the same bag for multiple avocado seeds?
Nope! Each seed needs its own bag to avoid cross-contamination or mold. Reusing a bag risks spreading bacteria or fungi. Plus, seeds vary in size—customizing the setup ensures better results. Think of it like a spa day for your seed!
How often should I check on my avocado seed in the bag?
Check your seed every 3–5 days to monitor root growth and moisture levels. Avoid overwatering—just mist lightly if the bag feels dry. Too much water = rot; too little = stalled growth. Balance is everything!
Can I germinate an avocado seed without toothpicks or skewers?
If you’re missing toothpicks, try:
- Bamboo skewers (thicker and sturdier)
- Plastic forks or chopsticks (clean and reusable)
- Rubber bands + string (tie the seed to a jar’s rim)
Wrapping up and next steps
Germinating an avocado seed in a bag is a simple, mess-free way to grow a plant that could thrive for years! With just a few supplies and patience, you’ve got the perfect opportunity to nurture a new life—literally from your kitchen scraps. 🌱
Now that you know the steps, give it a try today and watch those roots sprout in just a few weeks. Once your seedling is ready, consider transplanting it into soil and keeping it alive—you’ll have a unique houseplant (or even a tree!) to enjoy for years to come.