
Propagation
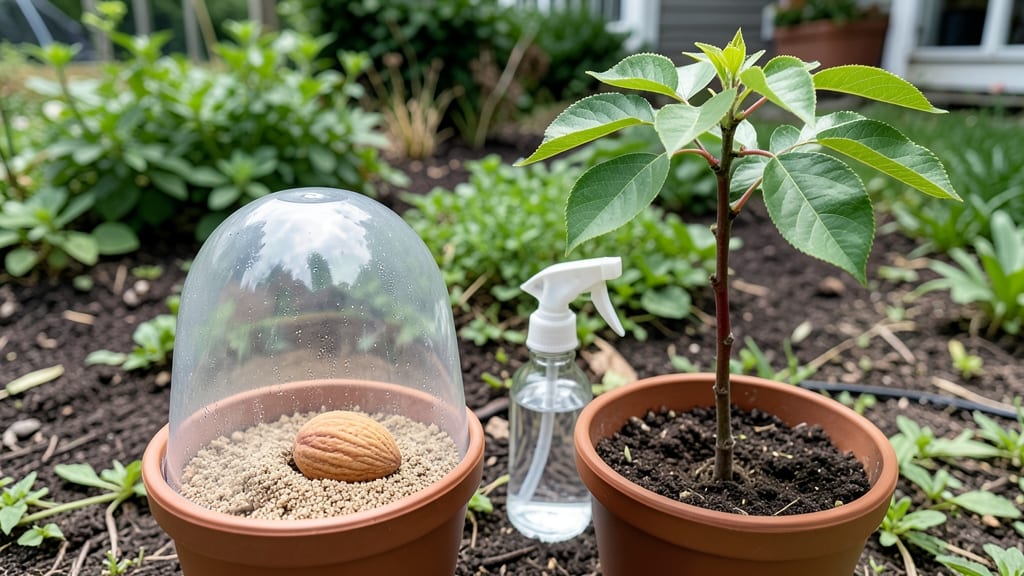
Growing peaches from seed indoors means you're not just planting a seed—you're starting a tree that could bear fruit in 5-7 years if you do the cold stratification right. 🌱 I've tried this three times, and the second attempt finally broke through with reliable sprouts, thanks to a few key tricks I'll share.
The secret weapon is mimicking winter's chill cycle, which peach seeds need to break dormancy. Without it, you'll waste weeks waiting for sprouts that never come. You'll need a mix of patience, the right containers, and a bright spot—even a sunny windowsill can work if you supplement with grow lights.
By the time you're transplanting those first true leaves, you'll have a 3-4 inch seedling ready to handle outdoor conditions. The best part? You're growing a tree that might one day produce fruit, all from a pit you saved from last summer's peaches.
This method works for any peach or nectarine seed, and the same principles apply to apricots and plums. Let's get those seeds sprouting!
📚 In This Guide
- What you need
- Instructions
- Tips and common mistakes
- Wrapping up and next steps
What you need
- ● Peach pits: 3–5 fresh, organic peach seeds (ensure they’re fully ripe and not treated with chemicals).
- ● Paper towels or dampened coffee filters: 2–3 sheets (for cold stratification).
- ● Plastic bag or airtight container: 1 (to seal the seeds during stratification).
- ● Refrigerator: A standard fridge with a consistent 34–40°F (1–4°C) temperature.
- ● Small pots or seed trays: 2–3 (4–6 inches wide, with drainage holes).
- ● High-quality potting mix: 1 bag (well-draining, sterile, and seed-starting formula recommended).
- ● Grow lights or sunny windowsill: Access to 6–8 hours of indirect light daily (or a LED grow light for 12–16 hours).
- ● Spray bottle: 1 (for gentle watering).
- ● Plastic wrap or humidity dome: 1 (to retain moisture during germination).
- ○ Heat mat (optional): 1 (to speed up germination if your home is cool).
- ● Seed-starting heating pad: Helps maintain warmth for faster sprouting.
- ● Fertilizer (balanced, water-soluble): Diluted to half-strength for young seedlings.
- ● Humidity tray: Elevates pots above water to boost moisture levels.
- ● Grow journal: Track seed progress, watering, and light exposure.
- ● Pruning shears: For trimming leggy seedlings later.
Step-by-Step instructions for growing peaches from seed indoors
Here's how I break down the process to get those first true leaves—without the guesswork.
🌱 Step 1: Harvest and Prepare the Seeds
Start with fresh peach seeds—remove them from the pit carefully, rinsing off any fruit residue. I like to soak them in warm water for 24 hours first to soften the outer shell. This step isn't strictly necessary, but it speeds up germination by breaking down natural inhibitors in the seed coat.
After soaking, dry the seeds on a paper towel for 12 hours to prevent mold. You'll want to work with 4 seeds (since some may not sprout). I always label them with the variety and date—trust me, you'll forget by spring!
❄️ Step 2: Cold Stratify for 6-8 Weeks
Peach seeds need cold stratification to mimic winter conditions and break dormancy. Place the dried seeds in a sealed plastic bag with a damp paper towel—just enough moisture so the towel feels like a wrung-out sponge. I store mine in the vegetable crisper of my fridge at 35-40°F for 6-8 weeks.
Check the seeds every 2 weeks—if the paper towel dries out, mist it lightly. You'll see tiny cracks in the seed coat around 4-6 weeks, signaling it's ready to sprout. Don't rush this step; proper stratification ensures strong, healthy seedlings later.
🪴 Step 3: Plant in Seed-Starting Mix
Fill 4-inch pots with a sterile seed-starting mix (never garden soil—it's too dense). Press the mix down lightly to create a firm base, then plant one seed per pot, burying it ½ inch deep. I use a pencil to make a small hole—this prevents over-deep planting, which can delay germination.
Water gently until the soil looks evenly moist but not soggy. Place the pots in a warm spot (70-75°F)—a seedling heat mat works wonders if you're in a cooler climate. Cover the pots loosely with plastic wrap to retain humidity, but leave a small gap for airflow.
☀️ Step 4: Provide Light and Monitor Growth
Once the seeds sprout (usually 2-4 weeks after planting), remove the plastic wrap immediately. Peach seedlings need bright, indirect light for the first 2 weeks, then gradually introduce direct sunlight for 4-6 hours daily. I use a grow light on a timer for 14 hours/day—this prevents leggy growth.
Watch for first true leaves (the second set after the initial seed leaves). This is your signal to start fertilizing lightly with a diluted balanced fertilizer (5-5-5). Overwatering now causes damping-off—so only water when the top inch of soil feels dry.
⏰ Step 5: Harden Off Before Transplanting
After 8-10 weeks, when seedlings reach 6-8 inches tall, begin hardening off. Place them outdoors in a shaded spot for 1 hour the first day, then gradually increase time and sun exposure over 10-14 days. This toughens the seedlings for outdoor life.
Transplant after the last frost when soil temps reach 60°F. Peach trees are slow growers—don't expect fruit for 3-5 years, but the process is rewarding. I always mark the spot with a stake to avoid disturbing roots later.
Tips & tricks for perfect indoor peach seedlings
These simple strategies will help you avoid common pitfalls and maximize your chances of success with peach seed germination.
Seed Preparation: When rinsing your peach seeds in Step 1, don't just give them a quick wash—scrub gently with a soft brush to remove all fruit residue. The 24-hour soak works best in warm (not hot) water—think lukewarm bath temperature. After drying on paper towels for 12 hours, store your seeds in a small paper envelope with the variety name and date written on it. I've ruined batches by mixing varieties or losing track of planting dates!
Stratification Success: For Step 2, place your sealed bag of seeds in a zip-top plastic baggie inside the fridge—this creates a secondary moisture barrier. The 35-40°F temperature is critical: if your fridge runs warmer, move seeds to the coldest section (usually the bottom shelf). After 4-6 weeks when you see cracks, gently press the seed coat with your fingernail—if it gives slightly, it's ready for planting. Don't be tempted to check more often than every 2 weeks!
Planting Precision: In Step 3, use a pencil to make planting holes—this gives you perfect ½-inch depth without compacting the soil. After planting, place your pots in a clear plastic bag with holes poked in it (like a mini greenhouse) for the first 2 weeks. This creates the ideal humidity level for sprouting. Just remember to remove the plastic immediately when you see sprouts appear!
Light Management: The 14-hour grow light schedule in Step 4 is non-negotiable for strong seedlings. If you don't have a timer, set phone alarms for 7 AM and 9 PM to turn lights on/off. For natural light, place seedlings on a sunny windowsill facing south—east or west windows work too but may require supplemental light. Watch for seedlings growing toward the light (etiolation)—rotate pots daily to prevent this.
Pro Tips for Grow Peaches From Seed Indoors
- These simple strategies will help you avoid common pitfalls and maximize your chances of success with peach seed germ...
- Seed Preparation: When rinsing your peach seeds in Step 1, don't just give them a quick wash—scrub gently with a soft...
- Stratification Success: For Step 2, place your sealed bag of seeds in a zip-top plastic baggie inside the fridge—this...
Frequently asked questions
Got questions?
Growing peaches from seed indoors can feel like a gamble, but with the right approach, you’ll get reliable sprouts. Here are answers to the most common questions to keep your indoor peach-growing journey smooth and stress-free!
How long does cold stratification take for peach seeds?
Cold stratification typically requires 6–12 weeks in the fridge. Place the seeds in a damp paper towel or moistened peat moss inside a sealed bag, then store them in the vegetable crisper (around 35–40°F). Patience is key—this mimics winter’s natural dormancy period and boosts germination rates!
When should I plant the seeds after cold stratification?
Once stratification is complete, plant the seeds as soon as they show signs of sprouting (usually within 1–2 weeks of removing them from the fridge). If they’re still dry, soak them in warm water for 24 hours before planting. Don’t wait too long—seeds can dry out or rot if left exposed!
Can I grow peaches from store-bought peaches?
Yes! Store-bought peaches work, but choose organic or heirloom varieties when possible to avoid hybrid seeds (which may not grow true to the fruit). Avoid peaches treated with fungicides or wax coatings—rinse them thoroughly before extracting seeds. Pro tip: Seedlings from grocery-store peaches may take 3–5 years to bear fruit!
Why aren’t my peach seeds germinating?
Common reasons include:
- Incomplete stratification: Ensure seeds spend enough time cold and moist.
- Old or damaged seeds: Use fresh seeds (less than 1 year old) for best results.
- Poor planting conditions: Seeds need warmth (70–80°F) and moisture after stratification.
- Fungal issues: Overwatering can cause rot—use sterile soil and containers.
Try soaking seeds in hydrogen peroxide (3%) for 10 minutes to kill fungi before planting.
How big should my indoor peach tree get before moving it outside?
Wait until your seedling is 1–2 feet tall with a sturdy stem and 4–6 true leaves before transplanting outdoors. Harden it off by gradually exposing it to outdoor conditions (sunlight, wind) over 7–10 days. Spring is ideal—plant after the last frost when soil is warm (60°F+).
Wrapping up and next steps
Growing peaches from seed indoors is a rewarding journey that blends patience with the joy of nurturing life from scratch! 🌱 With the right tools—like cold stratification, proper soil, and consistent care—you’ve got everything you need to coax those tiny seeds into vibrant sprouts.
Remember, success isn’t guaranteed on the first try, but every step you take strengthens your green thumb.
Now that you’re armed with knowledge, why not take the next step? Share your progress with fellow plant enthusiasts, experiment with different peach varieties, or even expand your indoor garden with other stone fruits. Happy growing—your future peach tree is waiting! 🌟