
Size
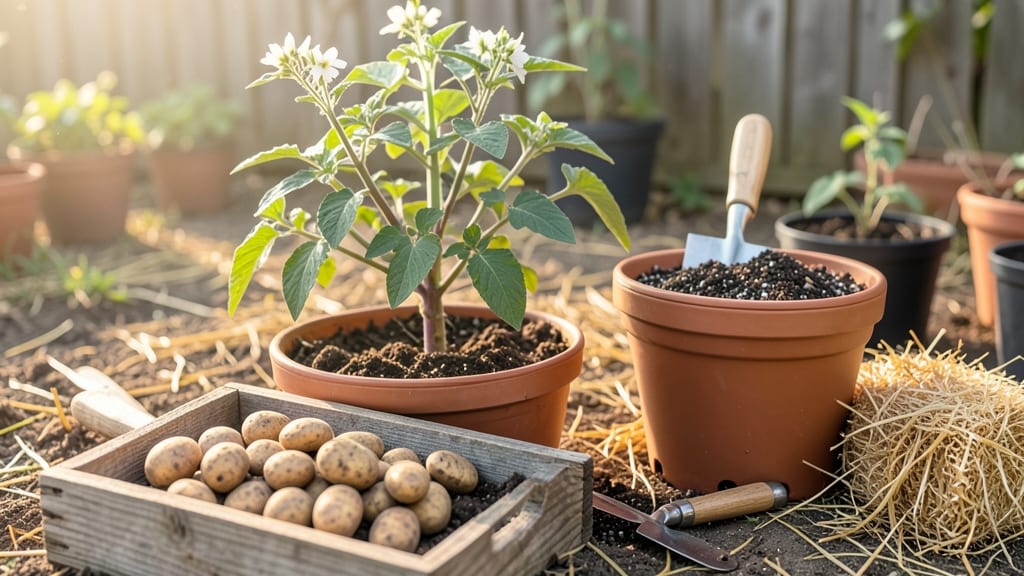
Growing seed potatoes in pots means harvesting crisp, homegrown spuds without a backyard—just a sunny spot and a few basic supplies. 🌱 I’ve grown enough potatoes in 5-gallon buckets to feed my family for weeks, and the secret isn’t fancy equipment but matching the right container, soil, and care to how potatoes naturally grow underground.
The key is starting with certified seed potatoes (not grocery store spuds) and giving them room to multiply. You’ll need containers at least 12 inches deep, well-draining soil mixed with compost, and a way to "hill" soil as the plants grow.
No digging required—just lift the pot when harvest time comes. Even beginners get 3-5 pounds of potatoes per 5-gallon container with this method.
Expect bright green foliage by early summer and tiny potato "babies" forming by midseason. The real magic happens when you see those familiar potato eyes poking through the soil, ready to be harvested. It’s satisfying, space-efficient, and works for anyone from urban balconies to rural patios.
Here’s where it gets interesting—companion plants like bush beans or lettuce thrive alongside potatoes in pots, and you’ll avoid common pitfalls like overwatering (which causes rot) or planting too shallow (which stunts growth). Let’s get those tubers growing!
📚 In This Guide
- What you need
- Instructions
- Tips and common mistakes
- Wrapping up and next steps
What you need
- ● Seed potatoes: 2–3 certified disease-free seed potatoes per pot (choose varieties like Yukon Gold, Red Pontiac, or Kennebec for reliability).
- ● Containers: 1–2 large pots (10–12 inches deep and wide) per seed potato, with drainage holes. Fabric grow bags or 5-gallon buckets work well!
- ● Potting mix: A lightweight, well-draining blend (e.g., 50% peat moss or coco coir, 30% perlite or vermiculite, and 20% compost). Avoid garden soil—it’s too dense!
- ○ Chitting tray (optional): A tray or egg carton to sprout your potatoes indoors before planting (speeds up growth!).
- ● Fertilizer: A balanced, slow-release organic fertilizer (e.g., 10-10-10 or fish emulsion) or compost tea for feeding.
- ● Watering can or hose: With a gentle spray nozzle to avoid disturbing the soil.
- ○ Garden twine or chicken wire (optional): To create a cage for vining varieties like Purple Majesty.
- ● Drainage is key! Ensure pots have holes to prevent root rot—add a layer of gravel or broken pottery at the bottom if needed.
- ● Sunlight: Place pots in a spot with 6+ hours of direct sunlight daily (south-facing windowsills or balconies work great!).
- ● Temperature: Keep pots in a 50–60°F (10–15°C) environment until sprouts appear, then move to warmer spots.
Step-by-Step guide to growing seed potatoes in containers
Here’s how to grow a thriving potato harvest in pots—no garden required.
🪴 Step 1: Choose the Right Containers and Fill with Soil
Use 5-gallon buckets or 12-inch-deep pots with drainage holes—seed potatoes need room to develop tubers. I like fabric grow bags because they let excess moisture escape, preventing rot. Fill each container ¾ full with well-draining potting mix (avoid garden soil—it compacts and suffocates roots). Mix in a slow-release fertilizer (like 10-10-10) to give early growth a nutrient boost.
Press the soil down lightly to remove air pockets, but don’t compact it. You want a loose, crumbly texture—think of it like fluffy cake batter. This ensures roots grow freely without resistance. If your mix feels dense, add 1 part perlite to 3 parts soil to improve aeration.
🌱 Step 2: Pre-Sprout and Plant Seed Potatoes
Place your seed potatoes in a bright, cool spot (55-60°F) for 4-6 weeks before planting. They’ll sprout tiny shoots—this jumpstarts growth. Once sprouted, plant 1-2 potatoes per container, placing them 4-6 inches deep with the sprouts facing up. Cover with soil and water gently until the surface feels damp but not soggy.
Don’t bury them too deep—you’ll see green shoots emerge in 2-3 weeks. If your container is small, opt for smaller seed potatoes (like "Yukon Gold" or "Red Pontiac") to avoid overcrowding. Overcrowding leads to stunted growth and fewer tubers.
☀️ Step 3: Provide Sun and Water Consistently
Seed potatoes need full sun (6-8 hours daily)—place containers where they’ll get direct morning light and partial afternoon shade in hot climates. If indoors, use a grow light 12 inches above the plants for 14-16 hours daily. Without enough light, stems grow leggy and weak, and tubers stay small.
Water once a week, letting 1 inch of water soak into the soil. Check moisture by sticking your finger 2 inches deep—if it’s dry, water again. Too much moisture causes rot, while too little stunts growth. Mulch with 2 inches of straw to retain moisture and keep soil temperatures stable.
✂️ Step 4: Hilling and Maintaining Through the Season
When stems reach 6 inches tall, add 2-3 inches of soil or compost around the base (called "hilling"). Repeat every 2-3 weeks until the container is full. This encourages more tuber formation below ground. You’ll see new shoots emerge from the soil—leave them be, as they’ll develop into additional tubers.
Fertilize once a month with a balanced liquid fertilizer (like 5-5-5) to support foliage and tuber growth. Stop fertilizing 4-6 weeks before harvest to let tubers mature. Watch for yellowing leaves—this signals the plant is ready for harvest, usually 10-12 weeks after planting.
🌿 Step 5: Harvest and Cure Your Potatoes
Gently empty the container and brush off excess soil to reveal your harvest. Handle tubers carefully—they bruise easily. Cure potatoes in a dark, dry place (55-60°F) for 1-2 weeks to thicken their skins and improve storage life. Store in a cool, dark spot (40-50°F) with high humidity to prevent sprouting.
If you’re growing new potatoes, harvest smaller tubers when they’re golf-ball sized (about 8-10 weeks). For storage potatoes, wait until foliage yellows completely. You’ll know they’re ready when the skin is thick and rough—not smooth like baby potatoes.
Tips & tricks for growing seed potatoes in containers
These simple adjustments will help you maximize your container potato harvest—no matter your space or experience level.
Container Selection: Fabric grow bags are my top recommendation because they allow excess moisture to escape, preventing rot. If using plastic buckets, drill extra drainage holes near the bottom to avoid waterlogging. I’ve found that containers with a diameter of at least 12 inches give roots enough room to spread without competing for nutrients.
Soil Preparation: The loose, crumbly texture you create in Step 1 is absolutely critical—think of it as creating a root-friendly environment. If your potting mix feels dense, mix in perlite at the 1:3 ratio mentioned. This improves aeration and prevents compaction, which can suffocate developing tubers. I’ve seen containers where dense soil led to stunted growth, so don’t skip this step.
Lighting Strategy: For indoor growers, position your grow light 12 inches above the plants and keep it running for 14-16 hours daily. I’ve noticed that plants under artificial light need slightly more frequent watering—check moisture every 3-4 days rather than weekly. If you’re using natural light, rotate containers weekly to ensure even sun exposure all around.
Hilling Technique: When you reach the hilling stage in Step 4, use a mix of soil and compost to encourage tuber formation. I’ve found that adding a thin layer of compost (about 1 inch) mixed with the soil gives a gentle nutrient boost without overwhelming the plant. The key is to hill gradually—adding 2-3 inches at a time—so the plant can adjust without shock.
Pro Tips for Grow Seed Potatoes In Pots
- These simple adjustments will help you maximize your container potato harvest—no matter your space or experience level.
- Container Selection: Fabric grow bags are my top recommendation because they allow excess moisture to escape, preventing rot.
- Soil Preparation: The loose, crumbly texture you create in Step 1 is absolutely critical—think of it as creating a root-friendly environment.
Frequently asked questions
Got questions about growing seed potatoes in pots?
You’re not alone! Here are answers to the most common queries to help you grow like a pro—no digging required.
How deep should my pots be for seed potatoes?
Your pots need at least 10–12 inches of depth to accommodate the growing tubers. If you’re planting multiple potatoes, opt for deeper containers (14+ inches) to prevent overcrowding. Just ensure drainage holes are present to avoid soggy roots!
When is the best time to plant seed potatoes in pots?
Start indoors 4–6 weeks before your last frost date (early spring) if using certified seed potatoes. For store-bought potatoes, wait until 2–3 weeks after frost risk has passed. Warmer soil (50–60°F) speeds up sprouting and growth.
Can I use regular grocery store potatoes as seed potatoes?
Yes, but certified seed potatoes are better—they’re disease-free and produce stronger yields. If using grocery potatoes, choose organic, untreated ones (like russets or Yukon Golds) and cut them 2–3 weeks before planting to let the cut sides heal.
How do I prevent pests or diseases in potted potatoes?
Keep pests at bay with row covers (for early blight) and neem oil (for aphids). Avoid overhead watering to deter fungal issues. If you spot wilting or spots, remove affected foliage immediately and improve airflow by spacing plants properly.
What can I plant with potatoes in pots to save space?
Pair potatoes with companion plants like:
- Lettuce or spinach (shade-tolerant)
- Bush beans (fixes nitrogen)
- Chives or garlic (deters pests)
Wrapping up and next steps
Growing seed potatoes in pots is a rewarding, space-saving adventure that proves you don’t need a backyard to harvest fresh, homegrown spuds! 🌱 With just a few containers, some sunlight, and a little patience, you’ll soon be enjoying crisp, homegrown potatoes—whether roasted, mashed, or straight from the vine.
Once you’ve mastered this method, why not expand your container garden? Try growing other tubers like sweet potatoes or even leafy greens alongside your potatoes for a thriving, compact harvest!