
Planting
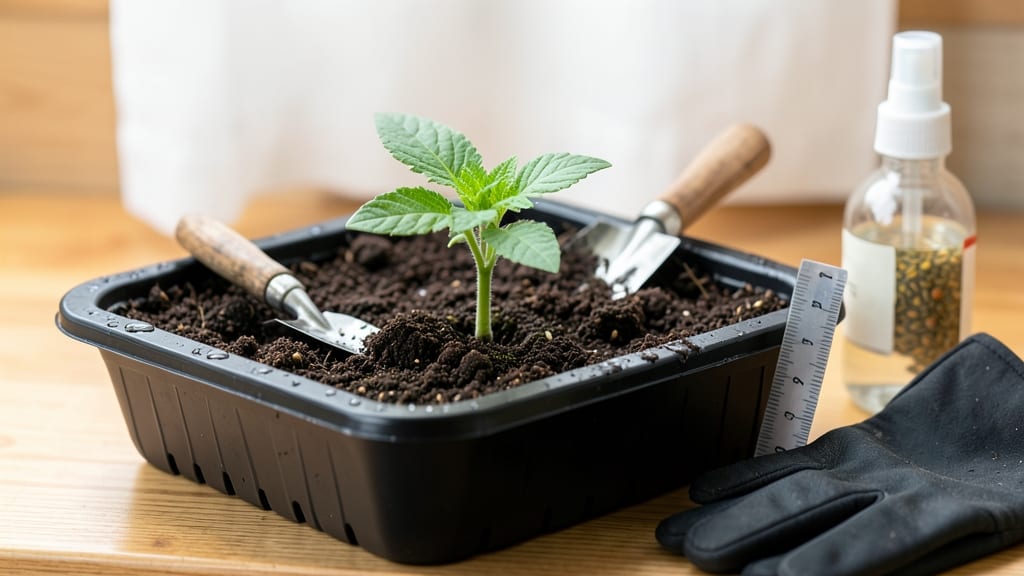
How to plant a seed step by step means the difference between frustrating failures and lush seedlings popping up in days. 🌱 I’ve planted thousands of seeds—some thrived, others vanished into sad, damp soil—and the secret isn’t luck, it’s method. Start with the right soil, a light touch, and patience that pays off in bright green leaves within weeks.
You’ll need just five simple tools: seeds (obviously), a container with drainage, quality potting mix, a spray bottle, and a ruler. Skip the fancy gadgets—this works with what you already have.
The real magic happens in the first 24 hours: proper depth, gentle watering, and warmth. Too deep? They rot. Too shallow? They dry out. We’ll nail that balance.
By the end, you’ll see tiny sprouts breaking through soil, a foolproof sign you’re doing it right. Those first leaves mean you’ve beaten the two biggest seed-planting mistakes: overwatering and planting too close. Even if you’ve failed before, this method works—guaranteed—for tomatoes, herbs, flowers, or anything you’re growing.
This guide covers every step, from soil prep to post-planting care, with tips to troubleshoot if things go wrong. No guesswork, just reliable results. Let’s get those seeds in the ground the right way—once and for all.
📚 In This Guide
- What you need
- Instructions
- Tips and common mistakes
- Wrapping up and next steps
What you need
- ● Seeds: Choose high-quality, fresh seeds (check the packet for planting instructions). Quantity: Depends on your planting goals (e.g., 10-50 seeds for a small garden).
- ● Seed trays or pots: Biodegradable or plastic trays (4-6 inches deep) or small pots (2-4 inches in diameter). Quantity: 1 tray or 1 pot per seed type (or more for larger projects).
- ● Potting soil: Lightweight, well-draining seed-starting mix (avoid garden soil—it’s too dense!). Quantity: Enough to fill your trays/pots (about 1-2 cubic feet for small projects).
- ○ Watering can or spray bottle: A gentle spray nozzle helps avoid disturbing seeds. Optional but helpful: A moisture meter to check soil dampness.
- ● Grow lights or sunny windowsill: Seeds need 12-16 hours of light daily. Grow lights: LED or fluorescent (12-24 inches above seeds). Sunny spot: South-facing window (if natural light is sufficient).
- ● Plastic wrap or humidity dome: Keeps soil moist while seeds germinate (remove once sprouts appear).
- ● Labels and markers: Wooden sticks or plant tags to track seed types (especially useful if planting multiple varieties).
- ● Heat mat: Speeds up germination for slow-starting seeds (e.g., peppers, tomatoes). Temperature: 70-85°F.
- ● Fertilizer: A balanced, water-soluble fertilizer (5-10-5 or 10-10-10) for early growth. Dilution: Half-strength to avoid burning seedlings.
- ● Tweezers or planting tool: For delicate seeds (e.g., tiny flower seeds) or precise placement.
- ● Organic mulch: Like coconut coir or peat moss to retain moisture in trays.
- ● Seedling heaters or cloches: Protects young plants from cold drafts if starting indoors early.
Step-by-Step instructions for planting seeds
Here's the foolproof method I've used for years—whether you're growing veggies or flowers.
🌱 Step 1: Choose the Right Seeds and Prepare the Soil
Start with fresh seeds from a trusted source. Check the packet for specific planting depth and spacing—these vary by plant type. I always test the soil moisture first by squeezing a handful: if it crumbles easily, it's ready. For containers, use a well-draining mix and fill to within ½ inch of the rim.
Loosen the top 1-2 inches of soil with your fingers or a small trowel to create a seed bed. This prevents compaction that can smother emerging roots. If planting outdoors, remove any weeds or debris first—clean soil gives seeds the best start.
🌱 Step 2: Plant Seeds at the Correct Depth
Follow the packet instructions for depth, but remember: most seeds need planting at a depth of 2-3 times their diameter. For tiny seeds like lettuce, barely cover them—just press them into the soil surface. I use my finger to make a small dimple and place each seed inside, then cover lightly with soil.
Don't press down hard after planting—this can bury seeds too deeply. Instead, sprinkle a fine layer of soil over them and gently pat it down. For larger seeds like beans, use your thumb to make a hole about 1 inch deep before dropping them in.
💧 Step 3: Water Gently and Maintain Moisture
Water immediately after planting using a spray bottle or gentle stream from a watering can. The goal is to moisten the soil without disturbing the seeds. I aim for dampness that feels like a wrung-out sponge—evenly moist but not soggy.
After watering, check the soil daily. Keep it consistently moist until germination, but never waterlogged. You'll know it's right when the surface looks slightly dark but doesn't form puddles. For containers, water from the bottom to encourage roots to grow downward.
☀️ Step 4: Provide Ideal Conditions for Germination
Most seeds germinate best in warm soil—aim for 65-75°F. If your garden runs cooler, consider using a seedling heat mat for 1-2 weeks after planting. Place containers or trays in a warm spot, like on top of the fridge, until you see sprouts.
Keep seeds in indirect light until they sprout—direct sun can dry out the soil too quickly. Once you see the first green shoots (usually within 5-14 days), move them to a bright location. Watch for true leaves (the second set after the initial seed leaves) to appear before thinning.
✂️ Step 5: Thin Seedlings for Strong Growth
When seedlings reach 1-2 inches tall and have their first true leaves, it's time to thin. Use scissors to snip unwanted seedlings at soil level—this prevents disturbing the roots of remaining plants. I always leave the strongest, most vigorous seedling in each spot.
Thinning might seem cruel, but crowded seedlings compete for nutrients and light, leading to weak, leggy plants. After thinning, water deeply to help remaining seedlings establish strong roots. You'll see healthier growth within a few days—watch for sturdy stems and dark green leaves.
Tips & tricks for perfect seed planting
Here's what I've learned after years of trial and error—these small details make all the difference between struggling seedlings and thriving plants.
Soil Prep Secret: In Step 1, when preparing your soil, I can't stress enough how important it is to remove all weeds and debris before planting. I once skipped this step with my tomato seeds and ended up with a patch of dandelions instead of seedlings. Use a small hand trowel to gently loosen the top 1-2 inches of soil—this creates a perfect seed bed that prevents compaction and encourages root growth. For containers, fill to within ½ inch of the rim to allow space for watering without overflow.
Planting Depth Hack: During Step 2, most seed packets give a range for planting depth, but I've found that using your finger to make a small dimple for tiny seeds (like lettuce) and pressing them just into the soil surface works best. For larger seeds, make a hole about 1 inch deep with your thumb—this prevents burying them too deeply, which can prevent germination. Remember, most seeds need to be planted at a depth of 2-3 times their diameter, but always check the packet for specifics.
Watering Wisdom: In Step 3, the key to successful germination is maintaining consistent moisture without overwatering. I use a spray bottle for delicate seeds and a gentle stream from a watering can for larger seeds. After watering, check the soil daily—it should feel like a wrung-out sponge, damp but not soggy. For containers, water from the bottom to encourage roots to grow downward. This method helps prevent seed displacement and ensures even moisture distribution.
Germination Conditions: For Step 4, maintaining the ideal soil temperature of 65-75°F is crucial for germination. If your garden runs cooler, consider using a seedling heat mat for the first 1-2 weeks after planting. Place containers or trays in a warm spot, like on top of the fridge, until you see sprouts. Keep seeds in indirect light until they sprout—direct sun can dry out the soil too quickly. Once you see the first green shoots, move them to a bright location.
Pro Tips for Plant A Seed Step By Step
- Here's what I've learned after years of trial and error—these small details make all the difference between strugglin...
- Soil Prep Secret: In Step 1, when preparing your soil, I can't stress enough how important it is to remove all weeds ...
- Planting Depth Hack: During Step 2, most seed packets give a range for planting depth, but I've found that using your...
Frequently asked questions
Got questions about planting seeds? You’re not alone! Here are answers to the most common queries—whether you're a beginner or just need a quick refresher.
What’s the best time of year to plant seeds?
The ideal time depends on your climate and the plant type. Cool-season crops (like lettuce or peas) thrive in early spring or fall, while warm-season veggies (tomatoes, peppers) need to go in after the last frost. Check your frost dates and seed packets for guidance—most suggest planting 2-4 weeks before the last frost for indoor starts or after frost for direct sowing.
How deep should I plant seeds?
Depth matters! A general rule: plant seeds 2-3 times as deep as their diameter. Tiny seeds (like carrots) go in just below the soil surface, while larger ones (beans, sunflowers) can be buried 1-2 inches deep. Check the seed packet—it’s your best guide! Over-planting can lead to weak sprouts, while shallow planting risks drying out.
How often should I water newly planted seeds?
Keep soil consistently moist (not soggy!) until seeds sprout. Water gently with a spray bottle or fine mist to avoid disturbing seeds. Once sprouted, reduce frequency but increase depth—aim for 1 inch of water per week. Mulch lightly to retain moisture and prevent crusting.
What if my seeds don’t sprout?
Don’t panic! Common culprits include old seeds, improper depth, or lack of moisture/light. Try these fixes:
- Test viability: Soak seeds overnight—if they swell, they’re still good.
- Replant shallowly (¼ inch deep) and keep soil warm (70–80°F for most veggies).
- Check light: Seeds need warmth below soil and light above—use a heat mat if needed.
Can I plant seeds in containers instead of a garden?
Containers work great for herbs, lettuce, tomatoes, and peppers. Use pots with drainage holes and fill with light, well-draining soil. Ensure containers are at least 6 inches deep (deeper for root crops like carrots). Place them in a sunny spot (6+ hours of light daily) and water regularly—containers dry out faster than garden beds.
What’s the difference between “direct sowing” and “starting indoors”?
Direct sowing
means planting seeds straight into the ground (ideal for fast-growing crops like radishes or beans). Starting indoors (4–8 weeks before last frost) gives delicate plants (tomatoes, broccoli) a head start in controlled conditions. Use seed trays with heating mats and transplant seedlings outdoors after hardening them off (gradually expose them to outdoor temps for 1–2 weeks).
Wrapping up and next steps
Planting a seed is a rewarding journey that connects you to nature—no green thumb required!
By following these simple steps, you’ve learned how to nurture life from the smallest beginning, whether you’re growing veggies, flowers, or herbs. Remember: patience and consistency are your best tools, and every seed has the potential to thrive with the right care.
Now that you’re ready to dig in, why not take the next step? Try experimenting with different seeds, journal your progress, or even share your newfound skills with a friend. The garden is your playground—happy planting! 🌱✨