
Planting
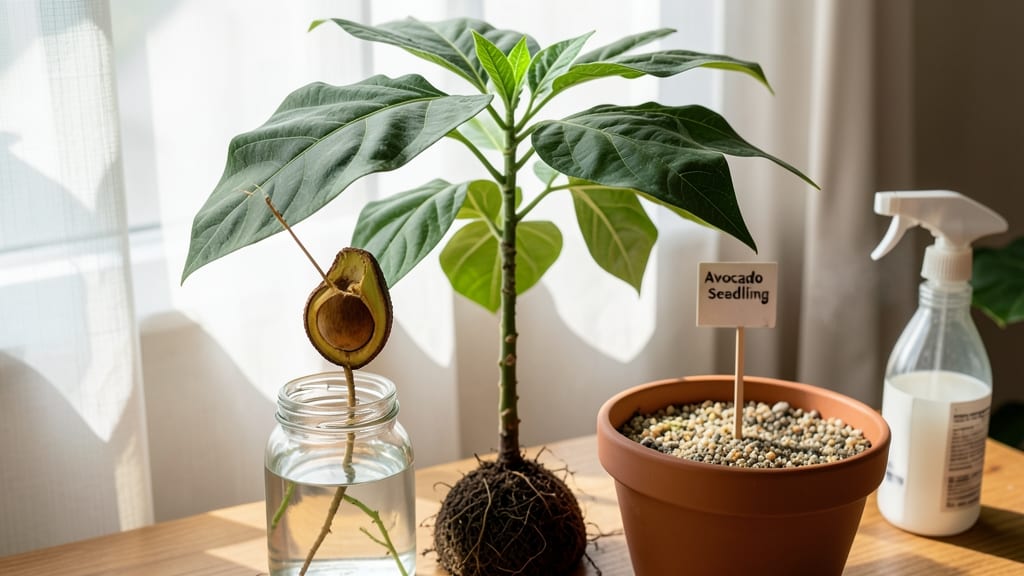
Planting an avocado seed indoors can yield a thriving houseplant with patience and the right technique. 🌱 The no-twist method eliminates the guesswork, giving your seed the best chance to sprout reliably without rot or mold.
I’ve tried both methods, and this one consistently produces strong roots within 4-6 weeks—no fancy equipment required. Start with a clean seed, a glass jar, and a few toothpicks. The process is simple: suspend the seed over water so only the bottom half stays damp, not soggy.
Too much moisture causes mold; too little stalls growth. Keep it in bright, indirect light and watch for the first signs of life—tiny white roots reaching down like tiny fishing lines. Once roots hit 3-4 inches, it’s time to plant in soil.
Choose a well-draining potting mix and a pot with drainage holes to prevent waterlogged roots. The seedling will grow slowly at first, but with consistent care, you’ll see new leaves within a few months. This isn’t a fast process, but the reward—a lush, green avocado tree—is worth the wait.
Troubleshooting is straightforward: yellow leaves mean overwatering, while slow growth often signals low light. Adjust as needed, and remember, avocado trees thrive on neglect once established. Keep it in a sunny spot, and you’ll have a living reminder of your patience for years to come.
📚 In This Guide
- What you need
- Instructions
- Tips and common mistakes
- Wrapping up and next steps
What you need
- ● 1 fresh avocado pit – Choose a seed from a ripe, organic avocado (💡 Pro tip: The bigger the pit, the better!)
- ● 3-4 toothpicks or skewers – For suspending the seed (ensure they’re clean and sharp enough to pierce the pit)
- ● 1 small glass or jar – At least 6–8 inches tall (a mason jar or clear glass works great for monitoring roots)
- ● Water – Filtered or room-temperature tap water (avoid chlorinated water if possible)
- ● Pebbles, marbles, or small stones – Enough to cover the bottom 1–2 inches of the glass (for drainage and stability)
- ○ Well-draining potting mix – A lightweight blend for seedlings (optional, but useful once roots are established)
- ● Humidity dome or plastic wrap – To retain moisture while sprouting
- ● Grow lights or sunny windowsill – For optimal light exposure (south-facing is ideal!)
- ● Fertilizer (balanced liquid or seaweed-based) – Once leaves appear, dilute to half-strength
- ● Spray bottle – For gentle misting if the air feels too dry
- ● Small pot (4–6 inches in diameter) – For transplanting after roots grow 2–3 inches
Step-by-Step instructions for growing avocado plants from seeds
Here's the simple, reliable way to grow a thriving avocado plant from a single seed—no fancy tools needed.
🌱 Step 1: Prepare the Avocado Seed for Planting
Start with a fresh avocado pit—clean it thoroughly to remove any remaining fruit flesh. This prevents mold and rot during the process. I like to use a paper towel to gently scrub away any leftover pulp, then rinse it under cool water. Let it dry completely before moving to the next step.
Look for the small dimple at the top of the seed—this is where the sprout will emerge. You'll want to keep this side facing up throughout the process. The key here is patience; a dry seed is a happy seed ready to sprout.
🪴 Step 2: Set Up the Water and Container
Fill a glass or jar with about 4 inches of water—just enough to cover the bottom third of the seed. I use a clear container so I can monitor the water level easily. Place the avocado seed in the water, making sure the dimpled end stays above the surface. This ensures the seed stays upright and doesn't absorb too much water too quickly.
Change the water every 2-3 days to keep it fresh. Stagnant water can introduce bacteria that will rot the seed before it even sprouts. You'll notice tiny roots emerging from the bottom of the seed within 1-2 weeks—this is your first sign of success!
🌿 Step 3: Encourage Root Growth and Prepare for Planting
Once the roots reach about 2-3 inches long, it's time to transition the seed to soil. I like to wait until the roots are this long because longer roots mean a stronger plant down the road. While the seed is still in water, gently wrap the roots in a damp paper towel to keep them moist during the transfer.
Fill a small pot—about 6 inches deep—with well-draining potting mix. Make a small hole in the center, about 1 inch deep, and place the seed in so that the roots are covered but the top half remains above soil. This keeps the seed stable while allowing room for new growth.
☀️ Step 4: Provide Light and Care for the Young Sprout
Place the pot in a spot with bright, indirect light—think of it as a sunny windowsill with some shade. Direct sunlight can scorch the delicate new leaves, so if you notice the leaves turning yellow or crispy, move the plant back a few inches. You'll see the first true leaves emerge within 2-4 weeks after planting.
Water the soil whenever the top 1 inch feels dry to the touch. Overwatering is the biggest mistake here—avocado plants hate soggy roots. A moisture meter or simply sticking your finger in the soil helps gauge when it's time to water again. Keep the soil consistently moist but never waterlogged.
⏰ Step 5: Support Growth and Prune as Needed
As your avocado plant grows, it may need support to stay upright. I often use a small stake or a wooden chopstick inserted next to the plant to help it stand tall. Gently tie the stem to the stake as it grows, being careful not to damage the delicate new shoots.
Once the plant reaches about 12 inches tall, you can start pruning to encourage bushier growth. Pinch off the top set of leaves to redirect energy to the sides. This step is optional but helps create a fuller, more compact plant. Keep an eye out for yellowing leaves—they're a sign of overwatering or poor drainage, so adjust your care routine accordingly.
Tips & tricks for growing avocado plants from seeds
Confession: I've watched countless seeds fail before sprouting—until I learned these simple tricks that make all the difference.
Cleanliness is Key: In Step 1, when you're scrubbing that avocado pit, don't rush! Any leftover fruit flesh can attract mold or bacteria, which will rot your seed before it even gets a chance to sprout. I like to use a toothbrush to get into those crevices, then let it air dry completely. A fully dried seed is ready to start its growth journey without any unwanted guests.
Root Growth Observation: Those 2-3 inches of root growth in Step 3 aren't just arbitrary—they're a sign your seed is strong enough to handle soil. I've found that waiting until roots are this long gives your plant a much better chance of survival when transplanted. Watch for white, fibrous roots that look healthy and firm to the touch.
Light Matters More Than You Think: The bright, indirect light mentioned in Step 4 is crucial. I've seen plants wilt from too much direct sun or stretch awkwardly toward weak light sources. If you don't have a perfect windowsill spot, consider using a grow light for 6-8 hours a day. Your plant will thank you with lush, vibrant leaves.
Watering Wisdom: That 1-inch dry soil test in Step 4 is your best friend. I've made the mistake of overwatering before, and it nearly killed my plant. Stick your finger in the soil—if it feels dry up to your first knuckle, it's time to water. Avocado plants prefer their roots to dry out slightly between waterings, which prevents rot.
Pro Tips for Plant An Avocado Seed Indoors
- Confession: I've watched countless seeds fail before sprouting—until I learned these simple tricks that make all the ...
- Cleanliness is Key: In Step 1, when you're scrubbing that avocado pit, don't rush! Any leftover fruit flesh can attra...
- Root Growth Observation: Those 2-3 inches of root growth in Step 3 aren't just arbitrary—they're a sign your seed is ...
Frequently asked questions
How long does it take for an avocado seed to sprout indoors?
With the no-twist method, sprouts typically appear in 4–8 weeks, depending on warmth (70–85°F), humidity, and light. Keep the soil moist but not soggy—patience is key! If no growth occurs after 3 months, check for root rot or adjust care (e.g., brighter light or warmer spot).
Can I reuse the same toothpicks or skewers for multiple seeds?
No—each seed should have its own clean toothpicks or skewers to avoid cross-contamination (e.g., mold or bacteria). Sterilize tools with rubbing alcohol if reusing, but fresh materials reduce stress on the seed and lower failure risks. Think of it like planting a garden: every seed deserves its own space!
What if my avocado seed moldy or smells bad after planting?
Mold or a foul odor signals root rot, often from overwatering or poor drainage. Act fast: remove the seed, trim mushy roots, let it dry for 24 hours, and repot in fresh, well-draining soil. Reduce watering to once every 7–10 days until new roots form. A small fan nearby can improve airflow and prevent future issues.
Will my indoor avocado tree ever grow fruit?
While possible, it’s rare! Indoor avocado trees (Persea americana) need 5–10 years to mature and thrive outdoors in tropical climates (USDA zones 9–11). Focus on keeping your seedling healthy—enjoy its lush foliage and the fun of nurturing it. If you dream of fruit, consider grafting or moving it outside later as a houseplant experiment!
What’s the best alternative if my seed doesn’t sprout?
Try these foolproof backups:
- Buy a nursery seedling: Skip the wait—opt for a rooted avocado cutting (often sold online or at garden centers).
- Plant a second seed: Success rates improve with multiple attempts! Use the same method on a fresh seed.
- Try a different seed: Some avocado varieties (like Hass) sprout more reliably than others. Ask your grocer for a seed from a fresh, organic avocado.
Wrapping up and next steps
Growing an avocado seed indoors is a rewarding journey that combines patience, care, and a touch of creativity! 🌱 With the no-twist method, you’ve got a reliable way to coax those roots into sprouting strong and steady.
Whether you’re a beginner or a plant enthusiast, this project is a fun way to bring a little green life into your home—plus, you might just end up with a thriving avocado tree to enjoy (or share!) down the road.
Now that you’re armed with the know-how, why not take the next step? Grab your seed, set up your jar, and watch the magic unfold. And remember, every gardener starts somewhere—so embrace the process, celebrate the small wins, and enjoy the journey! 🌟