
Propagation
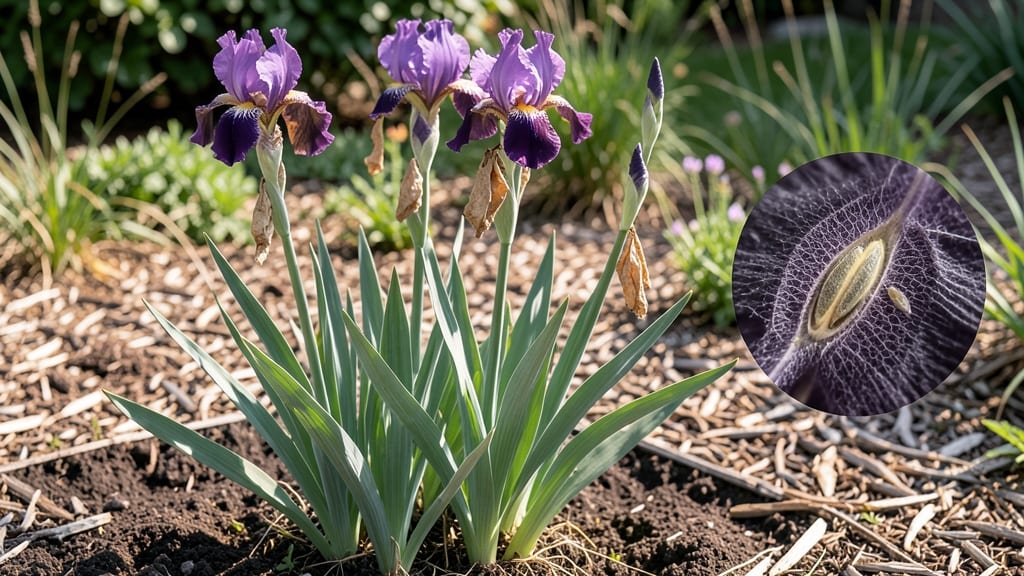
Iris seed pods are nature’s way of giving you free irises for next season—if you know when to harvest them. 🌱 The moment those pods turn from green to tan and start splitting open, you’ve got a zero-waste opportunity to grow new plants without buying a single bulb.
Most gardeners miss this step entirely, but I’ve turned my iris seed harvest into a reliable source of fresh blooms every few years.
Harvesting is simple: just snip the pods when they’re dry but before they release seeds everywhere. Store them in a paper bag until they open completely, then scatter the seeds on well-draining soil in fall.
No fancy germination tricks needed—just patience. The real magic happens when those first skinny green shoots appear in spring, signaling your free irises are on their way.
You’ll end up with plants that grow true to their parent’s colors and forms, often more vibrant than store-bought varieties. Just be ready for a wait: it takes 3-5 years for iris seedlings to bloom, but the payoff is worth it.
These plants thrive in full sun and rocky soil, making them perfect for low-maintenance gardens.
Perfect for iris lovers who want to expand their collection without spending money. Here’s how to do it right—no green thumb required.
📚 In This Guide
- What you need
- Instructions
- Tips and common mistakes
- Wrapping up and next steps
What you need
- ● Mature iris seed pods: 5–10 fully dried, brown pods (harvest when they split open naturally or are paper-thin).
- ● Pruning shears or sharp scissors: Clean, sterilized tools to snip pods without damaging stems.
- ● Paper bags or breathable mesh sacks: 2–3 medium-sized bags to collect seeds and pods (avoid plastic to prevent moisture buildup).
- ● Labeling tags or markers: To note pod varieties (e.g., "Bearded Iris – Purple Haze").
- ○ Gloves (optional but recommended): Protect your hands from thorns or rough stems.
- ● Magnifying glass: For inspecting seed viability or spotting pests.
- ● Small brush or sieve: To gently separate seeds from chaff or debris.
- ● Desiccant packets (silica gel): Place 1–2 in your storage container to keep seeds dry.
- ● Notebook or app: Track pod maturity dates or seed germination progress.
How to harvest and save iris seed pods for future gardens
Here’s my simple, zero-waste method—no fancy tools, just patience and timing.
🌱 Step 1: Identify and Wait for Mature Seed Pods
After your irises bloom, watch for the seed pods that form in place of the flowers. These look like small, green, sausage-shaped bulges that start soft but gradually harden as they mature. Wait until they turn tan or brown and feel dry to the touch—this usually takes 8-12 weeks after flowering. If you harvest too early, the seeds won’t be viable.
Here’s the thing—don’t confuse these with the seed pods of bearded irises (which are sterile). Look for smooth, elongated pods on siberian or Louisiana irises, as these are the ones that produce seeds. If you’re unsure, snap open a dry pod to check for tiny, flat, black seeds inside.
✂️ Step 2: Harvest the Pods at the Right Time
Once the pods are dry and papery, use clean scissors or pruners to snip them off the stem. Cut ½ inch above the pod to avoid damaging the plant. Place the pods in a paper bag (not plastic—you want airflow) and store them in a cool, dry place (like a garage or basement) for 2-4 weeks to fully dry.
I know it seems counterintuitive to wait longer, but this extra drying time prevents mold. If you rush and store them too soon, moisture trapped inside can ruin the seeds. Real talk: I’ve lost entire batches by skipping this step—don’t make my mistake!
🌿 Step 3: Extract and Store the Seeds Properly
After the pods are completely dry, gently squeeze or roll them over a clean sheet of paper to release the seeds. You’ll see tiny, flat, black seeds that look like miniature beans. Discard any pods that crumble or feel mushy—they’re past their prime. Store the seeds in an envelope or small jar with a moisture absorber (like a silica packet) and keep them in the fridge for up to 6 months.
Label the envelope with the iris variety and harvest date—seeds lose viability over time, and you’ll want to plant them as soon as possible. I’ve found that seeds stored longer than 6 months germinate poorly, so don’t wait too long to use them.
🌱 Step 4: Plant the Seeds for Next Year’s Garden
In early spring, sow the seeds ¼ inch deep in a well-draining seed-starting mix (not garden soil). Keep the soil moist but not soggy and place the tray in a warm, bright spot (like a sunny windowsill). Germination can take 2-4 weeks, so be patient—some seeds may take longer to sprout.
Once the seedlings have 2-3 true leaves, transplant them into individual pots and grow them under bright, indirect light for another 4-6 weeks before hardening off. This ensures they’re strong enough to handle outdoor conditions. You’ll see the first blooms in 3-4 years, but the wait is worth it for those stunning, unique flowers.
Tips & tricks for perfect iris seed pod harvesting
Here's what nobody tells you about turning those little pods into next year's garden stars.
Timing is Everything: The 8-12 week wait after flowering is non-negotiable for viable seeds. I learned this the hard way—harvesting too soon gives you shriveled, non-viable seeds. Mark your calendar from when the flowers fade to track this window. A simple garden journal with bloom dates saves you from guessing next season.
Pod Selection Secret: Not all iris pods are created equal. Focus on smooth, elongated pods from siberian or Louisiana irises—they're the seed producers. Bearded iris pods are sterile, so skip those. When in doubt, crack open a dry pod to check for those tiny black seeds before committing to harvest.
Drying Strategy: That 2-4 week drying period in Step 2 is your mold prevention insurance. I've ruined batches by skipping this—trust me. Use a paper bag (not plastic) for airflow and store in a garage or basement where humidity stays low. If your climate is damp, extend the drying time by a week rather than risking mold.
Storage Wisdom: Labeling your seed storage with variety and harvest date is a game-changer. I've opened jars years later only to forget what they were! The fridge keeps them viable for up to 6 months, but plant them as soon as possible—they degrade over time. A small silica packet in your storage container prevents moisture buildup that can ruin seeds.
Pro Tips for Iris Seed Pods
- Here's what nobody tells you about turning those little pods into next year's garden stars.
- Timing is Everything: The 8-12 week wait after flowering is non-negotiable for viable seeds. I learned this the hard ...
- Pod Selection Secret: Not all iris pods are created equal. Focus on smooth, elongated pods from siberian or Louisiana...
Frequently asked questions
Got questions about harvesting iris seed pods? You’re not alone! Here are some of the most common queries—and their answers—to help you master zero-waste propagation like a pro.
When is the best time to harvest iris seed pods?
Harvest iris seed pods after they’ve fully matured—usually late summer to early fall (August–September). Wait until the pods turn brown and dry but before they split open naturally. This ensures seeds stay viable for planting. If pods crack too soon, collect seeds immediately to avoid losing them to birds or wind!
How do I know if iris seeds are ready for planting?
Ready-to-plant iris seeds should be small, dark, and firm (like tiny beans). If they’re soft or shriveled, they’ve lost viability. For best results, store them in a cool, dry place (like a paper envelope) until spring. Pro tip: Label pods by variety to track your future blooms!
Can I use iris seed pods from store-bought irises?
Yes, but with a caveat! Store-bought irises are often hybrids, so seeds may not replicate the parent plant’s exact traits. For consistent results, harvest pods from heirloom or named varieties grown in your garden. If you’re experimenting, treat it as a fun surprise—your seedlings might delight with unexpected colors or forms!
What do I do if birds or squirrels eat my seed pods?
Don’t panic! Cover pods with fine mesh netting or a lightweight cloth as soon as they form. Secure it loosely to allow airflow but block critters. If pods are already compromised, salvage any intact seeds and plant them immediately. Bonus: This is a great excuse to get creative with garden decor—try a whimsical bird-proof "seed pod greenhouse"!
How long does it take for iris seeds to grow into flowers?
Patience is key! Iris seedlings typically take 2–3 years to mature enough for their first blooms. In the meantime, enjoy their grass-like foliage and the thrill of watching them grow. For faster results, consider dividing mature iris rhizomes (a quicker propagation method), but seed-grown irises often boast hardier, more unique traits.
Wrapping up and next steps
Harvesting iris seed pods is a rewarding way to ensure next year’s vibrant blooms while embracing a zero-waste garden ethic. By following these simple steps—waiting for pods to dry, collecting seeds gently, and storing them properly—you’re not just nurturing new plants but also fostering sustainability. 🌱
Ready to put your newfound knowledge into action? Start by scanning your garden this fall for ripe pods—your future iris blooms will thank you! For extra inspiration, explore creative ways to share seeds with fellow gardeners or experiment with propagation techniques like division. Happy growing! 🌸