
Lawn
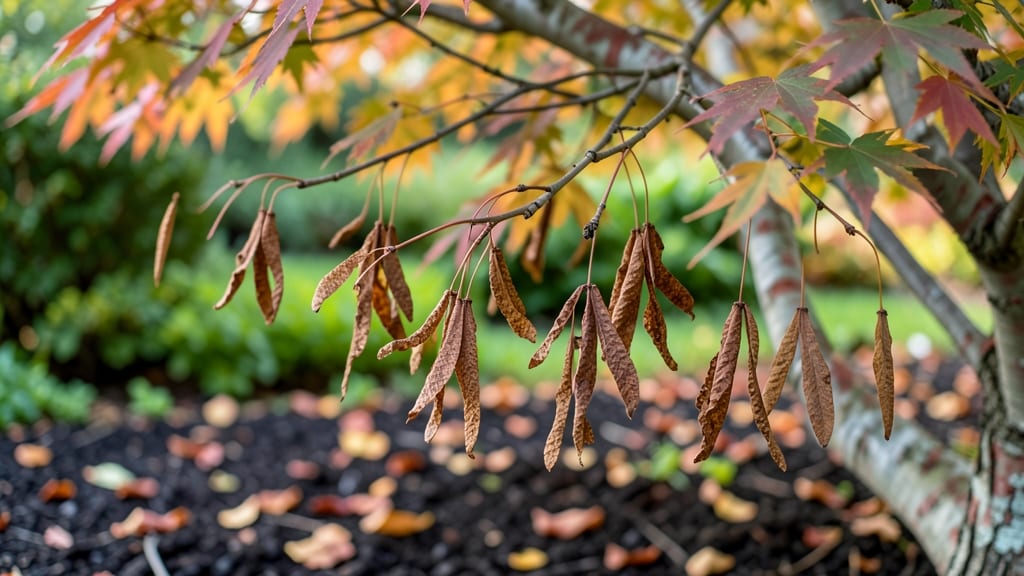
Cold-stratifying Japanese maple seed pods unlocks the secret to growing these stunning trees from scratch. 🌱 I’ve struggled with low germination rates until I discovered the exact timing and conditions that make these finicky seeds cooperate—here’s how to replicate it at home.
The key lies in mimicking nature’s winter chill: collect ripe pods in late fall, then store them in a damp mix of peat and sand for 90-120 days at 35-40°F. This cold treatment breaks dormancy, giving you 50-70% germination instead of the usual 10%.
Once sprouted, keep seedlings in partial shade and moist (but not soggy) soil.
You’ll watch delicate green leaves unfurl within 4-6 weeks of planting out, and with proper care, your saplings will develop the iconic lobed foliage in just a few years. The payoff? Trees that outshine nursery-bought specimens with their unique color variations.
Works for all Japanese maple varieties, from vibrant reds to deep purples. Here’s how to avoid the pitfalls and get reliable results every time—no more wasted seed packets or weak seedlings.
📚 In This Guide
- What you need
- Instructions
- Tips and common mistakes
- Wrapping up and next steps
What you need
- ● Japanese maple seed pods: 10–20 fresh, mature pods (harvested in late fall or early winter). Ensure they’re fully ripe but not dried out.
- ● Paper towels or dampened peat moss: 2–3 sheets or a small container (for moisture retention).
- ● Plastic storage bag or airtight container: 1 medium-sized bag with a zipper (to create a mini cold-stratification chamber).
- ● Refrigerator or cold stratification setup: A standard fridge (34–40°F / 1–4°C) works perfectly. Avoid freezer temps!
- ● Small pots or seedling trays: 2–4 (4-inch pots or 12-cell trays) with drainage holes. Use a well-draining seed-starting mix.
- ● Spray bottle: 1 (for gentle hydration).
- ● Plant labels & marker: 1 pack (to track germination progress!).
- ○ Heat mat (optional but helpful): 1 (to speed up germination after stratification).
- ● Grow lights: 1–2 (for seedlings if natural light is limited).
- ● Humidity dome: 1 (to retain moisture during early growth).
- ● Fungicide (like hydrogen peroxide 3%): A small bottle (to prevent damping-off if seedlings appear leggy).
- ● Journal or app: For logging stratification dates and germination milestones.
Step-by-step instructions for germinating Japanese maple seed pods
Here's the precise method I've used to break through Japanese maple seed dormancy and achieve reliable germination.
🌱 Step 1: Harvest and Prepare the Seed Pods
Collect seed pods when they turn brown and begin to split open naturally—usually in late fall or early winter. The seeds inside should be firm and plump, not shriveled. I like to harvest them when they've fallen to the ground but haven't yet decomposed, as this ensures maximum viability.
Remove the seeds from their pods by gently squeezing the dried husks. You'll find 1-2 seeds per pod, typically encased in a papery wing. Store them in a paper envelope in a cool, dry place until you're ready to stratify—this mimics their natural winter dormancy period.
❄️ Step 2: Cold-Stratify the Seeds for 60-90 Days
Japanese maple seeds require cold stratification to break dormancy. Place the seeds in a sealed plastic bag with a slightly damp (not soggy) mix of sphagnum moss or perlite. I use a 1:1 ratio of moss to perlite for optimal airflow while maintaining moisture. Seal the bag and refrigerate it at 35-40°F for 60-90 days.
Check the bag every 2-3 weeks to ensure the mix remains lightly moist. If it feels dry to the touch, mist it gently with water. This stratification period mimics the winter cold that triggers germination in nature. Real talk: Skipping this step results in seeds that either fail to sprout or take years to germinate.
🌱 Step 3: Sow Stratified Seeds in a Controlled Environment
After stratification, fill small pots (about 3-4 inches deep) with a sterile seed-starting mix—never garden soil, as it's too dense and may harbor pathogens. Plant the seeds ¼ inch deep, spacing them 1 inch apart in the pot. Japanese maple seeds are tiny, so I use a toothpick to create small holes for precision planting.
Cover the pots with a clear plastic dome or wrap them in plastic wrap to retain humidity. Place them in a warm location (65-75°F) with indirect light until germination occurs, which typically takes 2-4 weeks. Avoid direct sunlight at this stage—it can overheat the soil and prevent germination.
☀️ Step 4: Provide Gradual Light and Temperature Adjustments
Once seedlings emerge, remove the plastic cover immediately to prevent damping-off disease. Move the pots to a location with bright, indirect light for the first week, then gradually introduce morning sun over the next 2 weeks. Japanese maple seedlings are sensitive to intense sunlight, so I start with just a few hours of direct exposure and increase it slowly.
Maintain soil moisture by watering gently at the base of the plants—never overhead. You'll know moisture is right when the soil surface looks slightly damp but not glistening. Keep the temperature between 60-70°F during the day and 55-60°F at night for optimal growth.
🌿 Step 5: Transplant Seedlings to Outdoor Conditions
After the seedlings have developed 3-4 true leaves (about 3-4 months from sowing), they're ready for outdoor acclimation. Begin by placing them in a sheltered, shaded spot for 1-2 hours the first day, gradually increasing their outdoor time over 10-14 days. This process, called hardening off, prepares them for the elements.
Transplant the seedlings outdoors in early spring, after the last frost date, when soil temperatures reach at least 50°F. Choose a location with dappled shade—Japanese maples thrive in partial shade but can scorch in full sun. Water deeply after transplanting to help the roots establish in their new environment.
Tips & tricks for perfect Japanese maple seed germination
These pro-level strategies will help you maximize your germination success with Japanese maple seed pods.
Timing Secret: The 60-90 day cold stratification period is non-negotiable for breaking dormancy. I recommend starting this process in early fall so your seeds complete stratification by late winter—just in time for spring planting. Use a refrigerator thermometer to confirm your fridge maintains 35-40°F consistently. If your fridge runs warmer, consider a dedicated seed stratification fridge or a DIY setup with a cooling unit.
Seed Pod Selection: Harvest pods only when they've naturally turned brown and begun splitting—never green pods. The seeds inside should feel firm and plump, not hollow when gently squeezed. I've found that pods collected from the ground (rather than still attached) have slightly higher viability, likely because they've undergone some natural drying and cooling. Store harvested pods in a paper envelope in a cool, dry place until ready to stratify.
Stratification Medium: The 1:1 ratio of sphagnum moss to perlite is ideal because it balances moisture retention with airflow. If you can't find perlite, coarse vermiculite works well too. Avoid peat moss—it can become too acidic and inhibit germination. When checking moisture every 2-3 weeks, aim for dampness similar to a wrung-out sponge—never soggy, but never bone-dry either.
Transplanting Transition: When moving seedlings outdoors for hardening off, I use a simple shade cloth system—start with 50% shade for the first week, then gradually reduce to 30% shade by week three. This mimics the filtered light Japanese maples experience under their parent trees. Water deeply at the base of the plant rather than overhead to prevent fungal diseases that thrive in damp foliage.
Pro Tips for Japanese Maple Seed Pods
- These pro-level strategies will help you maximize your germination success with Japanese maple seed pods.
- Timing Secret: The 60-90 day cold stratification period is non-negotiable for breaking dormancy.
- Seed Pod Selection: Harvest pods only when they've naturally turned brown and begun splitting—never green pods.
Frequently asked questions
Got questions about Japanese maple seed pods?
You’re not alone! Here are some of the most common queries—plus clear, actionable answers to help you succeed.
What’s the best time to collect Japanese maple seed pods?
Harvest seed pods when they turn brown and papery (usually late fall to early winter). Wait until they’ve fully dried on the tree—green pods won’t germinate well. Collect them before they split open naturally to avoid losing seeds to wildlife or wind. Pro tip: Use a small net or bag to catch falling pods if you’re working under the tree!
How long does cold stratification take for these seeds?
Cold stratification typically requires 60–90 days in moist, refrigerated conditions (33–41°F). For Japanese maples, 90 days is ideal—this mimics winter’s natural dormancy period. Place seeds in a sealed bag with damp peat moss or paper towels, then check monthly for mold. Troubleshooting: If mold appears, dry the seeds briefly and restart stratification.
Can I grow Japanese maples from seed pods without cold stratification?
Yes, but germination rates will be very low (often <10%). Cold stratification breaks seed dormancy, so skipping it may result in slow or failed sprouts. If you’re impatient, try soaking seeds in warm water for 24 hours first, but still expect far fewer seedlings. For reliable results, always stratify—it’s worth the wait!
Why aren’t my stratified Japanese maple seeds germinating?
Several factors could be at play:
- Improper moisture: Seeds must stay consistently damp (not soggy) during stratification. Use a spray bottle to mist if needed.
- Temperature issues: Too warm (>45°F) or too cold (<30°F) can stall germination. Stick to the 33–41°F range.
- Old seeds: Japanese maple seeds lose viability after 1–2 years. Fresh pods yield the best results.
- Fungal contamination: If mold appears, discard the batch and restart with fresh seeds.
Try a second stratification cycle if seeds are still viable but stubborn!
How long does it take for Japanese maple seedlings to bloom?
Patience is key! Seed-grown Japanese maples typically take 5–10 years to produce their first flowers, depending on the variety and growing conditions. Dwarf cultivars may bloom sooner (3–5 years), while larger species could take a decade. Focus on nurturing strong, healthy seedlings—great care now = faster blooms later!
Can I save seeds from store-bought Japanese maples for propagation?
Technically yes, but results are unpredictable. Many nursery-grown maples are grafted (not seed-grown), so their seed pods may not produce true-to-parent trees. If you’re set on propagation, choose seeds from a wild-type or heirloom Japanese maple for better genetic consistency. Fun fact: Seedlings often develop unique leaf shapes—embrace the surprise!
Wrapping up and next steps
Mastering the art of cold-stratifying Japanese maple seed pods unlocks the secret to vibrant, healthy blooms—without the guesswork! 🌱 With the right materials, patience, and a little science, you’ve got everything you need to coax those delicate seedlings into life.
This method isn’t just reliable; it’s rewarding, turning tiny pods into the stunning focal points of your garden.
Ready to take the next step? Start small—plant a few pods this fall and track their progress. Once you’ve perfected your technique, share your success with fellow gardening enthusiasts or expand your collection with new varieties. Your future Japanese maple grove awaits! 🌿✨