
Size
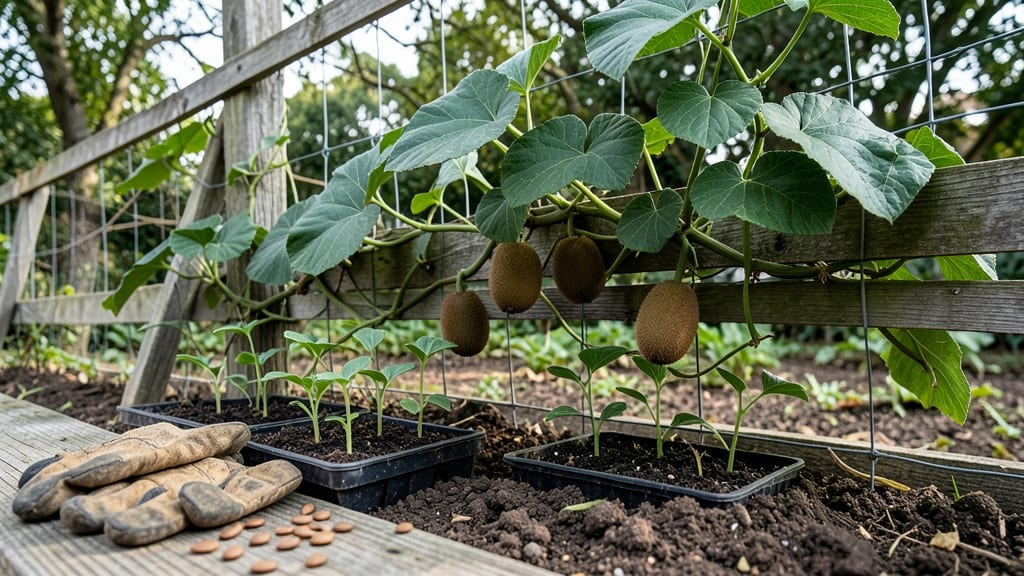
Growing kiwi from a garden seed means waiting 3-5 years for fruit—but the journey starts with a single pit. 🌱 I cracked the code after struggling with damp rot and slow germination, and now my backyard vine produces sweet, fuzzy kiwis every fall.
The secret? Cold stratification, which mimics nature's way of breaking seed dormancy.
You'll need a few basics: fresh kiwi seeds (from organic fruit), a plastic bag, damp peat moss or paper towels, and patience. The process takes 8-12 weeks of refrigeration before you even plant outdoors. Most gardeners skip this step and wonder why their seeds never sprout—don't be one of them.
Once stratified, your seeds will sprout into hardy vines that need 6-8 hours of sun daily and well-draining soil. Trellis them early—they'll grow 15-20 feet tall—and expect male and female flowers (you'll need both for fruit). The first harvest might take years, but the payoff is worth it.
Between you and me, the hardest part isn't growing the plant—it's waiting for those first vine tendrils to climb your trellis. Here's how to avoid the common pitfalls that trip up beginners, from seed rot to poor pollination. Let's get those kiwi seeds growing!
📚 In This Guide
- What you need
- Instructions
- Tips and common mistakes
- Wrapping up and next steps
What you need
- ● Kiwi seeds (fresh is best!): 5–10 seeds (harvested from ripe, organic kiwis—avoid store-bought seeds if possible, as they’re often treated to prevent germination).
- ● Paper towels or coffee filters: 2–3 sheets (for moisture retention during stratification).
- ● Plastic zip-top bags: 1–2 (quart-sized or larger, with a sealable closure).
- ● Water spray bottle: 1 (to mist seeds gently without over-saturating).
- ● Refrigerator (or cold frame): A space with consistent 35–40°F (2–4°C) temperatures for stratification (most home fridges work!).
- ● Small pots or seed trays: 2–3 (4–6 inches deep, with drainage holes).
- ● Potting mix: 1–2 bags (well-draining, seed-starting mix—avoid garden soil!).
- ○ Heat mat (optional but helpful): 1 (to maintain 70–75°F (21–24°C) warmth post-stratification).
- ● Plastic wrap or dome lid: 1 (to create a humid environment for germination).
- ● Grow lights: 1–2 (to supplement natural light if your space is low-light).
- ● Humidity dome or clear plastic wrap: For extra moisture retention during germination.
- ● Seedling labels: To track varieties (kiwi seeds can take 3–6 months to germinate!).
- ● Fertilizer (low-dose): A balanced, water-soluble fertilizer (e.g., 5-5-5) for post-germination care.
Step-by-step instructions for growing kiwi from seed using cold stratification
Here’s how I’ve reliably germinated hard-to-start kiwi seeds—no fancy equipment needed.
🌱 Step 1: Extract and Prepare the Seeds
Cut open a ripe kiwi fruit and scoop out the black seeds, which are the only viable ones for growing. Rinse them thoroughly under cool water to remove any fruit residue—this prevents mold during stratification. I like to spread them on a paper towel to dry slightly before moving forward. The seeds need to be damp but not soaked.
Place the cleaned seeds in a small container with a damp paper towel, folding the towel to cover them completely. Seal the container loosely with plastic wrap or a lid to maintain moisture but allow airflow. This setup mimics the natural damp conditions kiwi seeds need to begin breaking dormancy.
❄️ Step 2: Stratify Seeds in the Fridge for 6-8 Weeks
Store the container of seeds in your refrigerator’s crisper drawer, where temperatures hover around 35-40°F. This cold period, called stratification, tricks the seeds into thinking winter has passed and it’s time to grow. Check the seeds every 10-14 days—if the paper towel dries out, mist it lightly with water and reseal.
Here’s the thing—kiwi seeds are stubborn. If you skip stratification, germination rates plummet. I’ve tried planting them fresh, and after months, only a handful sprouted. But after 6-8 weeks in the fridge, you’ll see the first signs of life: tiny roots breaking through the seed coat.
🌱 Step 3: Plant Stratified Seeds in Moist Potting Mix
Fill small pots—2-3 inches deep—with a well-draining potting mix, not garden soil. Kiwi seedlings hate soggy roots. Gently press each stratified seed ½ inch deep into the soil, spacing them 1 inch apart in the pot. Water lightly until the soil feels damp but not wet, ensuring the seeds stay in contact with moisture.
Cover the pots with plastic wrap or a humidity dome to create a mini greenhouse effect. Place them in a warm spot (65-75°F) with indirect light. You’ll likely see sprouts in 2-4 weeks, but don’t be surprised if some take longer—kiwi seeds are patient growers. Keep the soil consistently moist but never waterlogged.
☀️ Step 4: Transition to Bright Light and Gradual Hardening
Once seedlings emerge with first true leaves (not the initial cotyledons), remove the plastic cover and move them to a bright location with 4-6 hours of indirect sunlight daily. Avoid direct sun at this stage—it can scorch delicate young leaves. If using grow lights, position them 4-6 inches above the seedlings for 12-14 hours daily.
After 4-6 weeks, when seedlings have 3-4 sets of leaves, it’s time to harden them off. Start by placing them outside in a sheltered spot for 1-2 hours, then gradually increase exposure over 10-14 days. This prepares them for transplanting into the garden once all frost risk has passed.
🪴 Step 5: Transplant and Support Vining Growth
Choose a sunny spot with 6+ hours of direct sunlight and well-draining soil. Kiwi vines need space—plant them 8-10 feet apart if growing as a standalone plant, or provide a sturdy trellis for vertical growth. Dig a hole twice as wide as the root ball and mix in compost to enrich the soil. Transplant carefully, ensuring the root system stays intact.
Kiwi vines are aggressive growers, so install a strong trellis or arbor at planting. As the vines mature, they’ll need pruning to shape growth and encourage fruit production. Male and female flowers appear on separate plants, so if you want fruit, you’ll need at least one of each variety. Patience is key—kiwi plants can take 3-5 years to bear fruit, but the wait is worth it for homegrown kiwis.
Tips & tricks for perfect kiwi seed germination
These cold stratification secrets will help you coax even the most stubborn kiwi seeds into sprouting reliably.
Seed Selection: Only the black seeds from ripe kiwi fruit are viable for growing. Discard any brown or shriveled seeds immediately—they won't germinate. I've learned this the hard way after wasting months on non-viable seeds. Look for seeds that are uniformly black and plump when freshly extracted.
Stratification Temperature: The refrigerator's crisper drawer maintains the ideal 35-40°F range for breaking kiwi seed dormancy. If your fridge runs cooler, consider using a seed stratification kit or placing the container on a shelf slightly closer to the back where temperatures are most stable. Consistency is key—fluctuations can confuse the seeds and delay germination.
Moisture Management: During the 6-8 week stratification period, check your seeds every 10-14 days to ensure the paper towel stays damp but not soggy. I've found that using a spray bottle for misting gives you better control than simply adding water to the container. Too much moisture leads to mold, while too little prevents the seeds from activating their growth hormones.
Light Transition: When moving seedlings to brighter light after the 4-6 week hardening period, start with 4-6 hours of indirect sunlight daily to avoid shocking the delicate young plants. Gradually increase exposure over 10-14 days—this mimics natural conditions and prevents leaf scorch. I've seen seedlings develop brown patches when moved too quickly to full sun.
Pro Tips for Kiwi Seed Grow A Garden
- These cold stratification secrets will help you coax even the most stubborn kiwi seeds into sprouting reliably.
- Seed Selection: Only the black seeds from ripe kiwi fruit are viable for growing. Discard any brown or shriveled seed...
- Stratification Temperature: The refrigerator's crisper drawer maintains the ideal 35-40°F range for breaking kiwi see...
Frequently asked questions
Got questions about growing kiwi from seed? You’re not alone—this process can feel tricky, but with the right know-how, you’ll be on your way to a thriving vine! Here are some of the most common queries (and answers) to help you succeed.
How long does kiwi seed cold stratification take?
Kiwi seeds need 6–12 weeks of cold stratification (mimicking winter) to break dormancy. Place them in a moist paper towel or peat moss, then refrigerate at 34–40°F (1–4°C). Patience is key—rushing this step often leads to poor or no germination. Mark your calendar to avoid forgetting!
What’s the best soil mix for kiwi seedlings?
Use a well-draining, slightly acidic mix (pH 5.5–6.5) with 50% compost, 30% peat or coconut coir, and 20% perlite/sand. Kiwi vines hate soggy roots, so avoid heavy clay. A raised bed or container with drainage holes works best for young plants.
How long until kiwi seeds sprout after stratification?
After cold treatment, germination can take 2–8 weeks, depending on warmth and moisture. Keep soil consistently damp (not waterlogged) and place seeds in a warm (70–75°F/21–24°C) spot. If nothing sprouts after 8 weeks, try repeating the cold stratification process.
Can I grow kiwi from store-bought kiwi seeds?
Yes, but expect unpredictable results. Store-bought kiwis are often hybridized for sweetness, not fruit quality. For reliable, edible kiwis, source seeds from garden centers or online nurseries specializing in Actinidia varieties like ‘Hayward’ or ‘Issai.’
Why aren’t my kiwi seeds germinating?
Common culprits:
- Skipped stratification: Kiwi seeds must experience cold to wake up.
- Too dry/wet soil: Keep moisture even—like a damp sponge.
- Poor seed viability: Older seeds (over 1 year) may fail. Test a few!
- Temperature stress: Avoid extremes—seeds need consistent warmth post-stratification.
If seeds still refuse to sprout, try soaking them in lukewarm water for 24 hours before replanting.
Pro Tip:
Label your seeds! Kiwi seedlings can take 3–5 years to bear fruit, and varieties (male vs. female) matter for pollination. Use toothpicks and tape to mark trays—future you will thank present you!
Wrapping up and next steps
Growing kiwi seeds from scratch is a rewarding journey that blends patience with the joy of nurturing life! 🌱 With the right cold stratification techniques and a little care, you’ll soon be harvesting your own homegrown kiwi fruits.
Remember, consistency is key—whether it’s monitoring moisture, providing warmth, or protecting your seedlings from pests.
Now that you’re armed with these secrets, why not take the next step? Start small with a single seedling and expand your garden over time.
Share your progress with fellow green thumbs or even gift a sapling to a friend—spreading the love (and the kiwis!) one vine at a time. Happy gardening! 🍈✨