
Lawn
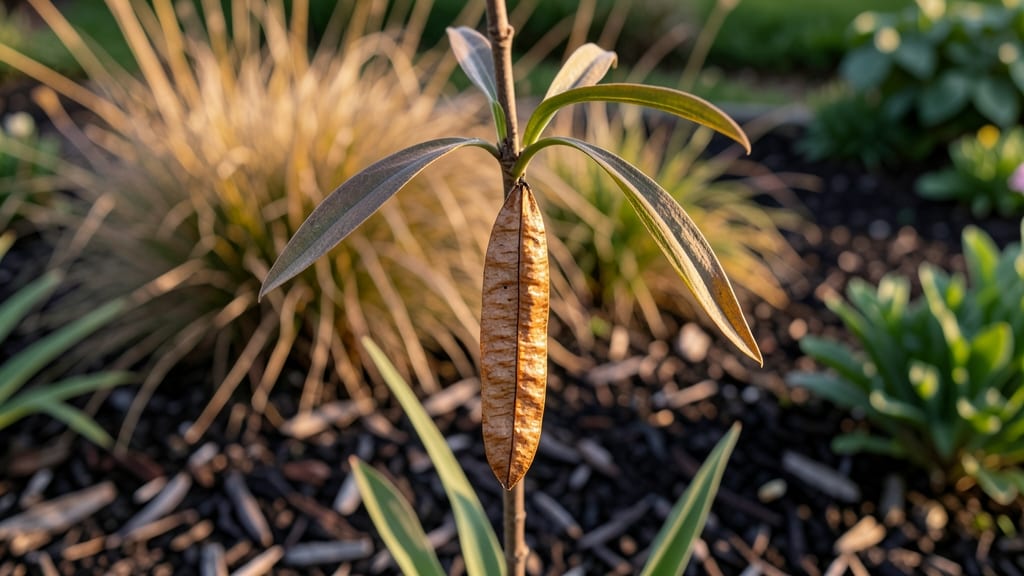
Harvesting lily seed pods means turning last year's spent blooms into next season's stunning plants—naturally. 🌱 The pods look like dried, papery lanterns hanging from the stems, and they're packed with potential if you know when and how to collect them.
I've grown lilies from seed for years, and the secret to success starts with timing and a few simple tricks to coax those seeds out without damage.
Timing is everything—wait until the pods turn completely brown and crispy, usually late fall after the first frost. Once they're ready, gently twist them off the stem and place them in a paper bag for a few weeks.
Nature does the rest: the pods will split open on their own, revealing glossy black seeds that look like tiny marbles. This zero-waste method saves you money and gives you control over the varieties you grow.
Germination takes patience but pays off with robust, disease-resistant lilies. Plant the seeds in well-draining soil, barely covering them, and keep the mix moist but not soggy. In 6-8 weeks, you'll see the first green shoots—thin and delicate, but full of promise.
These young plants need consistent moisture and protection from strong winds until they're strong enough to stand on their own.
One of the biggest mistakes beginners make is rushing the process—whether by planting too early or expecting instant results. Give the seeds time to mature, and don't be discouraged if the first batch doesn't perform perfectly.
Even my first attempts produced lilies that bloomed the following year, proving that a little patience and the right technique can turn simple pods into a garden showstopper.
📚 In This Guide
- What you need
- Instructions
- Tips and common mistakes
- Wrapping up and next steps
What you need
- ● Mature lily seed pods: 5–10 fully dried pods (brown, papery texture, and slightly cracked). Pro tip: Harvest them after they’ve naturally opened or are close to splitting!
- ● Pruning shears or sharp scissors: A pair with clean, sharp blades to snip stems without damaging the pods.
- ● Paper bags or breathable fabric sacks: 2–3 medium-sized bags to collect seeds and prevent spills.
- ● Tweezers or small tongs: For gently extracting seeds from pods without crushing them.
- ● Rubbing alcohol (70% or higher) and cotton swabs: To sterilize tools and prevent mold or bacteria.
- ○ Glove (optional but recommended): A pair of thin gardening gloves to protect your hands from prickly pods or sap.
- ● Magnifying glass: For inspecting seeds or pods up close.
- ● Small sieve or fine mesh screen: To separate seeds from chaff or debris.
- ● Labeling tags and markers: If you’re saving seeds for specific varieties (e.g., Lilium asiaticum vs. Lilium longiflorum).
- ● Seed storage container: Airtight and moisture-proof for long-term seed preservation.
- ● Camera or phone: To document your pods’ progress or share your zero-waste wins!
Step-by-Step guide to harvesting lily seeds naturally
Skip the guesswork—here's how to coax open those stubborn pods for fresh seeds.
🌱 Step 1: Identify and Select Mature Seed Pods
Look for pods that have turned completely brown and feel dry to the touch—this signals they're fully mature. I avoid pods with any green streaks, as those aren't ready yet. Gently twist the pod between your fingers to check for resistance; a mature pod will separate easily from the stem.
Harvest pods when they're dry but before they split open naturally. If you wait too long, seeds scatter everywhere, and squirrels get first pick. Use clean pruning shears to snip the stem about 1 inch below the pod. Place them in a paper bag with a few holes punched in the sides—this allows airflow while keeping seeds contained.
☀️ Step 2: Dry and Prepare Pods for Opening
Spread the pods on a dry, flat surface in a warm, dry spot with indirect sunlight. I use a mesh screen or an old window screen to keep them elevated and prevent mold. Turn them every 2-3 days to ensure even drying—this prevents uneven splitting and mold growth.
Drying takes about 1-2 weeks, depending on humidity. You'll know they're ready when the pods feel completely light and hollow when tapped. If you hear seeds rattling inside, they're ready for the next step. Avoid direct sunlight, which can cause pods to crack prematurely and scatter seeds.
✂️ Step 3: Open Pods for Seed Harvesting
Place a single pod on a clean cutting board or paper towel. Use a sharp knife or small scissors to carefully slice along one seam of the pod—this creates an opening without damaging the seeds inside. I make a small cut about ½ inch long to start, then gently pry the pod open with my fingers.
Empty the seeds onto a clean surface. You'll notice some seeds are plump and healthy, while others may be shriveled or discolored—discard those. Store the good seeds in a paper envelope labeled with the variety and date. Keep them in a cool, dry place until ready to plant.
💧 Step 4: Store Seeds for Future Planting
Seeds from lily pods can remain viable for 1-2 years if stored properly. Place them in an airtight container with a silica gel packet to absorb excess moisture. I like to use small glass jars with tight-fitting lids—this keeps seeds dry and protected from pests.
Label each jar with the lily variety and the harvest date. Store them in a dark, cool place like a pantry or basement. Before planting, test a few seeds by soaking them in water overnight. If they swell and feel firm, they're ready to grow. Discard any seeds that remain hard or shriveled after soaking.
Tips & tricks for perfect lily seed pod harvesting
Here's what nobody tells you—these tricks will turn your seed collection from frustrating to foolproof.
Selection Strategy: In Step 1, don't just look for brown pods—give them the "twist test." A mature pod should feel light as a feather and separate cleanly from the stem. I've learned the hard way that pods with any green streaks won't yield viable seeds, no matter how long you wait. Harvest them when they're completely dry but still intact, or you'll lose seeds to wind or wildlife.
Drying Wisdom: The 2-3 day turning schedule in Step 2 is non-negotiable for even drying. I use an old window screen elevated on bricks to create airflow from all sides. If you're in a humid climate, you might need to extend this to 3-4 days between turns. Watch for mold—any sign of fuzz means you need better airflow or a drier location.
Opening Technique: When making that initial ½-inch cut in Step 3, use a sharp knife and cut against the natural seam of the pod. This prevents tearing the seeds inside. I've found that gently tapping the pod with the knife handle after cutting helps loosen the seeds without damaging them. Work on a clean surface—those tiny seeds disappear in seconds!
Storage Secret: For the 1-2 year viability mentioned in Step 4, I add a small packet of silica gel to my glass jars. This keeps moisture at bay and extends shelf life. Before planting, always test a few seeds—if they don't swell after overnight soaking, they've lost viability. Labeling with both variety and date saves headaches when you're ready to replant next season.
Pro Tips for Lily Seed Pod
- Here's what nobody tells you—these tricks will turn your seed collection from frustrating to foolproof.
- Selection Strategy: In Step 1, don't just look for brown pods—give them the "twist test."
- Drying Wisdom: The 2-3 day turning schedule in Step 2 is non-negotiable for even drying.
Frequently asked questions
Got questions about harvesting lily seed pods? You’re not alone! Here are some of the most common queries—plus straightforward answers to help you master the process like a pro.
How do I know when lily seed pods are ready to harvest?
Lily seed pods (like those from Lilium or Fritillaria) are ready when they turn brown and papery and split open naturally. If they’re still green, they need more time—typically 4–8 weeks after flowering, depending on the variety. Gently squeeze the pod: if seeds rattle inside, it’s harvest time! Avoid picking them too early, or the seeds may not mature.
What should I do if my lily seed pods won’t open on their own?
Sometimes pods resist splitting due to humidity or over-moisture. Try these tricks:
- Dry them indoors: Place pods in a well-ventilated spot (like a mesh bag) for 1–2 weeks.
- Freeze them: Pop pods in the freezer for 24 hours to shock them open.
- Gently crack them: Use a butter knife to carefully pry open stubborn pods—avoid crushing seeds.
Can I plant lily seed pods directly in the ground?
Yes! Once pods open, scatter seeds 1/4-inch deep in well-draining soil. Lilies thrive in full sun to partial shade with moist (but not soggy) soil. For faster germination, soak seeds in lukewarm water for 24 hours first. Note: Some lilies (like daylilies) produce tuberous offsets instead of true seeds—check your plant type!
What’s the best alternative if my lily doesn’t produce seed pods?
Not all lilies (like Lilium ‘Stargazer’) set seed easily. Try these alternatives:
- Divide mature bulbs: Dig up clumps in fall, separate offsets, and replant.
- Buy seeds online: Specialty nurseries sell lily seeds (e.g., Lilium martagon or Fritillaria imperialis).
- Cross-pollinate: Use a paintbrush to transfer pollen between flowers of the same variety to encourage pod formation.
How long does it take for lily seeds to germinate?
Germination varies by species but typically takes:
- Spring-planted seeds: 2–4 weeks (if soil temps are 60–70°F).
- Fall-planted seeds: 6–12 months (they may need cold stratification to break dormancy).
Wrapping up and next steps
Growing lily seed pods is a rewarding way to embrace zero-waste gardening while enjoying nature’s beauty! With the right tools—like heat, moisture, and a little patience—you can unlock their hidden treasures without harming the plant.
Whether you’re a seasoned gardener or just starting out, these tricks make harvesting effortless and eco-friendly.
Ready to take the next step? Try experimenting with one method this season—whether it’s the boiling water soak or the freeze-and-thaw cycle—and share your results with fellow plant lovers. Happy harvesting! 🌱✨