
Lawn
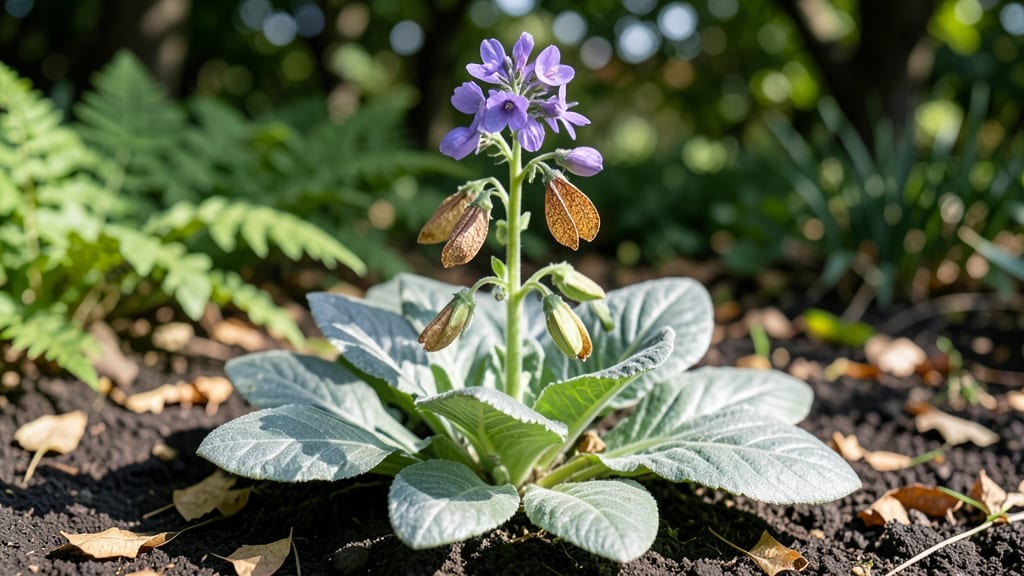
Those translucent moon-shaped lunaria seed pods are nature’s most elegant time capsules—packed with viable seeds for years and stunning enough to dry for winter arrangements. 🌙 I’ve harvested them for both propagation and decor, and the secret to keeping seeds viable without twisting the pods lies in timing and gentle handling.
The pods mature in late summer, turning from green to papery brown with a silvery sheen—like tiny moon windows. Harvest when fully dry but before they shatter (usually September-October in most climates), then store in a cool, dark place.
The seeds inside stay good for 3-5 years, ready to sprout next spring.
You’ll end up with two rewards: fresh lunaria plants for next season’s cheerful purple blooms and delicate dried pods perfect for wreaths or potpourri. The pods even make lovely confetti when sprinkled at weddings—nature’s free party favor.
Works for gardeners in zones 3-9, though timing shifts slightly with your first frost. Here’s how to do it without damaging a single pod or seed—no experience needed.
📚 In This Guide
- What you need
- Instructions
- Tips and common mistakes
- Wrapping up and next steps
What you need
- ● Lunaria plants (Honesty plants) – At least 3 mature plants (for optimal seed pod yield).
- ● Pruning shears or sharp scissors – For clean cuts without damaging stems.
- ● Paper bags or breathable mesh bags – 5–10 bags (to store pods while drying).
- ● Labeling tags & marker – To track seed varieties and harvest dates.
- ○ Drying rack or screen – For airflow (optional but recommended).
- ● Glass jars or airtight containers – For long-term seed storage (quart-sized or larger).
- ● Seed catalog or notebook – To log pod maturity and germination notes.
- ● Humidity monitor – Ensures pods dry at 30–40% humidity.
- ● Desiccant packets – For jars to prevent moisture buildup.
- ● Gloves – If handling large quantities of pods (to avoid skin irritation).
- ● A sunny, well-drained garden spot (Lunaria thrives in partial shade too!).
- ● Patience – Pods take 6–8 weeks to mature post-flowering.
- ● Knowledge of seed viability – Lunaria seeds stay viable for years if stored properly!
Step-by-Step guide to harvesting Lunaria seed pods for year-round viability
Here's how to collect seeds from these stunning moonflower pods without damaging them—keeping them viable for planting next season.
🌿 Step 1: Identify and Select Mature Seed Pods
Wait until the pods turn a papery white or light tan color—this signals full maturity. I always check in late summer when the foliage starts yellowing. Gently squeeze a few pods: if they rattle with seeds inside but don't feel mushy, they're ready. Avoid pods that have split open naturally, as their seeds may have already dispersed.
Harvest on a dry morning after any dew has evaporated. This prevents moisture from encouraging mold growth during storage. I like to collect pods when they're still attached to the plant, as this makes handling easier and reduces seed loss. Use clean, sharp scissors to snip the stems about 1 inch below the pod.
🪴 Step 2: Prepare for Drying and Storage
Spread the pods out in a single layer on a clean, dry surface like a mesh screen or paper towels. Place them in a warm, dry location with good air circulation—65-75°F works perfectly. Avoid direct sunlight, which can overheat the pods and crack them open prematurely. I often use a well-ventilated garage or covered porch.
Let the pods dry completely for 2-3 weeks. You'll know they're ready when the outer shell feels crisp and the seeds inside rattle loudly when shaken. If any pods start to split before this time, remove them immediately—they'll release seeds too soon. Store the dried pods in a paper envelope or breathable fabric bag, never plastic, to prevent moisture buildup.
⏰ Step 3: Extract Seeds and Test Viability
Once fully dry, gently squeeze each pod between your fingers until it cracks open. The seeds will pop out easily—you should get 4-6 seeds per pod. I like to do this over a clean sheet of paper to catch any stray seeds. If a pod feels hollow after squeezing, it was empty and can be discarded.
To test viability, place 10 seeds between damp paper towels in a sealed container. Keep them in a warm spot (70°F) for 7-10 days. If at least 80% sprout, your seeds are ready for storage. If fewer than half sprout, try storing the seeds for another month before retesting.
💧 Step 4: Store Seeds for Long-Term Viability
Place the viable seeds in an airtight container with a silica gel packet to absorb moisture. I use small glass jars with tight-sealing lids. Store them in a cool, dark place like a refrigerator or root cellar—35-40°F is ideal. Lunaria seeds can remain viable for 3-5 years under these conditions, though germination rates drop slightly after the first year.
Label each container with the variety name and harvest date. This helps track seed age and ensures you don't accidentally plant old seeds that may not germinate well. I also include the storage date to monitor viability over time. Check the seeds annually for any signs of mold or pests—discard any containers that show damage.
Tips & tricks for perfect Lunaria seed pod harvesting
These simple tricks will help you preserve those delicate moonflower seeds for years to come.
Timing is Everything: Harvest your pods in the morning after dew has evaporated but before the afternoon heat sets in. This gives you a full day for proper drying without worrying about afternoon humidity. I've found that harvesting between 8-10 AM gives me the best results—pods stay fresh longer and dry more evenly. The 2-3 week drying period in Step 2 is crucial, so starting with dry pods makes all the difference.
Visual Cues for Perfect Pods: Look for pods that are completely white or light tan with no green remnants. When you gently squeeze them, they should feel firm with a hollow sound inside—like a tiny drum! If any pods feel mushy or have already split open, they've missed their window. These visual cues help you select only the best pods for maximum seed viability.
Drying Strategy: For even drying, consider using a mesh screen or an old window screen. Place it over a cardboard box or tray to catch any stray seeds that might fall through. The 65-75°F temperature range mentioned in Step 2 is ideal—any hotter and you risk cracking the pods, any cooler and you risk mold. A well-ventilated garage or covered porch works perfectly, but avoid attics or basements where humidity might build up.
Seed Extraction Hack: When it's time to extract seeds, place your pods on a clean sheet of paper and gently tap them with a small wooden spoon. This helps release seeds without squeezing too hard and damaging them. You should get 4-6 seeds per pod—any fewer means the pod wasn't fully mature when harvested. This gentle method preserves seed integrity for better storage results.
Pro Tips for Lunaria Seed Pods
- These simple tricks will help you preserve those delicate moonflower seeds for years to come.
- Timing is Everything: Harvest your pods in the morning after dew has evaporated but before the afternoon heat sets in.
- Visual Cues for Perfect Pods: Look for pods that are completely white or light tan with no green remnants.
Frequently asked questions
Got questions about harvesting and storing Lunaria seed pods?
Here are some of the most common ones—plus expert tips to keep your seeds viable year-round!
When is the best time to harvest Lunaria seed pods?
The ideal time is when the pods turn brown and papery but before they split open naturally. This usually happens in late summer to early fall (August–October, depending on your climate). Harvest them on a dry day to prevent mold—just twist gently to detach the pods from the stem.
Can I harvest Lunaria seed pods in winter?
If pods remain on the plant over winter, they’ll open on their own when conditions are right (warm, dry weather). However, for guaranteed viability, harvest them in fall and store them in a cool, dry place (like a paper bag with ventilation) until spring. Avoid refrigeration—it can cause moisture buildup and spoil seeds.
What if my Lunaria pods split before I can harvest them?
Don’t worry! If seeds scatter naturally, collect them from the ground and let them dry for a few days in a shady spot. Store them in a breathable container (like a mesh bag) to prevent rot. Lunaria seeds stay viable for 2–3 years if stored properly.
Are there alternatives to Lunaria for zero-twist seed harvesting?
Yes! Other self-seeding plants with easy-to-harvest pods include:
- Nasturtiums – Edible, fast-growing, and great for pollinators.
- Calendula – Medicinal properties + bright orange flowers.
- Honesty (Lunaria annua’s cousin) – Similar seed pods but slightly smaller.
Why are my stored Lunaria seeds moldy or not germinating?
Mold or poor germination usually means too much moisture or improper storage. Fix it by:
- Storing seeds in a dry, well-ventilated container (avoid airtight jars).
- Keeping them in a cool (50–60°F) but not freezing spot.
- Checking for pests—if you see webbing or holes, discard the batch.
Wrapping up and next steps
Lunaria seed pods are a gardener’s secret weapon—offering easy, zero-twist harvesting for seeds that stay viable all year! Whether you’re a beginner or a seasoned green thumb, these striking moon-shaped pods make seed-saving effortless and rewarding. 🌙✨
Ready to dive in? Start by planting a few Lunaria annua seeds in your garden this season—then watch as their unique pods transform into nature’s seed bank. Next up: experiment with drying and storing your harvested seeds for future planting adventures!