
Lawn
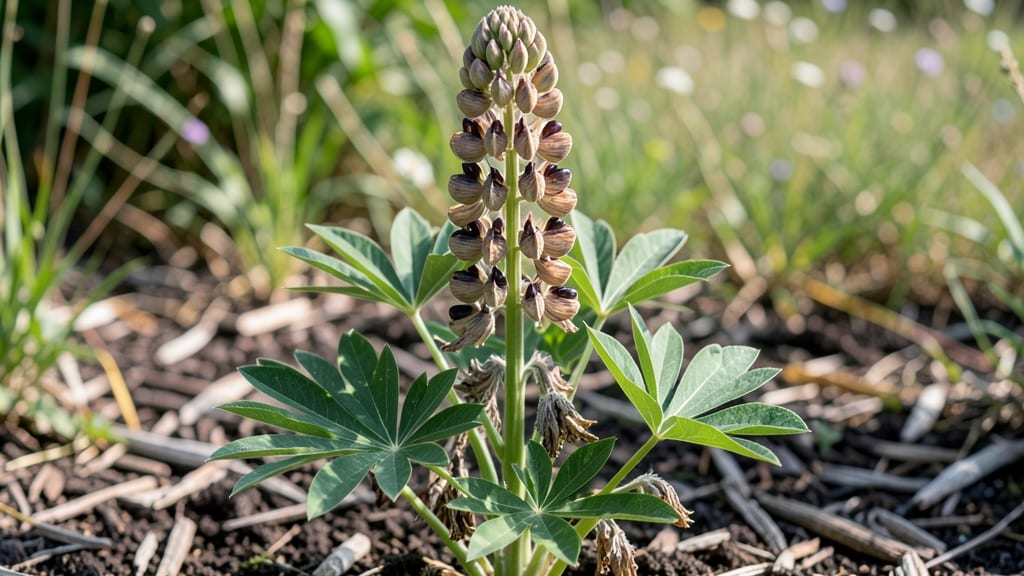
Lupine seed pods hold the secret to next year’s showstopper blooms—if you use the cold-moisture trick right. 🌱 I’ve watched my lupines go from floppy stems to tall, sturdy spikes just by storing their pods in damp peat moss over winter. The key?
Mimicking nature’s way of breaking seed dormancy without waiting for unpredictable spring rains. Most gardeners overlook this step, assuming lupine seeds will sprout on their own. But stratification—that cold, moist treatment—boosts germination rates from 50% to nearly 100%.
You’ll need a few simple supplies: harvested pods, damp sphagnum moss, and a sealed container. No fancy equipment, just patience and a little science. By spring, you’ll be planting seeds that pop up within 7-14 days, not the weeks of guesswork most gardeners face.
The payoff? Lupines that return bigger, brighter, and more reliable every year, plus the chance to grow rare varieties you’d never find at nurseries. Works for all lupine types—whether you’re growing the classic blue Lupinus perennis or the towering Lupinus polyphyllus.
Here’s how to make it work without the trial-and-error.
📚 In This Guide
- What you need
- Instructions
- Tips and common mistakes
- Wrapping up and next steps
What you need
- ● Mature lupine seed pods: 10–20 pods (harvested when dry and brown, ~2–3 inches long).
- ● Paper towels or coffee filters: 2–3 sheets (for moisture control).
- ● Plastic zip-top bags: 2–4 quart-sized bags (sealable, reusable).
- ○ Spray bottle (optional but helpful): 4–8 oz (for misting).
- ● Permanent marker: 1 (to label bags).
- ● Garden soil or potting mix: 1 small container (for transplanting, if desired).
- ● Garden twine or rubber bands: 1 roll (to secure pods if needed).
- ● Pruning shears: For harvesting pods cleanly.
- ● Small notebook: To track pod sources or germination dates.
- ● Grow lights or sunny windowsill: For post-stratification warmth.
- ● Humidity dome or clear lid: To maintain moisture during germination.
Step-by-Step instructions for harvesting and storing lupine seed pods
Here's how to turn this year's lupine blooms into next season's reliable plants—no fancy equipment needed.
🌱 Step 1: Identify and Harvest Mature Seed Pods
Wait until the pods turn brown and papery—this signals full maturity and readiness for collection. I like to harvest on a dry morning when the pods are crisp, as damp conditions can encourage mold. Use clean pruning shears to snip the entire seed pod from the stem, leaving about ½ inch of stem attached to help with later identification.
Real talk: don't harvest green pods. They won't store properly, and the seeds inside won't germinate reliably. You'll know they're ready when the pods split open naturally along their seams—this is your cue to act quickly before seeds scatter.
🪴 Step 2: Dry Pods Thoroughly Before Storage
Spread the harvested pods in a single layer on a screen or mesh tray in a dry, well-ventilated location. I use a covered porch or garage with good airflow—just avoid direct sunlight, which can overheat the pods and reduce viability. Turn the pods every 2-3 days to ensure even drying, which typically takes 7-10 days depending on humidity levels.
You'll see the pods become lightweight and hollow-sounding when tapped—this confirms they're properly dried. If any pods feel damp or develop mold, remove them immediately to prevent spoilage of the entire batch.
⏰ Step 3: Store Pods Using the Cold-Moisture Trick
Once fully dry, place the pods in a paper bag (plastic traps moisture and encourages rot). Store them in a cool, dark location—I keep mine in the refrigerator's crisper drawer where temperatures stay 35-40°F. This cold-moisture treatment mimics natural winter stratification, breaking seed dormancy for more reliable germination next spring.
Here's the thing—don't refrigerate the pods in sealed containers. The paper bag allows just enough moisture exchange to maintain viability without creating a damp environment. Check the pods every 2-3 months and remove any that show signs of mold or softening.
🌿 Step 4: Prepare Pods for Planting Next Season
In early spring, remove the pods from storage and let them sit at room temperature for 3-5 days to acclimate. Then, gently crush the dry pods between your fingers to release the seeds. I like to do this on a clean sheet of paper to catch any stray seeds—lupine seeds are small and can easily scatter.
Sow the seeds directly in the garden or in biodegradable pots at a depth of about ½ inch. Lupine seeds need moist, well-draining soil and benefit from a light covering of compost to improve germination. Water gently but thoroughly after planting, keeping the soil consistently moist until germination occurs in 2-4 weeks.
Tips & tricks for perfect lupine seed pod storage
A few key strategies that'll help you maximize germination rates and avoid common pitfalls with these delicate seed pods.
Harvest Timing Secret: The ½-inch stem attachment in Step 1 isn't just for identification—it helps the pods maintain structural integrity during drying. If you notice any pods beginning to split open naturally before harvest, collect them immediately, as the seeds inside will scatter within hours. I've learned the hard way that waiting even a day can mean losing 30% of your potential crop.
Drying Environment Matters: While Step 2 mentions dry, well-ventilated locations, I can't stress enough how critical this is. Humidity levels above 60% can extend drying time from 7-10 days to 2-3 weeks, increasing mold risk. If you're in a humid climate, consider using a small fan on low to circulate air around the pods. The hollow-sounding test is your best quality control—any pod that doesn't make that crisp sound when tapped needs more drying time.
Cold Storage Strategy: The 35-40°F refrigerator temperature in Step 3 is ideal, but placement matters just as much. Avoid the door where temperature fluctuations occur—opt for the crisper drawer where conditions remain most stable. I've found that storing pods in a single layer within the paper bag prevents crushing and maintains airflow. If you're short on fridge space, a root cellar or unheated basement works beautifully, just keep it consistently cool and dark.
Spring Prep Tip: When you're ready to plant next season, that 3-5 day room temperature acclimation in Step 4 is crucial for breaking dormancy. I like to place the pods in a small mesh bag during this time to catch any seeds that might release prematurely. For best results, plant immediately after crushing—lupine seeds lose viability quickly once exposed to air, so don't let them sit out longer than necessary.
Pro Tips for Lupine Seed Pods
- A few key strategies that'll help you maximize germination rates and avoid common pitfalls with these delicate seed pods.
- Harvest Timing Secret: The ½-inch stem attachment in Step 1 isn't just for identification—it helps the pods maintain structural integrity during drying.
- Drying Environment Matters: While Step 2 mentions dry, well-ventilated locations, I can't stress enough how critical this is.
Frequently asked questions
Got questions about harvesting, storing, or growing lupine seed pods? You’re not alone! Here are answers to the most common queries—because every gardener deserves a little extra help.
When is the best time to harvest lupine seed pods?
Harvest lupine seed pods when they turn brown and dry but before they split open (usually late summer to early fall). Check pods daily—they release seeds quickly once mature! If you miss the window, the seeds may scatter or sprout prematurely.
How do I store lupine seed pods for spring planting?
Store pods in a cool, dry place (like a paper bag or mesh sack) until spring. Avoid plastic—it traps moisture and can cause mold. For extra insurance, dry pods in a warm, well-ventilated area for 1–2 weeks before storing to prevent rot.
Why does the cold-moisture trick work for lupine seeds?
Lupines often need a stratification period to break seed dormancy. The cold-moisture trick mimics winter conditions, tricking seeds into thinking they’ve survived harsh weather. This boosts germination rates—just like nature intended! Soak pods in water for 24 hours, then refrigerate for 4–6 weeks.
Can I use lupine seed pods from wild plants?
Yes! Wild lupine pods work just as well as cultivated ones. Just ensure they’re fully dry and free of pests/disease. If you’re unsure about the source, test a few seeds first to confirm viability. Wild lupines are hardy and often more resilient than hybrid varieties.
What do I do if my lupine pods won’t open or stay green?
Green pods mean they’re not fully ripe—wait a few more days. If pods stay stubbornly closed, try gently squeezing them (wear gloves!) or placing them in a warm, dry spot to speed up drying. If mold appears, discard them immediately to prevent spreading.
Are lupine seed pods safe for birds or pets?
While lupine seeds are non-toxic to birds and pets, the pods themselves can be a choking hazard if ingested whole. Once dried, you can leave pods in the garden for birds to explore—but avoid feeding them directly. Always supervise pets around new plants!
Wrapping up and next steps
From harvesting to strategic storage, mastering the cold-moisture trick for lupine seed pods unlocks a reliable path to vibrant blooms next spring! 🌱 These resilient pods hold the secret to extending your garden’s beauty—no guesswork, just science-backed results.
Ready to put your newfound knowledge into action? Grab those pods, prep your storage spot, and plant with confidence—your future lupine parade starts now!
Next step: Download our free seed-pod storage checklist to keep track of your progress and ensure a seamless transition from harvest to bloom! 📋✨