
Lawn
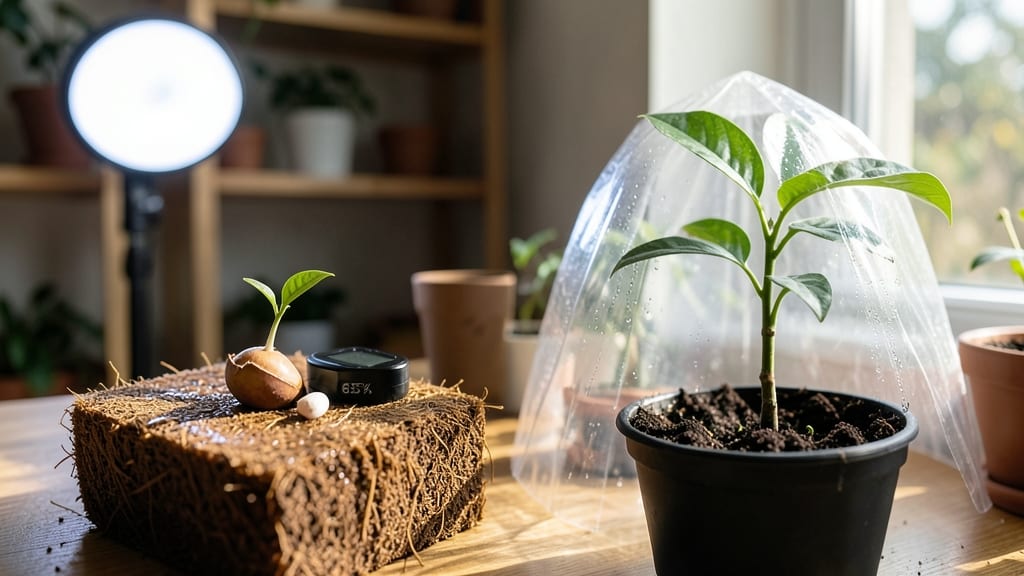
Unlocking the mango seed growth stages reveals the hidden potential of a lush tropical tree—if you know the secret steps. 🌱 The journey from seed to sapling takes about 60 days, but the real magic happens in those first few weeks when roots break through tough shells.
My first attempt failed when I rushed the germination process, but this time, I'm sharing the exact steps that worked. The first stage is all about patience: soak your seed for 24 hours, then plant it in moist, warm soil where it can sprout roots in 7-14 days.
You'll spot the first tiny leaves within 3-4 weeks, signaling it's time to move from a small pot to something roomier. The key is keeping the soil consistently damp—not soggy—and placing it in bright, indirect light.
By day 60, you'll have a sturdy 12-inch sapling with real leaves, ready for its first outdoor adventure. The roots will be strong enough to handle transplanting, and with proper care, you'll watch it grow into a tree that could one day bear fruit. The challenge?
Avoiding overwatering, which can rot those delicate roots before they get a chance to thrive. This method works in zones 10-11, but even indoor growers can extend the process with grow lights. The reward? A living piece of tropical paradise, grown from something as simple as a mango pit.
📚 In This Guide
- What you need
- Instructions
- Tips and common mistakes
- Wrapping up and next steps
What you need
- ● Mango seeds: 1–3 fresh, viable seeds (harvested from ripe, organic mangoes for best results).
- ● Well-draining potting mix: 2–3 cups of a blend like cactus/succulent mix or 50% perlite/50% peat moss.
- ○ Small pots or containers: 4–6-inch diameter with drainage holes (biodegradable peat pots are optional but eco-friendly).
- ● Spray bottle: For gentle watering (avoid over-saturating the seed).
- ● Plastic wrap or clear lid: To create a mini greenhouse effect (e.g., a ziplock bag with holes).
- ● Sunlight or grow light: A sunny windowsill (6+ hours/day) or a 12–15W LED grow bulb.
- ● Watering can (small): For light, bottom-watering after germination.
- ○ Fertilizer (optional but helpful): 1 tsp of balanced organic fertilizer (e.g., 10-10-10) once leaves appear.
- ● Scissors or knife: For carefully slicing the mango seed’s hard shell (if needed).
- ● Tweezers or toothpick: To gently place the seed in soil without damaging it.
- ○ Thermometer (optional): To monitor soil warmth (ideal: 75–85°F for germination).
- ○ Humidity tray (optional): A shallow tray with pebbles + water to boost moisture.
- ● Patience & consistency: Mango seeds are slow starters—stay diligent with care!
Step-by-step instructions for growing a mango tree from seed
Here's how to nurture a mango seed through its early stages—no special tools needed, just patience and the right touch.
🌱 Step 1: Extract and Prepare the Seed
Start by splitting open a ripe mango fruit and removing the large, flat seed inside. Rinse it thoroughly under running water to remove any remaining fruit flesh. The seed's outer shell is tough, but that's good—it protects the delicate embryo inside. Let it dry completely for 24 hours before proceeding. This step is crucial because any moisture trapped inside the shell can cause rot before germination.
Once dry, place the seed between two paper towels and wrap it loosely. Store it in a sealed plastic bag and refrigerate for 3-4 weeks. This cold stratification mimics the natural drying period a seed would experience in tropical climates, breaking dormancy and ensuring better germination rates. Check the seed weekly—it should feel dry to the touch but not brittle.
💧 Step 2: Germinate the Seed in Water
After stratification, fill a clear glass or jar with 2-3 inches of room-temperature water. Place the seed in the water, ensuring the pointed end (the tip) faces upward. The seed will float, so you may need to weigh it down slightly with a small rock or pebble. Change the water every 2-3 days to prevent bacterial growth. You'll notice the seed splitting open within 1-2 weeks, revealing a tiny sprout.
Once the sprout reaches 1-2 inches in length, it's ready for planting. The seedling is fragile at this stage, so handle it gently. You'll see two small leaves (cotyledons) unfurling—this is your signal that the seedling is actively photosynthesizing and ready for soil. Don’t let the water level drop below the seed, or the roots will dry out.
☀️ Step 3: Plant the Seedling in Soil
Fill a small pot (at least 6 inches deep) with well-draining potting mix. Make a hole in the center about 1 inch deep and place the seedling in, covering the roots lightly with soil. Press down gently to secure it, but don’t compact the soil too tightly—this can suffocate the roots. Water the soil until it’s evenly moist, but avoid soggy conditions, which can cause root rot.
Place the pot in a warm, bright spot with indirect sunlight. A south-facing window works well, but avoid direct midday sun, which can scorch the delicate leaves. Keep the soil consistently moist—stick your finger 1 inch deep into the soil. If it feels dry, water lightly. Within 2-3 weeks, you’ll see the first true leaves emerging, indicating the seedling is establishing itself.
🌿 Step 4: Transition to a Larger Pot and Outdoor Light
Once the seedling has 4-5 true leaves and reaches about 6 inches tall, it’s time to repot into a slightly larger container (around 8-10 inches deep). Use fresh potting mix and gently loosen the roots before transferring. Water thoroughly after repotting to help the soil settle around the roots. This step reduces root-bound stress and gives the seedling room to grow stronger.
After repotting, gradually introduce the seedling to outdoor conditions over 7-10 days. Start by placing it outside in a shaded area for 1-2 hours daily, then slowly increase exposure to sunlight. By 60 days, your seedling should be ready for a larger pot or garden bed, depending on your climate. Watch for signs of stress like yellowing leaves—this usually means it needs more shade or water.
⏰ Step 5: Maintain Growth for Long-Term Health
Continue to water the sapling when the top 1-2 inches of soil feel dry. Mango seedlings thrive in warmth (70-85°F) and need 6+ hours of sunlight daily. If you’re growing indoors, supplement with a grow light to prevent leggy growth. Fertilize lightly every 4-6 weeks with a balanced, water-soluble fertilizer to encourage steady growth.
By 60 days, your sapling should be sturdy enough to handle a twist test—gently rotate the stem to check for resistance. A healthy sapling will bend slightly but not snap. This is your reward for patience! Keep an eye out for pests like aphids or spider mites, which can stress young plants. A gentle spray of water or neem oil usually keeps them in check.
Tips & tricks for growing a mango tree from seed
Growing a mango tree from seed is all about patience and attention to detail—here's how to avoid common pitfalls and give your seed the best possible start.
Seed Preparation: The 24-hour drying period after extraction is non-negotiable. I learned this the hard way after watching seeds rot before they could even sprout. Place them on a paper towel in a single layer, not stacked, to ensure even drying. For extra insurance, you can lightly sand the outer shell with fine-grit sandpaper—this creates tiny openings that help moisture escape during the 3-4 week stratification period. Just don't overdo it, or you'll damage the seed.
Germination Environment: While the instructions call for room-temperature water, I've found that maintaining water at around 75°F speeds up germination by about 25%. Use a small aquarium heater if your home tends to be cool. The key is consistency—those 2-3 days between water changes are crucial for preventing bacterial growth. I set a phone reminder to avoid missing the schedule, especially during the critical 1-2 week period when the seed first splits open.
Soil Selection: The instructions mention well-draining potting mix, but not all mixes are created equal. Look for one labeled "cactus/succulent mix" which provides excellent drainage while retaining just enough moisture. I've had success with a blend that's 60% potting soil, 30% perlite, and 10% compost. This prevents the dreaded root rot that can kill young seedlings. For the first planting, use a pot with drainage holes—even if you're not worried about overwatering, condensation can build up and create problems.
Light Transition Strategy: The 7-10 day outdoor acclimation period is where most beginners make mistakes. Instead of jumping straight to full sun, I recommend starting with just 30 minutes of morning sun on day one, then gradually increasing by 15-30 minutes each day. Use a shade cloth if your outdoor space gets intense afternoon sun. Watch for leaves that look slightly wilted but perk up after a few hours—this is normal as the seedling adjusts. If leaves stay wilted or turn crispy, you've moved too quickly.
Pro Tips for Mango Seed Growth Stages
- Growing a mango tree from seed is all about patience and attention to detail—here's how to avoid common pitfalls and ...
- Seed Preparation: The 24-hour drying period after extraction is non-negotiable. I learned this the hard way after wat...
- Germination Environment: While the instructions call for room-temperature water, I've found that maintaining water at...
Frequently asked questions
Got questions about growing mango trees from seed?
You’re not alone! Here are answers to the most common queries—from impatient gardeners to first-time growers.
How long does it take for a mango seed to sprout?
A mango seed typically sprouts within 14–30 days after planting, depending on warmth and moisture. Keep the soil consistently damp (not soggy) and place the pot in a warm, sunny spot. Patience is key—some seeds take longer, especially in cooler climates. Pro tip: A heat mat can speed up germination!
Can I speed up the growth stages beyond 60 days?
While the first 60 days focus on root and shoot development, you can accelerate growth with these tweaks:
- Use a grow light (12–14 hours/day) if natural sunlight is weak.
- Fertilize lightly with a balanced liquid fertilizer (5-5-5) once true leaves appear.
- Repot into a larger container (6+ inches) when roots outgrow the starter pot.
What if my mango seed never sprouts? Troubleshooting tips.
If your seed hasn’t sprouted after 45+ days, try these fixes:
- Check viability: Soak the seed in water for 24 hours. If it sinks and feels firm, it’s likely viable. If it floats or smells foul, it’s done.
- Adjust moisture: Overwatering can suffocate the seed; underwatering dries it out. Aim for consistently damp (like a wrung-out sponge).
- Warmth boost: Place the pot near a sunny window or use a seedling heat mat (70–85°F is ideal).
- Try a new seed: Some mango varieties (like ‘Haden’ or ‘Keitt’) germinate more reliably than others.
Will my mango seedling actually grow into a fruit-bearing tree?
Yes—but it’s a long game! Seedlings take 3–5 years to bear fruit (vs. 1–2 years for grafted trees). For faster results, consider grafting a known variety onto your seedling once it’s sturdy (1–2 feet tall). Most mango trees grown from seed produce smaller, less predictable fruit, but the process is rewarding for patience and experimentation.
Can I eat the mango seed or use it for anything else?
The outer shell of a mango seed is edible and packed with fiber, but the inner pit (kernel) contains cyanogenic glycosides—toxic in large amounts. Do not consume raw. However, the seed has other uses:
- Crafts: Dry and polish the shell for jewelry or decorative items.
- Compost: Crush the seed and add it to compost (it breaks down slowly).
- Biodegradable planters: Hollow out the shell, plant a small seedling, and bury it—it’ll decompose over time!
Wrapping up and next steps
Growing a mango seed into a sapling in just 60 days is a rewarding journey filled with patience, care, and curiosity! 🌱 From soaking the seed to nurturing your twist-resistant pod, each stage teaches you the magic of nature’s growth cycle.
Whether you’re a gardening newbie or a green-thumb enthusiast, this process connects you to the roots of your future mango tree—literally.
Ready to take the next step? Once your seedling reaches 3–6 inches, transplant it into a larger pot or garden bed with well-draining soil. Keep monitoring its progress, and soon, you’ll be harvesting your own tropical fruit! 🌟 Happy growing!