
Lawn
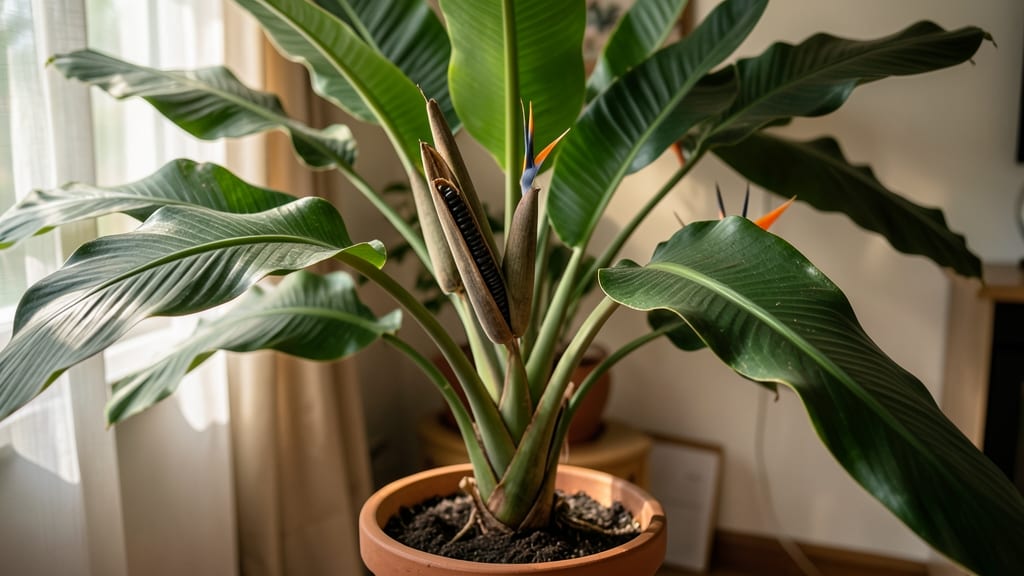
Cracking open Mexican bird of paradise seed pods reveals a gardening secret most people miss. 🌿 Those leathery brown pods hide seeds that can grow into stunning tropical plants—but only if you know the right way to extract them without damaging the treasure inside.
The natural trick involves letting pods dry completely on the plant before gently prying them open with your fingers or a small knife. I’ve tried forcing them too early, and the seeds either won’t germinate or sprout mold.
Patience here pays off—wait until the pods turn completely brown and papery before handling them. Once you’ve got the seeds, soaking them for 24 hours mimics natural rainfall and kickstarts germination. Plant them just below the soil surface in well-draining mix, and keep the soil consistently moist (not soggy).
Within a few weeks, you’ll see those first delicate sprouts pushing through—proof that the effort was worth it. These seeds thrive both indoors and out, but they need warmth to germinate. If your climate cools down, start them in pots and move them outside only after the last frost.
The real reward? A plant that blooms with fiery orange and red flowers, drawing hummingbirds like a magnet.
📚 In This Guide
- What you need
- Instructions
- Tips and common mistakes
- Wrapping up and next steps
What you need
- ● Mature Mexican Bird of Paradise seed pods – Harvest only fully dried, brown pods (about 3–5 inches long) from healthy plants.
- ● Heavy-duty gloves – Protect your hands from sharp pod edges (nitrile or leather preferred).
- ● Sturdy work surface – A concrete slab, thick cutting board, or even a sturdy table works best.
- ● Hammer or mallet – A 16–20 oz rubber or wooden mallet for gentle (but firm!) cracking.
- ● Tarp or large tray – To catch seeds and debris (12" x 18" minimum).
- ● Fine-mesh sieve or colander – For sifting out seeds from chaff (mesh size: ¼ inch or smaller).
- ● Paper towels or newspaper – To dry and store seeds afterward.
- ● Small plastic bags or envelopes – For seed storage (resealable or labeled paper envelopes).
- ● Pruning shears or sharp knife – To trim pods from stems (if harvesting fresh).
- ● Seed catalog or notebook – To log harvest dates and seed viability.
- ● Desiccant packets – For long-term seed storage (keeps moisture out).
- ● Labeling tape & marker – To mark seed bags with variety names/dates.
- ● Safety glasses – If you’re really going full DIY with a hammer!
How to extract seeds from Mexican Bird of Paradise pods
This natural trick saves hours of tedious cracking—just follow along for the easiest way to harvest seeds.
🌱 Step 1: Harvest Pods at Peak Ripeness
Wait until the seed pods turn a deep brown and begin splitting open naturally—that’s your cue they’re ready. I check pods weekly in late fall when they’re fully mature but still intact. If you harvest too early, the seeds won’t be fully developed; too late, and they’ll scatter on their own.
Use clean gardening shears to snip the stems, leaving about ½ inch attached. This prevents the pods from drying out too quickly. Place them in a dry, shaded spot to cure for 2-3 days—this helps the pods open more easily. You’ll know they’re ready when the outer skin starts cracking along the seams.
💧 Step 2: Soften Pods for Easy Cracking
Fill a large bowl with warm water (not hot) and submerge the pods for 10-15 minutes. The warmth softens the fibrous outer layer, making it easier to split open. I like to swirl the pods gently in the water to ensure even saturation—this prevents stubborn dry spots that resist cracking.
After soaking, drain the pods and pat them dry with a paper towel. The outer skin should feel pliable but not soggy. If it’s still too tough, let them air-dry for another 30 minutes before proceeding. This step is critical—skipping it means struggling with brittle pods that split unevenly.
✂️ Step 3: Crack Open Pods with a Hammer or Rolling Pin
Place a pod on a sturdy surface, like a cutting board or thick towel, to protect your work area. Hold it firmly with one hand and gently tap the sides with a rubber mallet or rolling pin until it splits open. You’ll hear a satisfying crack—that’s the sound of success. Avoid metal tools, as they can crush the seeds inside.
Once the pod opens, carefully pry apart the two halves with your fingers or a butter knife. Inside, you’ll find rows of small, dark seeds nestled in a papery membrane. Remove the seeds and set them aside in a dry container. The membrane can be composted—it’s completely natural and won’t harm your garden.
☀️ Step 4: Dry and Store Seeds Properly
Spread the extracted seeds in a single layer on a paper towel or mesh screen in a warm, dry place for 3-5 days. This ensures they’re fully dried before storage. I place mine near a sunny window but out of direct sunlight to prevent overheating. Stir them gently once a day to promote even drying.
Once completely dry, transfer the seeds to an airtight container like a small glass jar. Label it with the date and store it in a cool, dark place. Properly stored seeds remain viable for 2-3 years. If you notice any moisture or mold, discard those seeds immediately—they won’t germinate.
🌿 Step 5: Test Germination Before Planting
Before sowing, test a few seeds to confirm viability. Place 5-10 seeds between damp paper towels in a sealed plastic bag. Keep them in a warm spot (70-75°F) and check daily. You should see sprouts in 10-14 days. If fewer than half sprout, your seeds may need stratification or are past their prime.
Successful germination means your seeds are ready for planting. Sow them ¼ inch deep in well-draining soil and keep the soil consistently moist until seedlings emerge. Patience is key—Mexican Bird of Paradise seeds can take 3-4 weeks to sprout, but the wait is worth it for these striking plants.
Tips & tricks for perfect Mexican Bird of Paradise seed extraction
A few simple tricks will make this seed-harvesting process even smoother and more reliable than the instructions alone.
Timing Tip for Step 1: If your pods aren't naturally splitting after the 2-3 day curing period, try placing them in a paper bag with a few ripe apples overnight. The ethylene gas from the apples will accelerate the ripening process—just like commercial fruit ripening kits! This works especially well if you're harvesting in cooler fall weather when pods might be slower to mature.
Soaking Strategy for Step 2: For extra stubborn pods that resist cracking after the 10-15 minute soak, try adding 1 tablespoon of white vinegar to the warm water. The acid helps break down the fibrous outer layer even faster. Just be sure to rinse the pods thoroughly afterward to remove any vinegar residue before drying. I've found this cuts the soaking time by about 3-5 minutes for particularly tough pods.
Equipment Alternative for Step 3: Don't have a rubber mallet or rolling pin? A heavy ceramic mug works perfectly—just place the pod on a towel and gently tap the sides. The key is to use something with enough weight to crack the pod but not so hard that it damages the seeds inside. You can also use the bottom of a wooden spoon if you're in a pinch, though it might take a few extra taps.
Drying Hack for Step 4: If you're short on drying time and need your seeds ready faster, place the mesh screen with seeds in your oven at its lowest setting (around 150°F) for 30-60 minutes. Keep the door slightly ajar to allow moisture to escape. This won't cook the seeds but will speed up the drying process significantly—just monitor them closely to prevent any heat damage. Most seeds will be ready in about 1-2 hours this way.
Pro Tips for Mexican Bird Of Paradise Seed Pods
- A few simple tricks will make this seed-harvesting process even smoother and more reliable than the instructions alone.
- Timing Tip for Step 1: If your pods aren't naturally splitting after the 2-3 day curing period, try placing them in a...
- Soaking Strategy for Step 2: For extra stubborn pods that resist cracking after the 10-15 minute soak, try adding 1 t...
Frequently asked questions
Got questions about harvesting Mexican Bird of Paradise seed pods? You’re not alone!
Here are answers to the most common queries—from timing to troubleshooting—so you can crack those pods like a pro.
When is the best time to harvest Mexican Bird of Paradise seed pods?
Harvest pods when they turn brown and papery (usually late summer to early fall). Avoid harvesting too early—they won’t crack easily, and seeds may not be fully mature. Wait until pods split open naturally or feel dry to the touch. Pro tip: Morning harvests prevent humidity-related mold risks!
How long does it take for the pods to dry and crack open on their own?
If left on the plant, pods typically dry and split within 2–4 weeks after turning brown. For faster results, remove them and place in a well-ventilated, dry spot (like a mesh bag indoors). Humidity or rain can delay cracking—so keep them indoors if weather is damp.
What’s the easiest way to crack open stubborn seed pods?
If pods resist natural cracking, try these tricks:
- Freeze them overnight—cold makes them brittle.
- Gently tap with a hammer or roll with a rolling pin.
- Place in a paper bag and shake vigorously.
Can I grow Mexican Bird of Paradise from seed, or should I buy plants?
Yes! Seeds are viable but slow-growing (2–3 years to maturity). For faster results, buy nursery plants. If starting from seed, stratify them (mix with damp sand, refrigerate 4–6 weeks) to mimic winter conditions. Patience pays off—these birds of paradise thrive in USDA Zones 9–11!
What do I do if my seed pods develop mold or pests?
Mold or pests (like aphids) mean excess moisture. Immediately:
- Move pods to a dry, shaded area.
- Brush off pests with a soft brush or spray with soapy water.
- Discard moldy pods—do not use seeds.
Wrapping up and next steps
Mastering the art of extracting seeds from Mexican Bird of Paradise seed pods doesn’t have to be a challenge—just a few simple tools and a little patience can make all the difference! 🌱 Whether you’re aiming for a lush garden or sharing these vibrant seeds with fellow plant enthusiasts, your newfound technique will save time and frustration. Ready to put your skills to the test? Grab those pods, follow your method, and watch your garden flourish with ease!
🌿 Next Steps:
- Start with a small batch of pods to perfect your technique.
- Experiment with different drying methods for optimal seed viability.
- Share your success (and tips!) with gardening communities online.