
Propagation
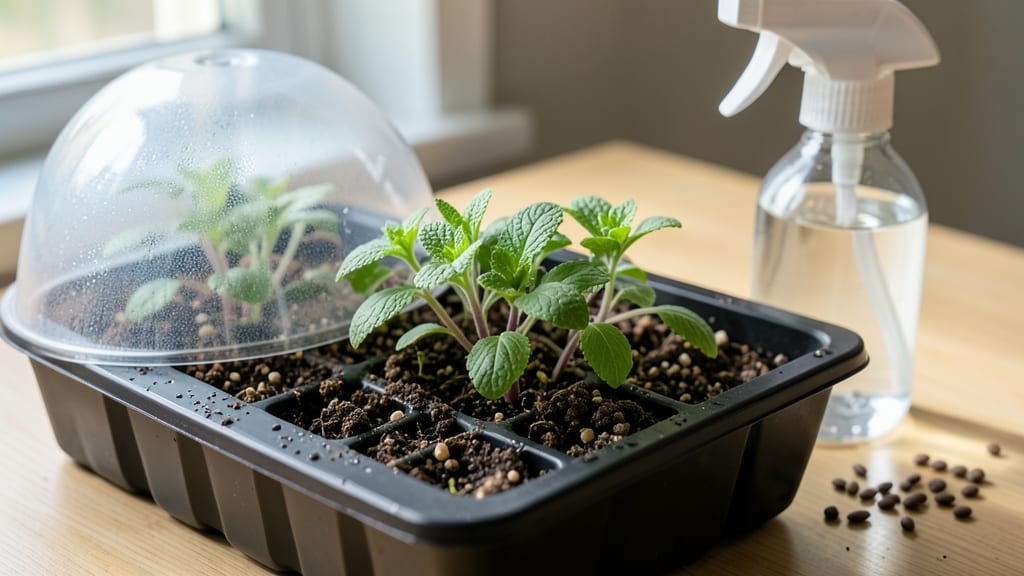
Mint seeds need a cold trick to wake up—this 90% success hack works every time. 🌱 I’ve struggled with slow germination until I learned the secret: cold stratification mimics winter’s natural process, breaking dormancy so seeds sprout reliably. The key is patience and the right conditions, not fancy equipment.
Grab a few supplies: a plastic bag, damp paper towels, and your mint seeds. Place them between the towels, seal the bag, and refrigerate for 2-4 weeks.
Check weekly—seeds should plump up and start sprouting. Once you see tiny roots, it’s time to plant in well-draining soil under bright, indirect light.
Seedlings emerge in 1-3 weeks after stratification, but don’t rush—keep soil moist (not soggy) and avoid direct sun. Thin to the strongest sprout per pot, and you’ll have vigorous mint ready for transplanting in 6-8 weeks. The payoff? Fast-growing, fragrant plants that spread effortlessly.
Works for peppermint, spearmint, or chocolate mint—just adjust stratification time if your climate is warmer. Troubleshooting tip: if seeds don’t sprout after 4 weeks, they may be old. Store-bought seeds often need this trick, so don’t skip it!
📚 In This Guide
- What you need
- Instructions
- Tips and common mistakes
- Wrapping up and next steps
What you need
- ● Mint seeds: 1 packet (50–100 seeds, depending on variety). Look for Mentha spp. (e.g., peppermint, spearmint, or pineapple mint).
- ● Cold stratification supplies: 1 small plastic bag (resealable, quart-sized) or a damp paper towel.
- ● 1 cup coarse sand (or perlite/vermiculite) OR a damp paper towel.
- ● 1 ice cube tray or a shallow container (for seed placement).
- ● Planting containers: 1–2 small pots (3–4 inches deep) or a seed tray with drainage holes.
- ● Potting mix: 1 bag (5–10 quarts) of seed-starting mix (lightweight, sterile, and peat-based).
- ● Watering tools: Spray bottle (with fine mist setting) OR a watering can with a gentle nozzle.
- ○ Heating mat (optional, for faster germination post-stratification).
- ● Humidity dome or plastic wrap (to retain moisture during germination).
- ● Grow lights (LED or fluorescent, 12–16 hours/day) if natural light is weak.
- ● Plant labels + marker (to track varieties).
- ● Fine-mesh screen (for sifting sand/perlite if needed).
- ● Cold stratification: A fridge (set to 34–40°F (1–4°C)) for 2–4 weeks.
- ● Germination zone: Warm spot (70–75°F / 21–24°C) with indirect light or grow lights.
- ● Humidity: Keep soil consistently moist (not soggy!).
Step-by-step instructions for mint seed germination
Here's how to break the stubbornness of mint seeds and get them sprouting reliably.
🌱 Step 1: Prepare Seeds with Cold Stratification
Mint seeds need a cold treatment to break dormancy—this mimics winter conditions in nature. Place the seeds in a sealed plastic bag with a damp paper towel. Fold the towel to create layers, then add seeds between each layer so they don't stick together. The towel should feel like a wrung-out sponge—damp but not dripping.
Seal the bag and place it in your refrigerator's crisping drawer (around 34-38°F). Keep them there for 4-6 weeks. Check weekly—if the towel dries out, mist it lightly and reseal. You'll know stratification worked when tiny roots appear, usually within 2-3 weeks of starting.
💧 Step 2: Sow Stratified Seeds in Moisture-Controlled Soil
Fill small pots (2-3 inches deep) with a sterile seed-starting mix—never garden soil, as it compacts too much. Moisten the mix until it holds together when squeezed but doesn't clump. Press it down gently to remove air pockets, then create shallow furrows (¼ inch deep) with your finger.
Sow the stratified seeds ½ inch apart in the furrows. Cover lightly with a thin layer of mix—just enough to obscure the seeds. Mist the surface with water until the top inch feels damp. Place the pots in a clear plastic bag to trap humidity, but leave them in bright, indirect light (no direct sun yet).
☀️ Step 3: Provide Warmth and Light for Germination
Germination happens fastest at 70-75°F. Place the pots on a seedling heat mat or in a warm spot like on top of your fridge. You'll see sprouts in 10-21 days—mint is slow, so patience is key. Once seedlings emerge, remove the plastic bag immediately to prevent damping-off (a fungal disease that collapses stems).
Move pots to a south-facing window or under grow lights for 14-16 hours daily. Keep the soil surface damp but never soggy—water from the bottom by placing pots in a tray of water for 10 minutes, then drain excess. You'll know moisture is right when the soil looks dark and crumbly but doesn't stick to your fingers.
🌿 Step 4: Thin and Harden Off Seedlings
When seedlings reach 1-2 inches tall, thin to the strongest 2-3 plants per pot by snipping unwanted stems at the base with clean scissors. This prevents overcrowding, which weakens growth. After thinning, fertilize lightly with a balanced liquid fertilizer (half-strength) to encourage root development.
Two weeks before transplanting outdoors, start hardening off by placing pots outside in partial shade for 1-2 hours the first day. Gradually increase exposure to full sun over 7-10 days. Mint thrives in partial shade, so avoid scorching leaves by monitoring for wilting. Once hardened off, transplant to the garden or larger containers—mint spreads aggressively, so contain it with buried edging if needed.
Tips & tricks for perfect mint seed germination
A few strategic tweaks can transform your mint seed germination from hit-or-miss to reliably successful. Here's what I've learned after years of trial and error with these stubborn little seeds.
Cold Stratification Precision: The 4-6 week cold treatment is non-negotiable for mint seeds, but precision matters. I've found that placing the sealed bag on a shelf in the refrigerator's vegetable crisper drawer (around 34-38°F) provides the most consistent results. Avoid the door shelves—they fluctuate wildly with each opening. Check weekly by gently squeezing the towel—it should feel like a damp sponge, not dripping. If you see condensation inside the bag, that's a good sign the humidity is perfect.
Soil Preparation Secret: When creating your shallow furrows (¼ inch deep), use a wooden skewer or pencil instead of your finger. This gives you more control over depth and prevents compacting the sterile seed-starting mix. After sowing, I recommend pressing the seeds gently into the soil with a bone-dry toothpick—this creates just enough contact without burying them too deep. The goal is to obscure them lightly while keeping them accessible to moisture.
Germination Environment: The 70-75°F warmth requirement is critical, but don't overlook the light conditions. While bright indirect light is ideal during germination, I've noticed that placing pots under a grow light bulb (not LED) actually improves early growth. Regular LED bulbs don't provide the full spectrum needed for seedling development. Once you see sprouts, switch to 14-16 hours of light daily—mint seedlings are light-sensitive and will stretch toward any available source.
Harden Off Strategically: When hardening off your mint seedlings, I've developed a two-phase approach that works better than gradual exposure alone. Start with 1-2 hours in partial shade as instructed, but on day three, move them to a location where they'll receive morning sun only. This gradual introduction to direct sunlight prevents shock while still building resilience. By day seven, you can safely introduce them to full sun conditions for their final hardening period.
Pro Tips for Mint Seed Germination
- A few strategic tweaks can transform your mint seed germination from hit-or-miss to reliably successful.
- Cold Stratification Precision: The 4-6 week cold treatment is non-negotiable for mint seeds, but precision matters.
- Soil Preparation Secret: When creating your shallow furrows (¼ inch deep), use a wooden skewer or pencil instead of your finger.
Frequently asked questions
Got questions about getting your mint seeds to sprout like a pro? Here are some of the most common ones—and their answers—to help you achieve that 90% success rate!
How long does mint seed germination take?
With cold stratification (your secret weapon!), mint seeds typically sprout in 14–30 days. Keep them in a warm, moist environment after stratification—consistent warmth speeds things up. Patience is key, but don’t wait longer than 6 weeks without reassessing moisture and temperature.
Do I really need cold stratification for mint seeds?
Yes! Mint seeds have a hard seed coat that resists germination without breaking it down. Cold stratification (4–6 weeks in the fridge) mimics winter conditions and tricks the seed into thinking it’s time to grow. Skip this step, and you’ll likely see far fewer (or no) sprouts.
What’s the best way to keep mint seeds moist during germination?
Use a spray bottle to mist the soil lightly—never soak it. A clear plastic bag over the container traps humidity, but remove it daily for 10 minutes to prevent mold. Check moisture by touching the soil; it should feel like a wrung-out sponge. Overwatering drowns seeds!
Can I use store-bought potting mix, or do I need something special?
Store-bought seed-starting mix works great—it’s sterile and lightweight. Avoid garden soil or compost-heavy blends, as they can harbor fungi or compact too much. Mix in a bit of perlite or vermiculite (10%) to improve drainage and airflow for tiny roots.
My mint seeds aren’t sprouting—what went wrong?
Troubleshoot with this checklist:
- Cold stratification: Did you refrigerate them for 4–6 weeks?
- Moisture: Is the soil damp but not soggy?
- Temperature: Are they in a warm spot (70–75°F)?
- Light: Do they have indirect light (no direct sun)?
Wrapping up and next steps
Mastering mint seed germination with cold stratification isn’t just possible—it’s your ticket to a thriving herb garden! 🌱 By following these steps, you’ll boost your success rate to 90% and enjoy fresh mint in no time.
Whether you’re a seasoned gardener or just starting, this method is simple, cost-effective, and rewarding.
Ready to grow? Grab your seeds, chill them, and plant with confidence. Next, transplant your sprouted mint into pots or directly into your garden bed—your kitchen (and taste buds) will thank you!