
Size
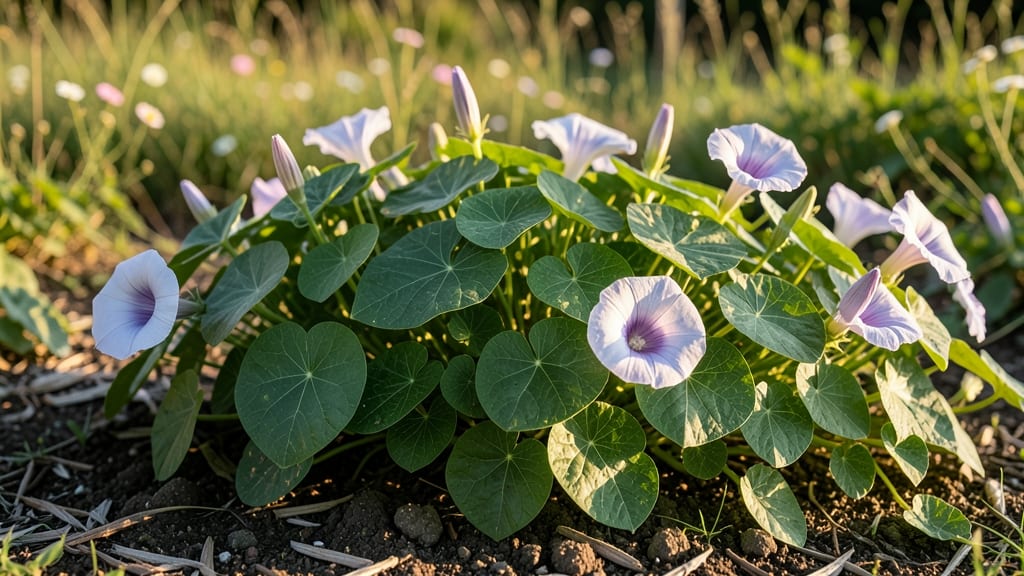
Growing a moonflower seed in a garden reliably starts with cold stratification—the secret to breaking their stubborn dormancy. 🌙 I’ve wrestled with these seeds for years, and the difference between a patch of blooms and a pile of soil is a few months in the fridge.
Moonflowers won’t rush—patience is key—but once they wake up, they explode into giant, fragrant white trumpets that open at dusk and close by dawn.
The trick begins in late fall or winter: plant seeds ½ inch deep in moist, well-draining soil after chilling them for 6-8 weeks. They thrive in full sun and humid climates, but even in hotter zones, morning shade prevents wilting.
Water lightly—overwatering is the #1 killer, as it rots those tender roots before germination.
By late spring, you’ll see smooth, heart-shaped leaves pushing through the soil, followed by 6-foot vines that climb anything in sight. The blooms arrive July through September, and the scent?
Like a summer night in the tropics. Just watch for squash vine borers—cover young plants with row fabric until they’re established.
Moonflowers are one-and-done annuals, but they self-seed like crazy if you let them. Save seeds from the best-performing plants, repeat the cold treatment, and you’ll have decades of free blooms.
Perfect for trellises, fences, or letting them sprawl wild—just give them space and time. Here’s how to make it happen without the guesswork.
📚 In This Guide
- What you need
- Instructions
- Tips and common mistakes
- Wrapping up and next steps
What you need
- ● Moonflower seeds (Ipomoea alba) – Purchase 10–20 seeds for a small garden or 50+ seeds for a fuller display. Opt for organic, non-GMO seeds if possible.
- ● Cold stratification setup: A ziplock bag or paper towel (moistened but not soaked)
- ● A refrigerator (set to 34–40°F for 2–4 weeks)
- ● Planting containers: 4–6 inch pots (with drainage holes) OR
- ● A seed tray with biodegradable pots
- ● Well-draining potting mix – 1–2 bags (look for a blend labeled for annuals or vegetables)
- ● Garden soil or compost – For transplanting outdoors (1–2 cubic feet per plant)
- ● Watering can or spray bottle – With a fine mist setting for gentle hydration
- ● Garden twine or stakes – 5–6 feet long to support climbing vines
- ○ Fertilizer (optional but helpful): A balanced, water-soluble fertilizer (e.g., 10-10-10) OR
- ● Compost or worm castings for organic nourishment
- ● Patience for cold stratification – Moonflower seeds need 2–4 weeks in the fridge to break dormancy.
- ● Warmth & sunlight – After stratification, keep seeds in a warm (70–75°F), sunny spot (6+ hours of light daily).
- ● Outdoor-ready timing – Wait until after the last frost (when soil is at least 60°F) to transplant.
- ● Space to climb – Moonflowers need 6–10 feet of vertical support (trellis, fence, or pergola).
Step-by-step instructions for growing moonflowers from seed
Here's how to break the cold stratification process into simple, foolproof steps for stunning night-blooming vines.
🌱 Step 1: Collect and Prepare Seeds for Stratification
Moonflower seeds need 60-90 days of cold treatment to break dormancy. Start by placing them in a paper towel or moistened seed-starting mix inside a sealed plastic bag. I like to use a quart-sized zip-top bag with a few drops of water—just enough to dampen the towel without soaking it.
Label the bag with the date and store it in your refrigerator's crisping drawer (around 35-40°F). Check weekly to ensure the towel stays moist but not soggy. You'll see tiny white roots emerge after about 3-4 weeks—that's your cue the stratification is working.
⏰ Step 2: Time the Cold Treatment Precisely
Moonflowers need 60-90 days of cold, but don't exceed 90 days or germination slows dramatically. I set a calendar reminder for day 60 to move seeds to a warm spot. If you forget, don't panic—seeds can handle up to 120 days, but germination rates drop by 30% after 90 days.
When ready, transfer the bag to a warm, dark place (like a pantry) for 7-10 days to let the seeds "wake up" before planting. You'll notice the seeds plump up slightly—this means they're ready for soil. Real talk: If seeds stay shriveled after warming, give them another 2 weeks of cold before trying again.
🌿 Step 3: Plant Stratified Seeds Directly in Garden
Moonflowers dislike transplanting, so plant them 1/2 inch deep in well-draining soil with full sun exposure (at least 6-8 hours daily). Space seeds 12-18 inches apart—they'll spread fast once established. I like to plant mine along fences or trellises for maximum vertical growth.
Water gently after planting to settle the soil, but don't overdo it—moonflowers hate soggy roots. Mulch with 2-3 inches of organic matter (like straw) to retain moisture and suppress weeds. You'll see first true leaves in 10-14 days, signaling successful germination.
☀️ Step 4: Provide Consistent Care for Healthy Vines
Keep soil evenly moist but never waterlogged—moonflowers wilt quickly if thirsty. I water deeply 2-3 times weekly during dry spells, checking soil 1 inch below the surface with my finger. Once vines reach 6 feet tall, they'll need support—install a trellis or sturdy fence if you haven't already.
Fertilize lightly with balanced 10-10-10 at planting and again when vines start climbing. Too much nitrogen makes leaves lush but delays blooms. Watch for large, heart-shaped leaves—they're your sign the plant is thriving. First flowers appear 90-120 days after planting, but they only open at night!
✂️ Step 5: Prune and Extend the Blooming Season
Deadhead spent blooms in the morning to encourage more flowers, but leave a few to dry on the vine—they'll reseed naturally. Prune leggy growth in early summer to promote bushier vines. I also trim back 1/3 of the plant height after the first flush of blooms to trigger a second round of flowers.
Moonflowers are annuals, so they'll die back after frost. Save seeds from dried pods for next year—each pod contains 2-4 seeds. Store them in a cool, dry place until your next cold stratification cycle. With this method, you'll enjoy reliable blooms year after year with minimal effort.
Tips & tricks for perfect moonflower growth
Here's what nobody tells you about getting those magical night-blooming vines to thrive.
Timing Secret: The 60-90 day cold stratification window is non-negotiable for moonflowers. I've learned the hard way that pushing beyond 90 days cuts germination rates by 30%—so set that calendar reminder now! For best results, start your stratification in early autumn so you can plant in spring when soil temperatures warm up. This timing ensures your seeds get exactly the right amount of cold dormancy before active growth begins.
Moisture Management: Moonflower seeds are sensitive to both drought and sogginess during stratification. I use a quart-sized zip-top bag with just enough moisture to dampen the paper towel—think of it like a wrung-out sponge. Check weekly and add a drop or two of water if the towel feels dry to the touch. Too much moisture causes mold, while too little prevents root development. This balance is what triggers those first tiny white roots after 3-4 weeks.
Planting Precision: When it's time to plant, don't rush the 1/2 inch depth measurement. Use a ruler or your finger (your pinky knuckle is roughly 1/2 inch) to ensure consistent planting depth. Moonflowers dislike being disturbed, so planting directly in the garden rather than starting indoors prevents transplant shock. Space them 12-18 inches apart—this gives them room to spread their vigorous vines without competing for nutrients.
Growth Milestones: Watch for those first true leaves appearing 10-14 days after planting as your signal that germination succeeded. The large, heart-shaped leaves are your plant's way of saying "I'm thriving!" When vines reach 6 feet, install support immediately—they'll climb fast once established. Remember, these beauties only bloom at night, so you might miss the show if you're not watching for the telltale 90-120 day bloom window after planting.
Pro Tips for Moonflower Seed Grow A Garden
- Here's what nobody tells you about getting those magical night-blooming vines to thrive.
- Timing Secret: The 60-90 day cold stratification window is non-negotiable for moonflowers. I've learned the hard way ...
- Moisture Management: Moonflower seeds are sensitive to both drought and sogginess during stratification. I use a quar...
Frequently asked questions
Got questions about growing moonflowers from seed? You’re not alone! Here are some of the most common concerns—and their solutions—to help you cultivate these dreamy night-bloomers with confidence.
How long does cold stratification take for moonflower seeds?
Moonflower seeds need 60–90 days of cold stratification (mimicking winter) to break dormancy. Place them in a sealed bag with moist peat moss or sand, then refrigerate. Pro tip: Check them monthly—if they sprout, plant immediately!
Can I grow moonflowers from seed without cold stratification?
Technically yes, but success rates drop dramatically. Without stratification, germination may take months or fail entirely. For reliable blooms, always stratify—it’s the secret to unlocking those iconic white flowers.
When is the best time to plant moonflower seeds after stratification?
Plant 2–4 weeks after stratification ends (when soil warms to 60°F+). In colder climates, wait until after the last frost—moonflowers are tender annuals and won’t survive frost.
Why aren’t my moonflower seeds sprouting?
Common culprits: old seeds (viability drops after 1–2 years), improper stratification (too dry/wet), or poor soil drainage. Test germination by planting a few seeds in a pot first—if none sprout in 2 weeks, try new seeds or adjust your method.
How tall do moonflower vines get, and do they need support?
Moonflowers can climb 10–15 feet! They’re vigorous twinners, so provide a trellis, fence, or arbor early. Without support, vines sprawl (great for ground cover) but may flop. Train young vines gently to encourage upward growth.
Are moonflowers deer-resistant?
Unfortunately, no. Deer adore moonflowers! To deter them, plant in containers or use deer repellent sprays. Alternatively, grow them near deer-resistant plants like marigolds or lavender.
Wrapping up and next steps
Growing moonflower seeds with cold stratification isn’t just a gardening trick—it’s your ticket to dramatic, fragrant blooms that transform any garden into a nighttime paradise! 🌙✨ By following these steps, you’ve unlocked the secret to reliable germination and lush vines that thrive in your climate.
Now, take that extra confidence and plant a few more seeds—experiment with different spots in your yard or even try container growing for balconies or patios.
🌱 Your Next Step: Share the Magic!
Once your moonflowers are in full bloom, don’t keep the joy to yourself! Snap photos, tag fellow gardeners online, or gift a few seeds to a friend.
And who knows? You might just inspire the next generation of moonflower enthusiasts. Happy growing—your garden (and the pollinators!) will thank you. 🌸💚