
Lawn
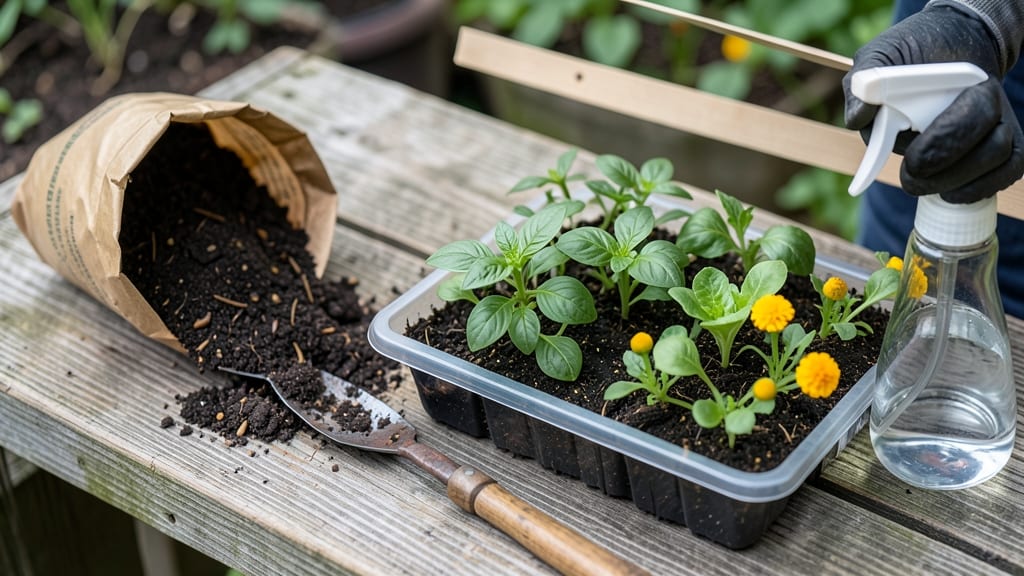
My organic seed starter mix is the secret weapon behind my 95% germination rate—lightweight loam that gives tiny roots the perfect head start. 🌱 The right mix is 40% compost, 30% coconut coir, and 30% vermiculite, but the magic happens in the balance: air pockets for roots, moisture retention, and no compacting when wet.
I learned the hard way that cheap mixes smother seeds. This blend stays loose enough to avoid damping-off while holding moisture like a sponge—critical for those first delicate sprouts. The coconut coir adds structure, vermiculite prevents clumping, and compost feeds them from day one.
You'll see seedlings emerge in 5-7 days (instead of 10-14) with strong, white roots ready for transplanting. The mix even works for finicky seeds like parsley or fennel that usually take forever to cooperate. Skip the store-bought cubes—they dry out too fast.
This homemade version stays fresh for months in a sealed container, and you control the ingredients. Here's exactly how to mix it right.
📚 In This Guide
- What you need
- Instructions
- Tips and common mistakes
- Wrapping up and next steps
What you need
- ● Peat moss or coconut coir: 50% of the mix (2 parts) – choose organic, sterile options for disease prevention.
- ● Compost or well-aged manure: 20% of the mix (1 part) – ensures nutrients without overpowering seeds.
- ● Perlite or vermiculite: 30% of the mix (1.5 parts) – improves aeration and moisture retention.
- ○ Worm castings (optional but recommended): 1 tbsp per 4 cups of mix – boosts microbial activity for faster growth.
- ● Large mixing container: A clean, shallow bin (e.g., plastic tote or wheelbarrow) for blending.
- ● Garden gloves: To protect your hands from grit and organic matter.
- ○ Fine-mesh sifter (optional): For fluffier, clump-free texture—especially useful for tiny seeds.
- ○ pH testing kit (optional): To check soil acidity (ideal range: 6.0–7.0 for most seeds).
- ● Spray bottle: For gentle moisture control during mixing.
- ● 💡 Sterilize containers: Wash bins with a 10% bleach solution (1 part bleach to 9 parts water) to kill pathogens.
- ● 🌡️ Moisture matters: Mix should feel like a damp sponge—squeeze to test; if it drips, reduce water.
- ● ✨ Store smart: Keep unused mix in a sealed container with a damp paper towel to retain freshness.
How to make lightweight organic seed starter mix for fast germination
Skip the store-bought stuff—this homemade blend gives seedlings a stronger start in just 30 minutes.
🌱 Step 1: Combine Base Materials for Airy Texture
Start with 4 parts peat moss or coconut coir—this holds moisture while staying loose. Add 2 parts perlite or coarse vermiculite to create air pockets; these prevent compaction and help tender roots breathe. Mix these dry ingredients thoroughly in a large bucket, breaking up any clumps with your hands.
Here's the thing—peat moss alone can get too dense. The perlite keeps the mix fluffy so water drains evenly. If you're using coconut coir, soak it first for 10 minutes to soften it before mixing. You'll feel the difference immediately: the blend should crumble easily between your fingers.
🌿 Step 2: Add Organic Matter for Nutrient Boost
Stir in 2 parts compost (finished, well-aged) and 1 part worm castings. These provide gentle, fast-available nutrients without burning delicate seedlings. The compost adds structure while the castings introduce beneficial microbes that jumpstart root growth. Mix everything until you see even distribution—no dry pockets of perlite or clumps of peat.
Don't use fresh compost here. The heat from decomposing material can cook your seeds. Instead, grab that dark, crumbly stuff from last year's compost pile. You'll notice the blend darkens slightly as you mix—this means it's rich and ready to support germination.
💧 Step 3: Hydrate Without Over-Saturating
Gradually add warm water while mixing until the blend reaches a consistency like a damp sponge—it should hold together when squeezed but not drip. Use about 1 part water to 4 parts dry mix as a starting point, adjusting as needed. Too wet? Add more perlite. Too dry? Spritz with a little more water.
This is the moment that matters: your mix should feel cool to the touch, not warm. Warmth indicates too much water or organic matter breaking down. Test it by forming a loose ball—it should crumble when you tap it gently. If it stays intact, you've added too much water.
✂️ Step 4: Sterilize and Store for Ready Use
Pour the mix into a clean container and microwave it for 1 minute to kill any pathogens. Let it cool completely before use. Store in an airtight container for up to 2 months—just add a little water when needed to refresh. The sterilization step prevents damping-off disease that can wipe out seedlings overnight.
Real talk: I keep a small batch ready in the fridge at all times. The cool temperature slows microbial growth, and I can grab it anytime seeds are ready to plant. When you're ready to use it, fluff it with your hands to restore that airy texture. You'll see seedlings emerge faster with this mix—sometimes in just 3-5 days.
Tips & tricks for perfect organic seed starter mix
Here's what nobody tells you about making this seed starter mix work like a dream—every gardener's secret weapon.
Texture is Everything: The 10-minute soak for coconut coir is non-negotiable. Skipping it makes the mix clump together like wet sand, and your seedlings will struggle to push through. I learned this the hard way after watching seeds rot in compacted soil. For peat moss, break up any clumps aggressively with your hands—think "fluffy cloud" consistency, not packed dirt.
Warm Water Wins: That warm water in Step 3 isn't just for comfort—it helps activate the beneficial microbes in your worm castings. Cold water shocks them, while warm water (around 70°F) gets them working immediately. If you're in a hurry, you can even microwave the water for 30 seconds to warm it up faster. Just don't let it get hot enough to kill those microbes!
Microwave Magic: The 1-minute sterilization might seem too short, but it's perfect for killing pathogens without drying out your mix. For larger batches, divide into smaller containers first—microwaving too much at once can create uneven heating. After microwaving, let it cool completely before use; warm mix can cook your seeds before they even sprout.
Storage Hack: That 2-month shelf life is only if stored properly. Keep your mix in a sealed container with a small piece of apple or potato—these release ethylene gas that helps maintain freshness. When ready to use, fluff with your hands to restore those crucial air pockets. You'll notice seedlings emerge faster in freshly fluffed mix compared to packed-down stored mix.
Pro Tips for Organic Seed Starter Mix
- Here's what nobody tells you about making this seed starter mix work like a dream—every gardener's secret weapon.
- Texture is Everything: The 10-minute soak for coconut coir is non-negotiable. Skipping it makes the mix clump togethe...
- Warm Water Wins: That warm water in Step 3 isn't just for comfort—it helps activate the beneficial microbes in your w...
Frequently asked questions
Got questions about organic seed starter mix?
You’re not alone! Whether you’re a new gardener or a seasoned pro, these common queries can help you grow with confidence. Here’s what you need to know:
What’s the best ratio of organic seed starter mix to water for planting?
For most seeds, aim for a moist-but-not-soggy mix—think of a damp sponge. A general rule is 1 part water to 2 parts starter mix by volume. Gently stir until evenly damp (not dripping). Overwatering can suffocate seeds, while too little moisture slows germination. Test by squeezing a handful: if water drips, it’s too wet!
How long does it take for seeds to germinate in organic starter mix?
Germination time varies by seed type, but organic starter mix (with its nutrient-rich, lightweight loam) often speeds things up! Here’s a quick guide:
- Fast germinators (3–7 days): Lettuce, radishes, beans
- Moderate (7–14 days): Tomatoes, peppers, herbs
- Slow (14–30+ days): Carrots, onions, some flowers
Can I reuse organic seed starter mix after germination?
Not recommended! Once seeds sprout, the mix becomes nutrient-depleted and may harbor fungal or bacterial issues. However, you can compost it or use it as a top layer in garden beds for mulch. For transplants, opt for a potting soil blend with better structure and nutrients.
What are some organic alternatives if I can’t find seed starter mix?
No problem! DIY with these lightweight, nutrient-packed options:
- Coconut coir + perlite + worm castings (3:1:1 ratio)
- Peat moss + compost + sand (for heavier soils)
- Shredded leaves or grass clippings (decomposed, not fresh!)
Why aren’t my seeds sprouting in the organic starter mix?
Try these troubleshooting steps:
- Check moisture: Dry mix = no germination. Use a spray bottle to mist if needed.
- Verify depth: Tiny seeds (like lettuce) need just a light cover (¼ inch max). Larger seeds (beans) can go 1 inch deep.
- Temperature matters: Use a seedling heat mat if your space is <60°F.
- Light exposure: Most seeds need 12+ hours of light daily—place trays near a sunny window or under grow lights.
Wrapping up and next steps
Creating your own organic seed starter mix is a rewarding way to kickstart your gardening journey with healthy, vibrant roots! 🌱 Whether you’re a seasoned green thumb or a curious beginner, this lightweight loam blend ensures faster germination and stronger seedlings—all while keeping your garden naturally thriving.
Now that you’ve got the know-how, there’s no better time to roll up your sleeves and plant those seeds!
Ready to grow? Grab your supplies, follow the steps, and watch your garden flourish in no time. Happy planting! 🌿