
Lawn
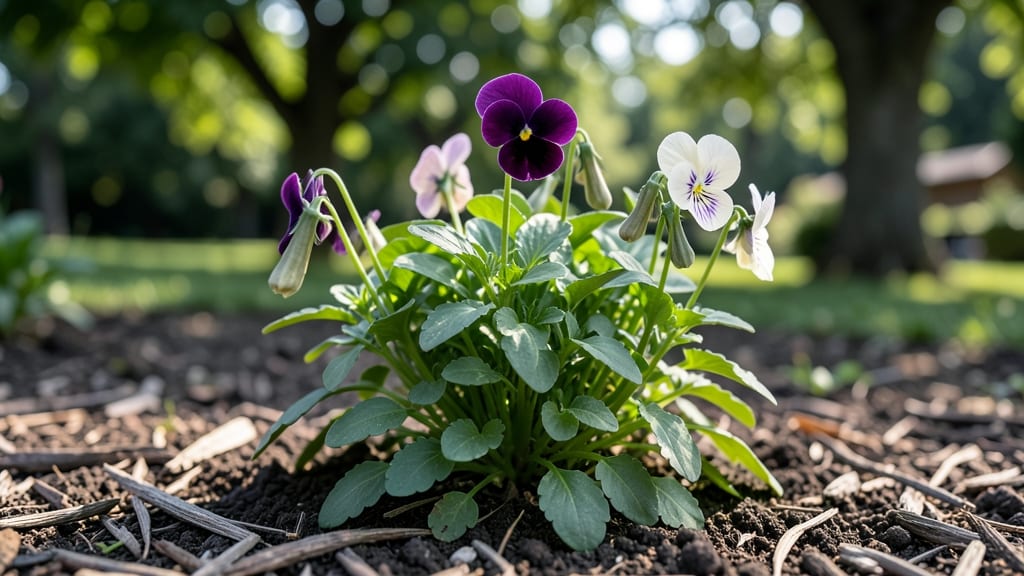
Harvesting pansy seed pods before they twist open is the secret to saving seeds that actually grow. 🌱 I’ve learned the hard way—wait too long, and the pods shatter, sending seeds everywhere, or they dry into brittle husks that crumble at the touch.
But when you catch them at the right moment, you’ll end up with plump, fertile seeds ready for next year’s garden. The pods form after pansies bloom, starting as tiny green bulges behind the flowers. They’ll turn brown and swell as seeds mature—this is your window.
Snip them when they’re firm but still intact, usually 4-6 weeks after flowering, before they split open naturally. A sharp pair of scissors works best to avoid crushing the pods. Once harvested, lay them on a paper towel in a dry, warm spot for 1-2 weeks to finish drying.
The pods should crumble easily when gently squeezed, revealing tiny, round seeds inside. Store them in an envelope labeled with the pansy variety and date—viability lasts 2-3 years if kept cool and dry. This method works for all pansy varieties, from classic violas to heirloom strains.
The payoff? Fresh, true-to-type pansies without the cost of buying new plants. Ready to save seeds like a pro?
📚 In This Guide
- What you need
- Instructions
- Tips and common mistakes
- Wrapping up and next steps
What you need
- ● Mature pansy plants – Choose healthy, fully bloomed plants with brown, papery seed pods (typically 6–8 weeks post-flowering).
- ● Sharp pruning shears or scissors – Clean, sterilized tools to snip pods without damaging stems.
- ● Paper bags or brown lunch bags – 1–2 per plant (breathable material prevents moisture buildup).
- ● Labeling tags & permanent marker – To note pansy variety and harvest date.
- ○ Glove (optional) – Protects hands from sticky seed pod residue.
- ● Desiccant (e.g., silica gel packets) – Speeds up drying if humidity is high.
- ● Seed tray or mesh screen – For post-harvest drying and winnowing.
- ● Fine-mesh sieve – Separates seeds from chaff efficiently.
- ● Spray bottle with water – For light misting if pods are overly dry.
How to harvest pansy seed pods for next year's blooms
Skip the frustration of brittle stems—here's how to collect healthy pansy seeds without losing your plants.
🌿 Step 1: Identify Mature Seed Pods
Wait until the seed pods turn from green to a dry, papery brown color—this means the seeds inside are fully mature. I check pods every 2-3 days in late summer, as pansies often finish their cycle quickly. A mature pod will feel light when you tap it gently; if it rattles, the seeds are ready.
Don't harvest pods that are still green or slightly yellow—they won't contain viable seeds. You'll also notice the petals drop off completely by this stage, leaving just the seed pod on the stem. This is your signal to act before the pods split open naturally and scatter seeds everywhere.
✂️ Step 2: Harvest Without Damaging the Stem
Use clean, sharp scissors or pruning shears to cut the entire seed pod from the stem, leaving about 1 inch of stem attached. This prevents the pod from splitting open during handling. I like to work on a dry, sunny morning when the pods are firm and less likely to crack.
Grasp the pod gently but firmly at the base—twisting can cause the stem to snap and scatter seeds prematurely. Place harvested pods in a paper bag immediately; the breathable material allows any excess moisture to evaporate while keeping seeds contained.
🪴 Step 3: Dry and Store Seed Pods Properly
Spread the pods out on a clean, dry surface in a single layer, away from direct sunlight. I use an old baking sheet lined with parchment paper for even drying. Let them dry for 7-10 days until completely crisp and hollow-sounding when tapped. This prevents mold from developing inside the pods.
Once fully dry, gently crush each pod between your fingers over a clean piece of paper to release the tiny, round seeds. Pansy seeds are extremely small—think 1/16 inch in diameter—so I use a fine-mesh strainer to catch any seeds that might blow away during the process.
⏰ Step 4: Store Seeds for Optimal Germination
Transfer the dried seeds into a small, airtight container like a glass jar or seed envelope. I label each container with the pansy variety and the harvest date—some pansies lose vigor if stored longer than 1 year. Keep the container in a cool, dark place like a refrigerator drawer or seed storage box.
For best results, sow pansy seeds as soon as possible in the fall for winter germination or in early spring. They require stratification (a cold period) to break dormancy, so don't rush planting them indoors too early. A quick cold treatment of 2-4 weeks in the fridge mimics winter conditions if you need to store them longer.
Tips & tricks for perfect pansy seed pod harvesting
Here's what nobody tells you about saving pansy seeds without the usual mess and frustration.
Timing Secret: In Step 1, those 2-3 days between checks are critical—pansy pods mature faster than you might expect. If you miss the window, the pods will split open naturally and scatter seeds everywhere. I've lost entire batches because I waited just one extra day. The best time to harvest is on a dry morning when the pods are firm but not brittle.
Harvest Technique: When cutting pods in Step 2, always leave that 1 inch of stem attached—this keeps the pod intact during handling. I've tried harvesting without the stem, and it always leads to broken pods. Also, work on a dry surface; any moisture makes the pods more fragile. A clean cutting surface prevents contamination too.
Drying Wisdom: The 7-10 days drying time in Step 3 can be tricky—too short and you risk mold, too long and the seeds lose viability. I place a small fan nearby to gently circulate air without blowing the pods around. Check daily by tapping them; they should sound hollow and crisp. If they feel damp at all, extend the drying time.
Seed Collection: Those 1/16-inch seeds are microscopic! I use a fine-mesh strainer over a piece of dark paper—it makes the tiny seeds stand out against the background. A flashlight helps too; I shine it at an angle to see any seeds hiding in crevices. Don't rush this step—missing just a few seeds means losing your entire harvest.
Pro Tips for Pansy Seed Pods
- Here's what nobody tells you about saving pansy seeds without the usual mess and frustration.
- Timing Secret: In Step 1, those 2-3 days between checks are critical—pansy pods mature faster than you might expect.
- Harvest Technique: When cutting pods in Step 2, always leave that 1 inch of stem attached—this keeps the pod intact during handling.
Frequently asked questions
Got questions about harvesting pansy seed pods? You’re not alone! Here’s what gardeners ask most often—and how to tackle them like a pro.
How do I know when pansy seed pods are ready to harvest?
Pansy seed pods are ready when they turn from green to tan or brown and start splitting open slightly. Gently squeeze a pod—if seeds rattle inside but the pod isn’t fully dried into a papery shell, it’s harvest time! Avoid waiting too long, or the pods may burst open naturally, scattering seeds everywhere.
Why are my pansy seed pods twisting or curling?
Twisting or curling pods are a natural defense mechanism to protect seeds from pests and harsh weather. While this doesn’t ruin viability, it can make harvesting trickier. Use sharp scissors to snip the entire pod (stem included) to avoid damaging the delicate seeds inside. Store pods in a paper bag to dry completely before opening.
Can I harvest pansy seeds without the pods twisting?
Unfortunately, no—twisting is normal for pansies! However, you can minimize stress by harvesting on a dry, sunny morning when pods are firm but not brittle. If pods twist excessively, try harvesting slightly earlier (when they’re still greenish-tan) and let them dry indoors in a well-ventilated area.
What’s the best way to store pansy seeds after harvesting?
Once pods are fully dried (papery and hollow-sounding when tapped), remove seeds carefully and store them in an airtight envelope or jar with a desiccant packet to prevent moisture. Label with the harvest date—pansy seeds stay viable for 2–3 years if kept cool (below 70°F) and dry.
What should I do if my pansy seed pods won’t open at all?
If pods stay stubbornly closed, they may need extra drying time. Place them in a brown paper bag with a rubber band and store in a warm, dry spot (like a sunny windowsill) for 1–2 weeks. Avoid refrigeration—humidity will cause mold. If pods still resist, gently crush them with a hammer (wear gloves!) to release seeds, but expect lower germination rates.
Wrapping up and next steps
Harvesting pansy seed pods is a rewarding way to nurture your garden while embracing nature’s resilience—especially when twist-resistant techniques come into play! 🌱 By following the right steps, you’ll ensure viable seeds for next season’s blooms.
Whether you’re a seasoned gardener or just starting out, this method makes seed-saving simple and stress-free.
Ready to grow your own pansies from scratch? Start by planting those saved seeds in well-draining soil this fall, and watch your garden flourish with vibrant colors year after year. Happy gardening! 🌸