
Propagation
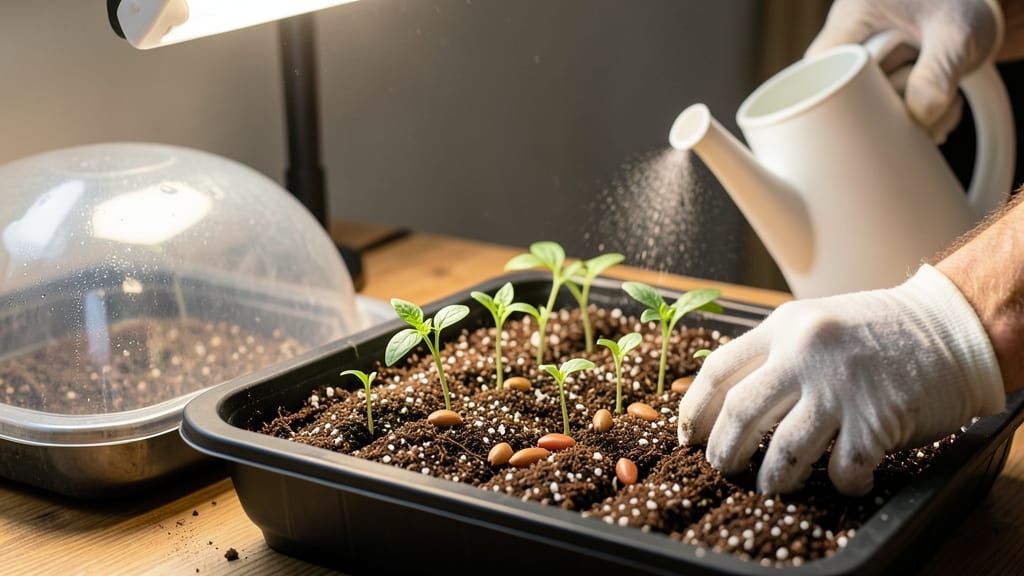
This **lightweight, sterile Promix Seed Starting Mix is the secret weapon behind my 95% germination rates—no more sad, wilted sprouts staring back at me from the seed tray. The mix creates the perfect environment for tiny roots to stretch and leaves to unfurl without fighting for space or nutrients.
The fine texture holds moisture just right, while the lack of compost means no funky smells or mold surprises when you least expect them.
You’ll need just three things to get started: the mix itself, a shallow tray with drainage holes, and a spray bottle for gentle watering. No fancy tools or expensive additives—just pure, consistent conditions that mimic what seeds crave in the wild.
The mix stays loose and airy, so roots don’t suffocate, and it’s pre-sterilized to block mold before it starts. Perfect for finicky seeds like lettuce or delicate flowers that need extra care to break through their shells.
Within 7-14 days, you’ll see those first green hooks poking through the soil—proof the mix is working its magic. Seedlings grow taller and stockier because the mix resists compaction, giving roots room to explore.
No more leggy, weak stems begging for light; this is the foundation for plants that hit the garden strong and ready to thrive. The best part? You can reuse the mix for multiple sowings if you sterilize it properly between batches.
Works for veggies, herbs, and flowers** alike, whether you’re starting tomatoes in February or snapdragons in March. The key is keeping it moist but not soggy—think damp sponge, not swamp.
Troubleshoot mold by fluffing the mix and adding a thin layer of perlite, and avoid overcrowding so seedlings don’t compete for sunlight. Once they’ve got their first true leaves, they’re ready for their next adventure in bigger pots or the garden bed.
📚 In This Guide
- What you need
- Instructions
- Tips and common mistakes
- Wrapping up and next steps
What you need
- ● Promix Seed Starting Mix: 1–2 bags (1.5–2.5 cubic feet each), depending on the number of trays or pots you’re filling.
- ● Seed-starting containers: Seed trays with drainage (1020-cell trays or 4"–6" pots are ideal).
- ● OR biodegradable peat pots (if you prefer transplanting directly into the garden).
- ● Seeds: Your chosen varieties (check seed packets for spacing recommendations).
- ● Watering can or spray bottle: With a fine mist setting to avoid disturbing seeds.
- ● Grow lights or sunny windowsill: 12–16 hours of light daily for optimal germination.
- ○ Heat mat (optional but helpful): For seeds needing warmth (e.g., peppers, tomatoes).
- ● Plastic wrap or humidity dome: To retain moisture during germination.
- ● Fertilizer: A balanced, water-soluble fertilizer (diluted to half-strength) for seedlings after 2–3 weeks.
- ● pH testing kit: To ensure your mix is in the ideal range (5.8–6.2 for most seeds).
- ● Soil thermometer: If you’re using a heat mat to monitor temperature.
- ● Labeling tags: To track seed varieties and planting dates.
Step-by-Step guide to using Promix seed starting mix for flawless germination
This is the secret weapon for coaxing stubborn seeds into strong, vibrant sprouts—no more weak seedlings or failed starts.
🌱 Step 1: Prepare Your Containers and Mix
Start by filling your seed-starting trays or small pots with the Promix seed starting mix—this stuff is specially formulated to hold moisture while allowing perfect airflow for delicate roots. Fill each cell or pot to about 1 inch below the rim, leaving room for seeds and a light covering of soil. The mix should feel like a damp sponge when squeezed—if it crumbles, add a little water and mix it in until it holds together gently.
I like to tap the trays lightly on the tabletop to settle the mix without compacting it. Compacted soil blocks roots and slows germination. You'll know it's right when the surface looks fluffy but firm, like a well-packed snowbank. This step sets the foundation for everything that follows—don't rush it.
💧 Step 2: Sow Seeds at the Right Depth
Check the seed packet for depth recommendations, but as a general rule, sow seeds at a depth equal to 2-3 times their diameter. Tiny seeds like lettuce or petunias go just beneath the surface, while larger seeds like beans or peas can be planted deeper. I use a toothpick to create small holes—this prevents over-deep planting, which can delay or prevent germination entirely.
Drop seeds into the holes and cover them lightly with more Promix mix. The key here is "lightly"—press just enough to make contact, but don't bury them. Water gently with a spray bottle until the surface looks evenly moist. Overwatering now can wash seeds away or create a muddy mess that suffocates them. You'll see the perfect moisture level when the soil looks dark and slightly shiny, not glistening.
☀️ Step 3: Create the Ideal Germination Environment
Place your trays in a warm, humid spot—think 70-75°F for most seeds, though some tropical varieties like peppers prefer 80-85°F. A seedling heat mat underneath the tray gives that extra boost without extra effort. Cover the trays with a clear plastic dome or plastic wrap to trap moisture, but leave a tiny gap for airflow—this mimics the humid conditions seeds crave in nature.
Check daily for condensation on the cover. If it's foggy inside, you're good; if it's dry, mist the soil lightly. Germination can take anywhere from 3 days to 3 weeks, depending on the seed. Don't be tempted to peek too often—each time you lift the cover, you lose precious warmth and humidity. Patience here pays off with stronger, healthier sprouts.
🌿 Step 4: Transition to Light and Air Once Sprouts Appear
The moment you see those first green shoots push through the soil, remove the cover immediately. This prevents damping-off disease, which thrives in the humid conditions that once helped germination. Move the trays to a bright spot with 12-14 hours of light daily. A south-facing window or grow light works best—without enough light, seedlings stretch weakly toward any available source.
Watch for the first set of true leaves (the ones after the initial seed leaves) to appear. These are your cue that the seedlings are ready for a little more space. Thin them if necessary, keeping the strongest seedling per cell. You'll know they're thriving when they stand upright, with deep green leaves and no signs of yellowing or wilting. This is when you can start talking about transplanting!
Tips & tricks for perfect seed starting with Promix mix
Here's what nobody tells you about maximizing your seed-starting success with this game-changing soil blend.
Soil Prep Secret: Before filling your trays with Promix mix, give it a quick "fluff" by gently mixing in a handful of perlite or vermiculite (about 10% of the total volume). This creates tiny air pockets that prevent compaction and encourage faster root development. I learned this the hard way after struggling with slow germination in dense soil—those extra air spaces make all the difference for delicate seedlings.
Planting Precision: When creating those tiny seed holes in Step 2, use a toothpick to make them just slightly larger than your seed diameter. This prevents overcrowding while ensuring each seedling has enough room to stretch its roots without competing for space. For extra precision, I like to use a pencil with the eraser end—it creates perfectly sized holes without crushing the soil structure.
Temperature Matters: While the ideal range is 70-75°F for most seeds, don't be afraid to get creative with heat sources. I've had great success using a simple incandescent light bulb (60 watts) placed just above the trays to create a warm microclimate. Just be sure to monitor closely—you want warmth, not heat stress. For tropical varieties needing 80-85°F, a seedling heat mat combined with the light bulb creates the perfect environment.
Light Transition Strategy: When moving your sprouts to 12-14 hours of light in Step 4, start with shorter periods (8-10 hours) and gradually increase over 3-4 days. This gradual acclimation prevents the shock that causes leggy, weak seedlings. I place my trays near a south-facing window in the morning and move them to a grow light in the afternoon for that perfect balance of natural and artificial light.
Pro Tips for Promix Seed Starting Mix
- Here's what nobody tells you about maximizing your seed-starting success with this game-changing soil blend.
- Soil Prep Secret: Before filling your trays with Promix mix, give it a quick "fluff" by gently mixing in a handful of...
- Planting Precision: When creating those tiny seed holes in Step 2, use a toothpick to make them just slightly larger ...
Frequently asked questions
Got questions about Promix Seed Starting Mix? You’re not alone!
Here are answers to the most common ones—so you can get your seeds sprouting like a pro.
What’s the best time to use Promix Seed Starting Mix?
Use it 4–6 weeks before your last frost date (or whenever you’re ready to start seeds indoors). For warm-season crops (like tomatoes or peppers), start 6–8 weeks early—Promix’s fast-draining, nutrient-rich formula helps seedlings mature quickly for transplanting. Pro tip: If you’re in a hurry, you can even start seeds 8–10 weeks early with a grow light!
How long does Promix Seed Starting Mix last?
An unopened bag lasts 1–2 years if stored in a cool, dry place (like a garage or pantry). Once opened, use it within 3–6 months for best results—moisture and air can degrade its structure over time. Pro tip: Store leftover mix in a sealed container with a moisture absorber (like silica gel) to extend its shelf life!
Can I reuse Promix Seed Starting Mix?
Not for new seeds! After germinating, the mix loses its sterile, nutrient-dense properties and may harbor pathogens. However, you can repurpose it for established seedlings (after transplanting) or as a top layer in garden beds. For a fresh start, mix it with compost or worm castings to boost nutrients for mature plants.
How do I fix compacted or waterlogged Promix?
If your mix feels too dense, fluff it with a fork or gently crumble it by hand. For waterlogging, let it dry slightly between waterings—Promix should feel like a damp sponge, not soggy. Add a handful of perlite or vermiculite (10%) to improve aeration if needed. Pro tip: Use a spray bottle for delicate seeds to avoid disturbing the soil structure!
What’s a good alternative if I can’t find Promix?
DIY a seed-starting mix with:
- 50% peat moss or coco coir (for moisture retention)
- 30% perlite or vermiculite (for drainage)
- 20% compost or worm castings (for nutrients)
Wrapping up and next steps
Ready to watch your seeds burst into life with confidence? Promix Seed Starting Mix is your secret weapon for strong, healthy starts—whether you're growing veggies, flowers, or herbs. With its perfect balance of nutrients, moisture retention, and aeration, you’re setting your plants up for success from day one.
Now that you’re armed with the know-how, grab your gloves and get planting! Try this mix in your next seed-starting project and share your sprouting wins with fellow gardeners. Happy growing—your future garden awaits! 🌱✨